
How to Schedule a Blog Post
Instead of publishing your blog posts immediately, you can schedule them to go live at a specific date and time. This is perfect for planning your content calendar in advance or timing posts to reach families when they're most active.
Schedule Your Blog Post
Follow these steps to set your post to publish automatically:
- Click Create New Blog Post from your blog dashboard
- Write your blog post content (title, body, images, etc.)
- Click Continue when you're done editing
- In the Schedule and Publish section, choose your preferred date and time
- Select your timezone to ensure it publishes at the right time for your location
- Click Schedule
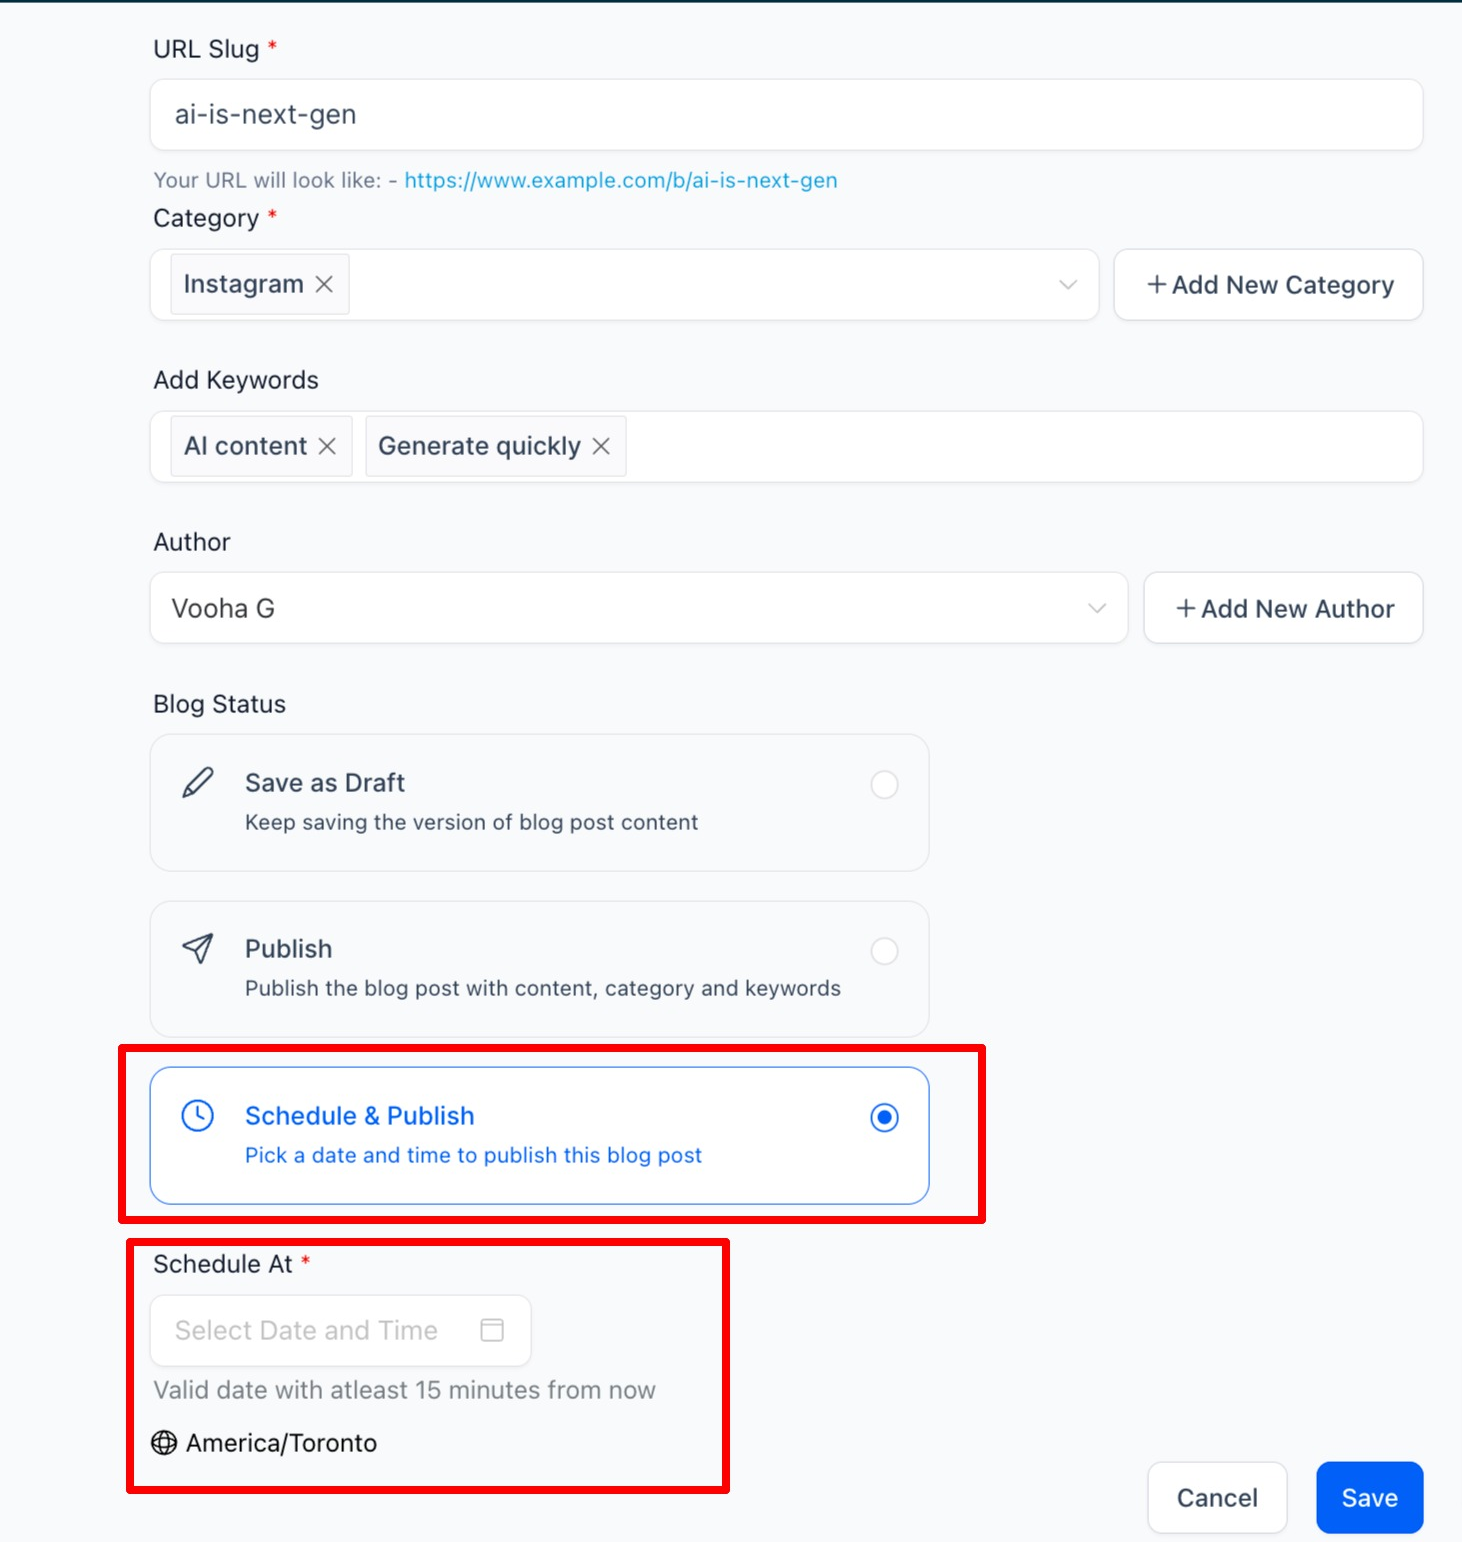
Your post will now appear in your blog dashboard with a "Scheduled" status. It will automatically go live at the time you selected.
Pro Tip: Schedule multiple posts in advance to maintain a consistent blog presence, even during busy enrollment seasons or holiday breaks.
Managing Scheduled Posts
You can view all your scheduled posts from your blog dashboard. To edit or reschedule a post before it goes live, simply click on it and update the schedule settings.