
How to Import Facebook Lead Ads into Enrollio
Running Facebook ads to attract new families? You can download your lead data from Facebook and import it directly into Enrollio to add prospective families to your enrollment pipeline and automations.
Downloading Leads from Facebook Business Suite
Facebook stores lead form submissions for 90 days, so download them regularly to avoid losing prospective family data.
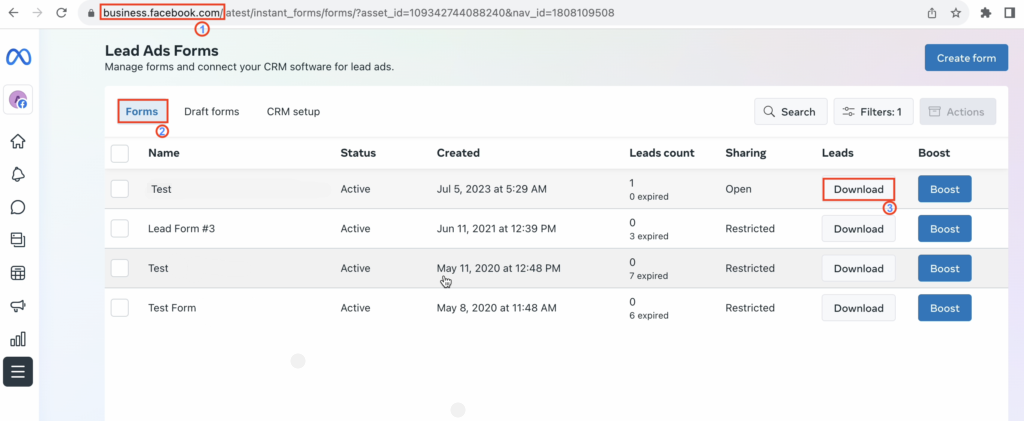
- Go to Facebook Business Suite
- Click More Tools from the menu
- Click Instant Forms
- Click Download next to the form containing the leads you want to export
- Choose your download option:
- Download New Leads — exports only leads received since your last download
- Download by Date Range — exports all leads from a specific time period (select your date range and click Download)
- Click CSV to download the file
Pro Tip: Set a weekly reminder to download your Facebook leads. This ensures you never lose a prospective family's information and can follow up while their interest is fresh.
Missing Ad ID or Ad Set ID?
If your downloaded file doesn't include Ad ID or Ad Set ID fields, it may be because:
- The lead came from organic reach (not a paid ad)
- The lead submitted through an ad preview
- You don't have advertiser privileges on the ad account
Can't Download Your File?
If you're having trouble downloading leads:
- Check with your Business Manager admin about customized permissions in Leads Access Manager
- If permissions haven't been customized, contact your Facebook Page admin for access (only Page admins can download leads by default)
- If permissions have been customized, make sure you've been granted the correct access
Importing Leads into Enrollio
Once you've downloaded your CSV file from Facebook, you can import those prospective families directly into Enrollio.
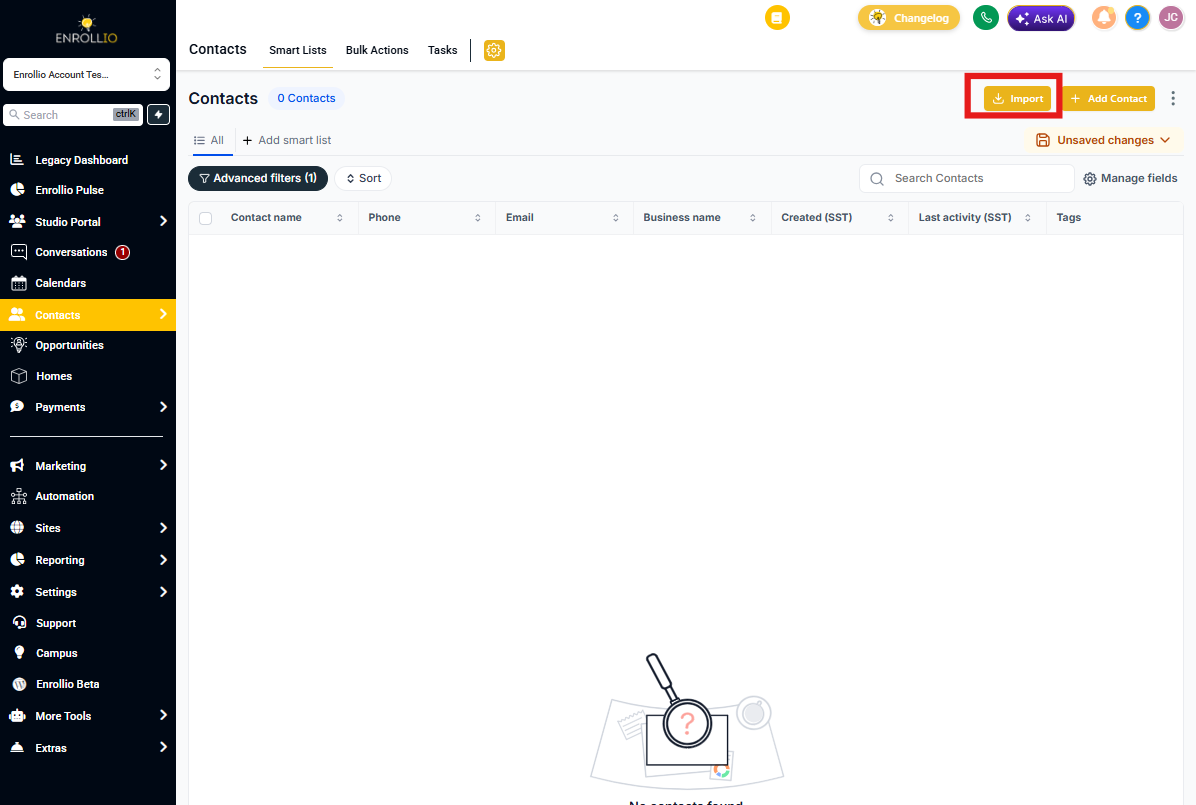
- In Enrollio, navigate to Contacts
- Click the Import Contacts bulk action
- Select your CSV file and click Next
- Map the fields from your Facebook Lead Form to your Enrollio fields, then click Next
Adding Imported Families to Automations
On the Details tab, you can automatically add these prospective families to an automation:
- Click the Advanced dropdown
- Add a tag for these leads (optional but recommended — for example, "Facebook Lead - [Month]")
- Toggle on "Add To Automation"
- Select the automation you want to trigger (such as your new family welcome sequence)
- Complete the import
Alternative Method: Using Tags and Bulk Actions
You can also add imported families to automations after the import is complete:
- During import, create or select a tag to apply to all contacts in the CSV (e.g., "FB Import - January 2024")
- After import completes, go to your Contacts list
- In filters, search for the tag you just created
- Select all the filtered contacts
- Click the "Add To Automation" bulk action
- Select your automation from the dropdown
- Give the action a name and confirm
Pro Tip: Create a dedicated automation for Facebook leads that sends a quick text message acknowledging their interest and offering to schedule a tour. Speed matters when families are researching childcare options.
Best Practices for Facebook Lead Imports
- Download weekly: Don't wait until the 90-day expiration — download leads at least once a week
- Use consistent tags: Tag each import batch so you can track which marketing efforts are working
- Act quickly: Import and follow up with Facebook leads within 24 hours for best results
- Set up automations: Create specific follow-up sequences for Facebook leads that acknowledge how they found you