
Make your blog posts easier to navigate by adding an automatic table of contents. This feature creates clickable links based on your post's headings, letting parents jump straight to the sections they need.
How It Works
- Go to Sites → Blog and click Edit Blog Site
- Open the blog post you want to edit (or create a new one)
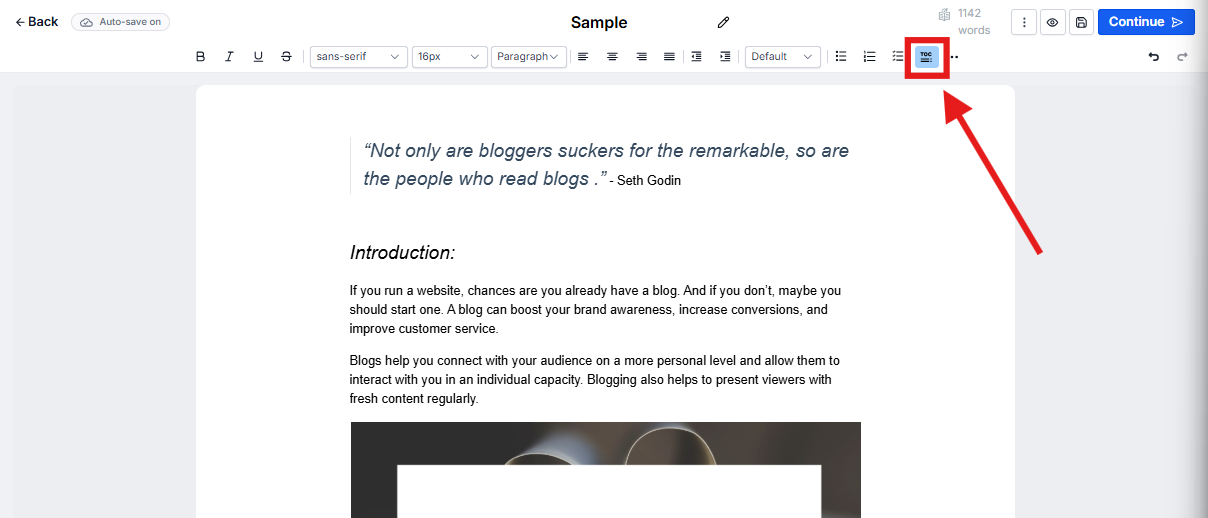
- In the blog editor toolbar, click the Table of Contents icon
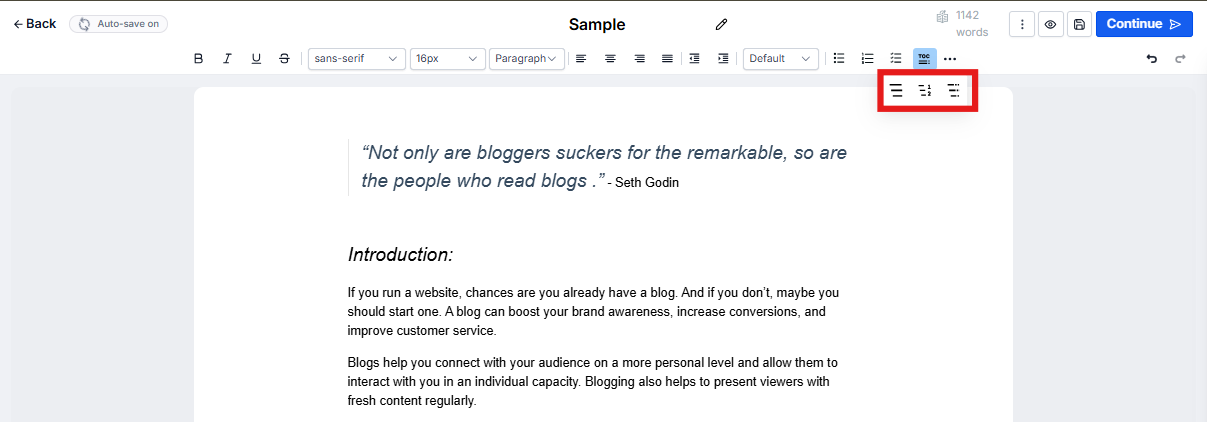
- Choose one of three layout options based on how you want your headings indented
- The table of contents will automatically generate based on your post's headings (H2, H3, etc.)
- Customize the styling using the toolbar — adjust bold, italic, underline, strikethrough, and font size
Styling Your Table of Contents
Once your table of contents is inserted, you can adjust its appearance to match your blog's design. Use the editor toolbar to modify text formatting, or click on the table of contents block to adjust alignment and spacing.
💡 Pro Tip: Use clear, descriptive headings in your blog posts. Your table of contents pulls directly from these headings, so "Enrollment Process" is better than "How We Do It."
Why Use a Table of Contents?
- Better readability: Parents can quickly scan and find the information they need
- Improved SEO: Search engines favor well-structured content with clear headings
- Professional appearance: Long-form posts about your programs, policies, or enrollment process look more organized
- Mobile-friendly navigation: Especially helpful for parents reading on their phones
This feature works best for comprehensive blog posts like enrollment guides, program overviews, parent handbooks, or detailed policy explanations — anywhere parents might want to skip to specific sections.