
Overview
Use multiple chat widgets to customize conversations based on which page parents are viewing. You can create different widgets for tours, enrollment questions, and general inquiries — all within your Enrollio account.
Each widget can have its own branding, messaging channels, and behavior to provide the most relevant experience on different pages.
Why Use Multiple Chat Widgets
- Targeted Experience: Show different chat options on your tour scheduling page versus your pricing page
- Easy Updates: Change widget settings anytime without reinstalling code
- Flexible Control: Set one default widget for your whole site, or customize individual pages
- All Conversations in One Place: No matter which widget families use, everything flows into your Enrollio inbox
Before You Start
You'll need to create the chat widgets you want to use before assigning them to pages. If you haven't created your widgets yet:
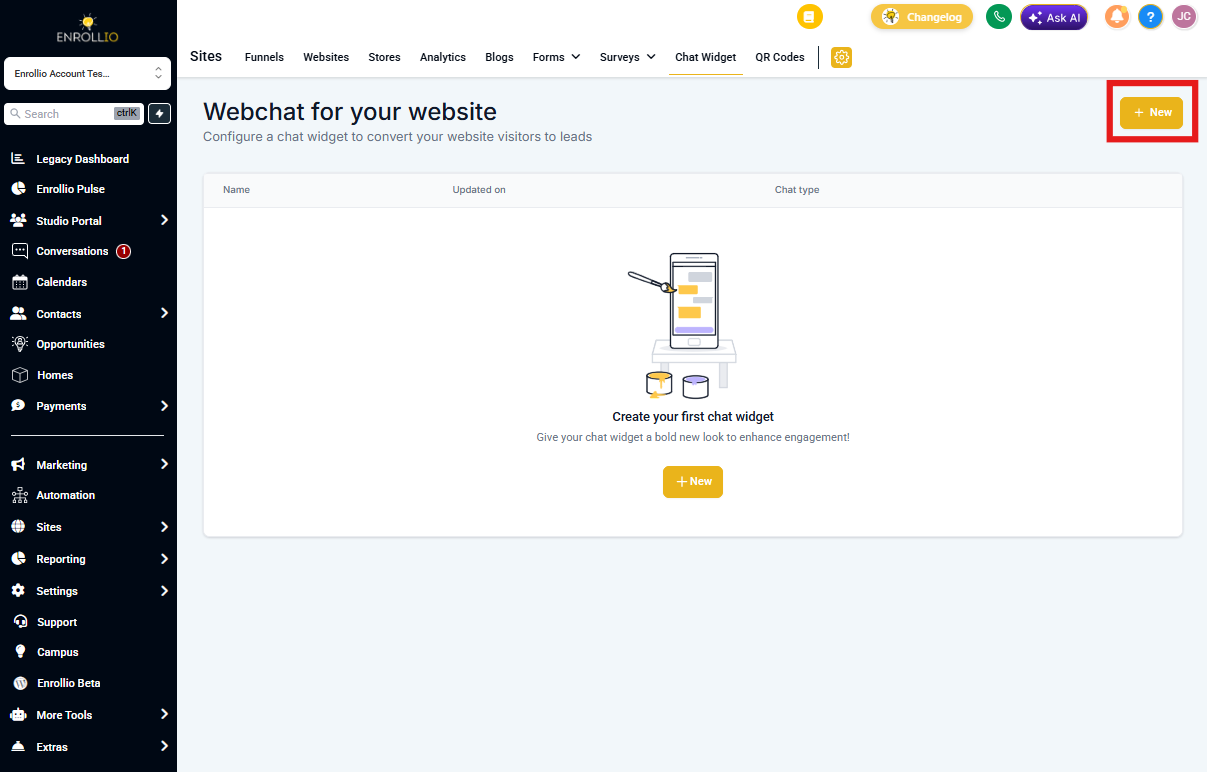
- Navigate to Sites → Chat Widget
- Click the blue + New button
- Select the type of chat widget you want to create
- Customize settings and save
Repeat this process for each widget you need. For detailed setup instructions, see our Getting Started with Chat Widget guide.
Set a Default Widget for Your Entire Site
Setting a site-level widget applies one chat experience across all pages. This is the easiest way to get started.
- Navigate to Sites → Websites or Landing Pages
- Select the enrollment site you want to edit
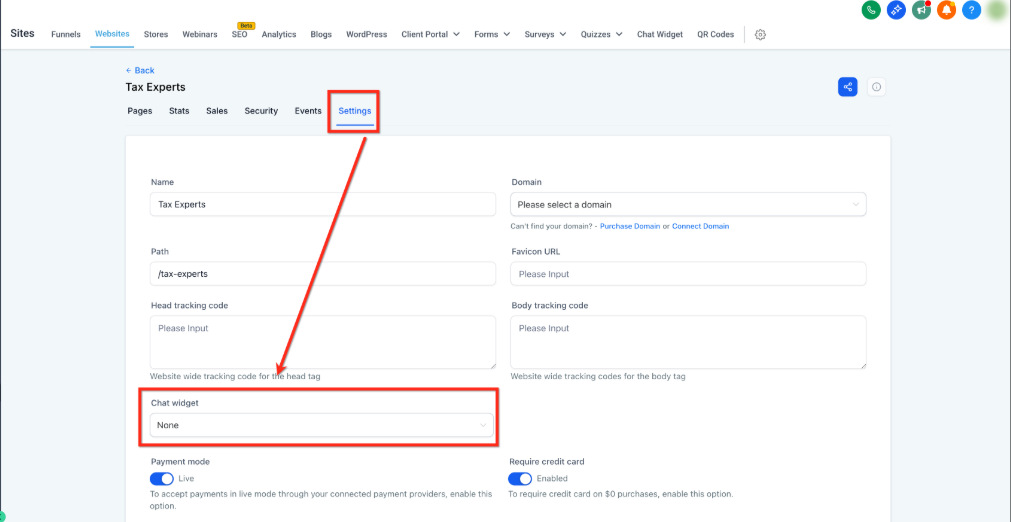
- Click the Settings tab
- Use the Chat Widget dropdown to select your preferred widget
- Save your changes
This widget will now appear on every page of your site unless you override it with a page-specific widget.
Assign Different Widgets to Specific Pages
Want to show a tour-focused widget on your scheduling page and a general inquiry widget everywhere else? You can add custom widgets to individual pages using a code embed.
Step 1: Turn Off the Site-Wide Widget
- Navigate to Sites → Websites or Landing Pages
- Select your enrollment site
- Go to the Settings tab
- Set the Chat Widget dropdown to "None"
- Click Save
Step 2: Get Your Widget Code
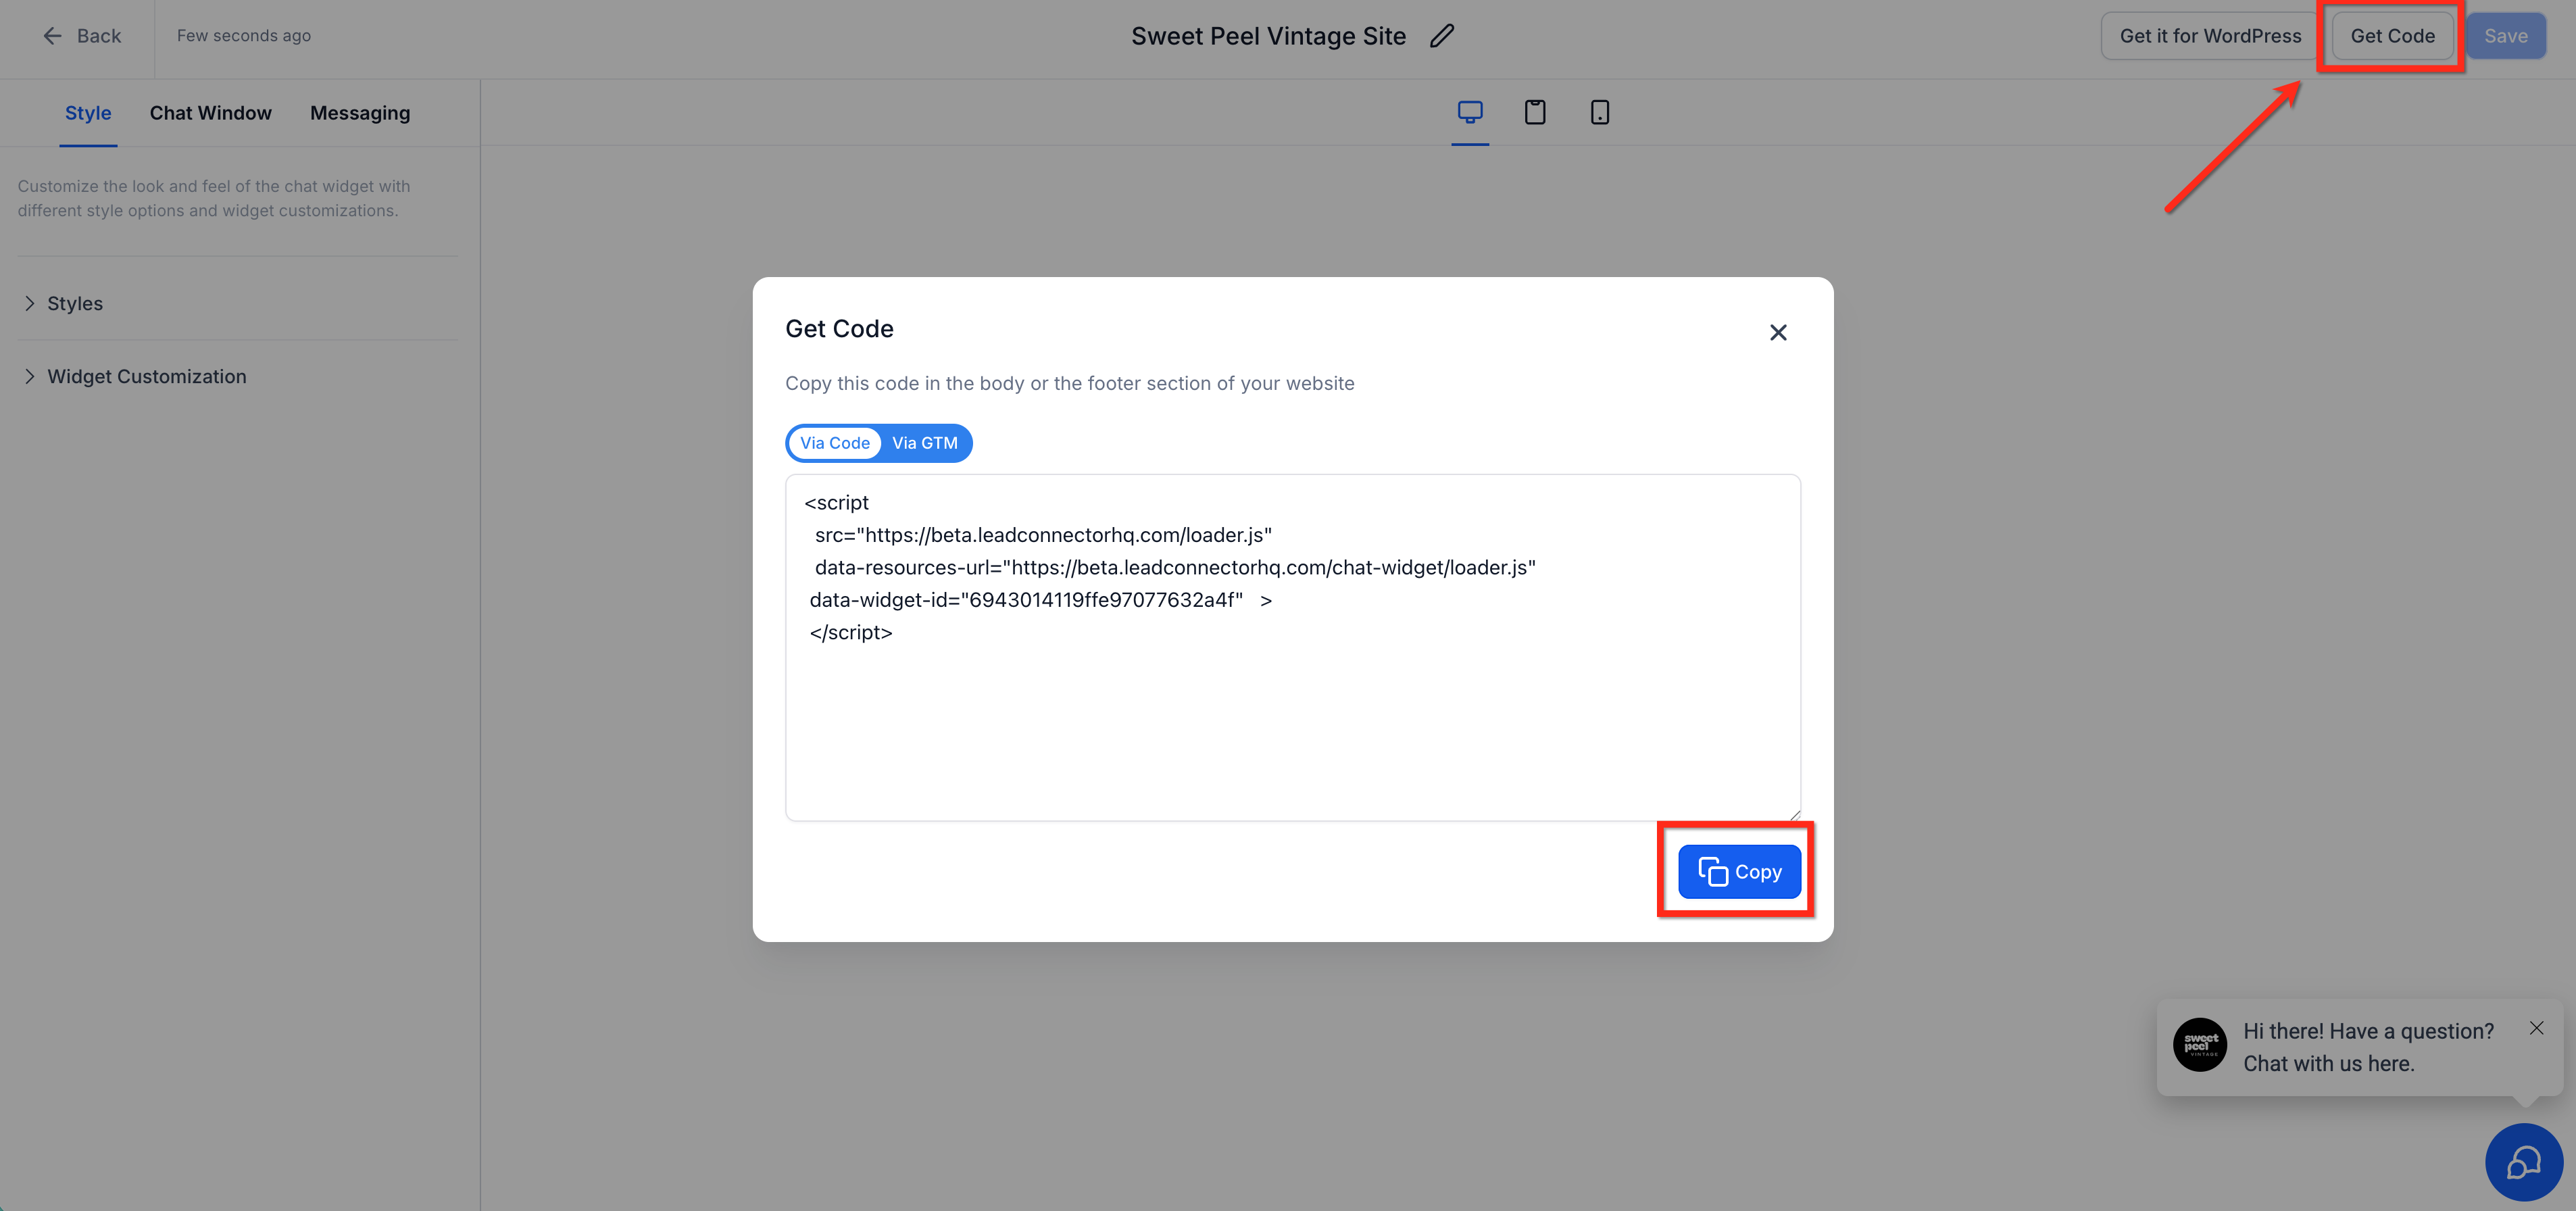
- Navigate to Sites → Chat Widget
- Open the widget you want to use on a specific page
- Click Get Code
- Copy the code snippet
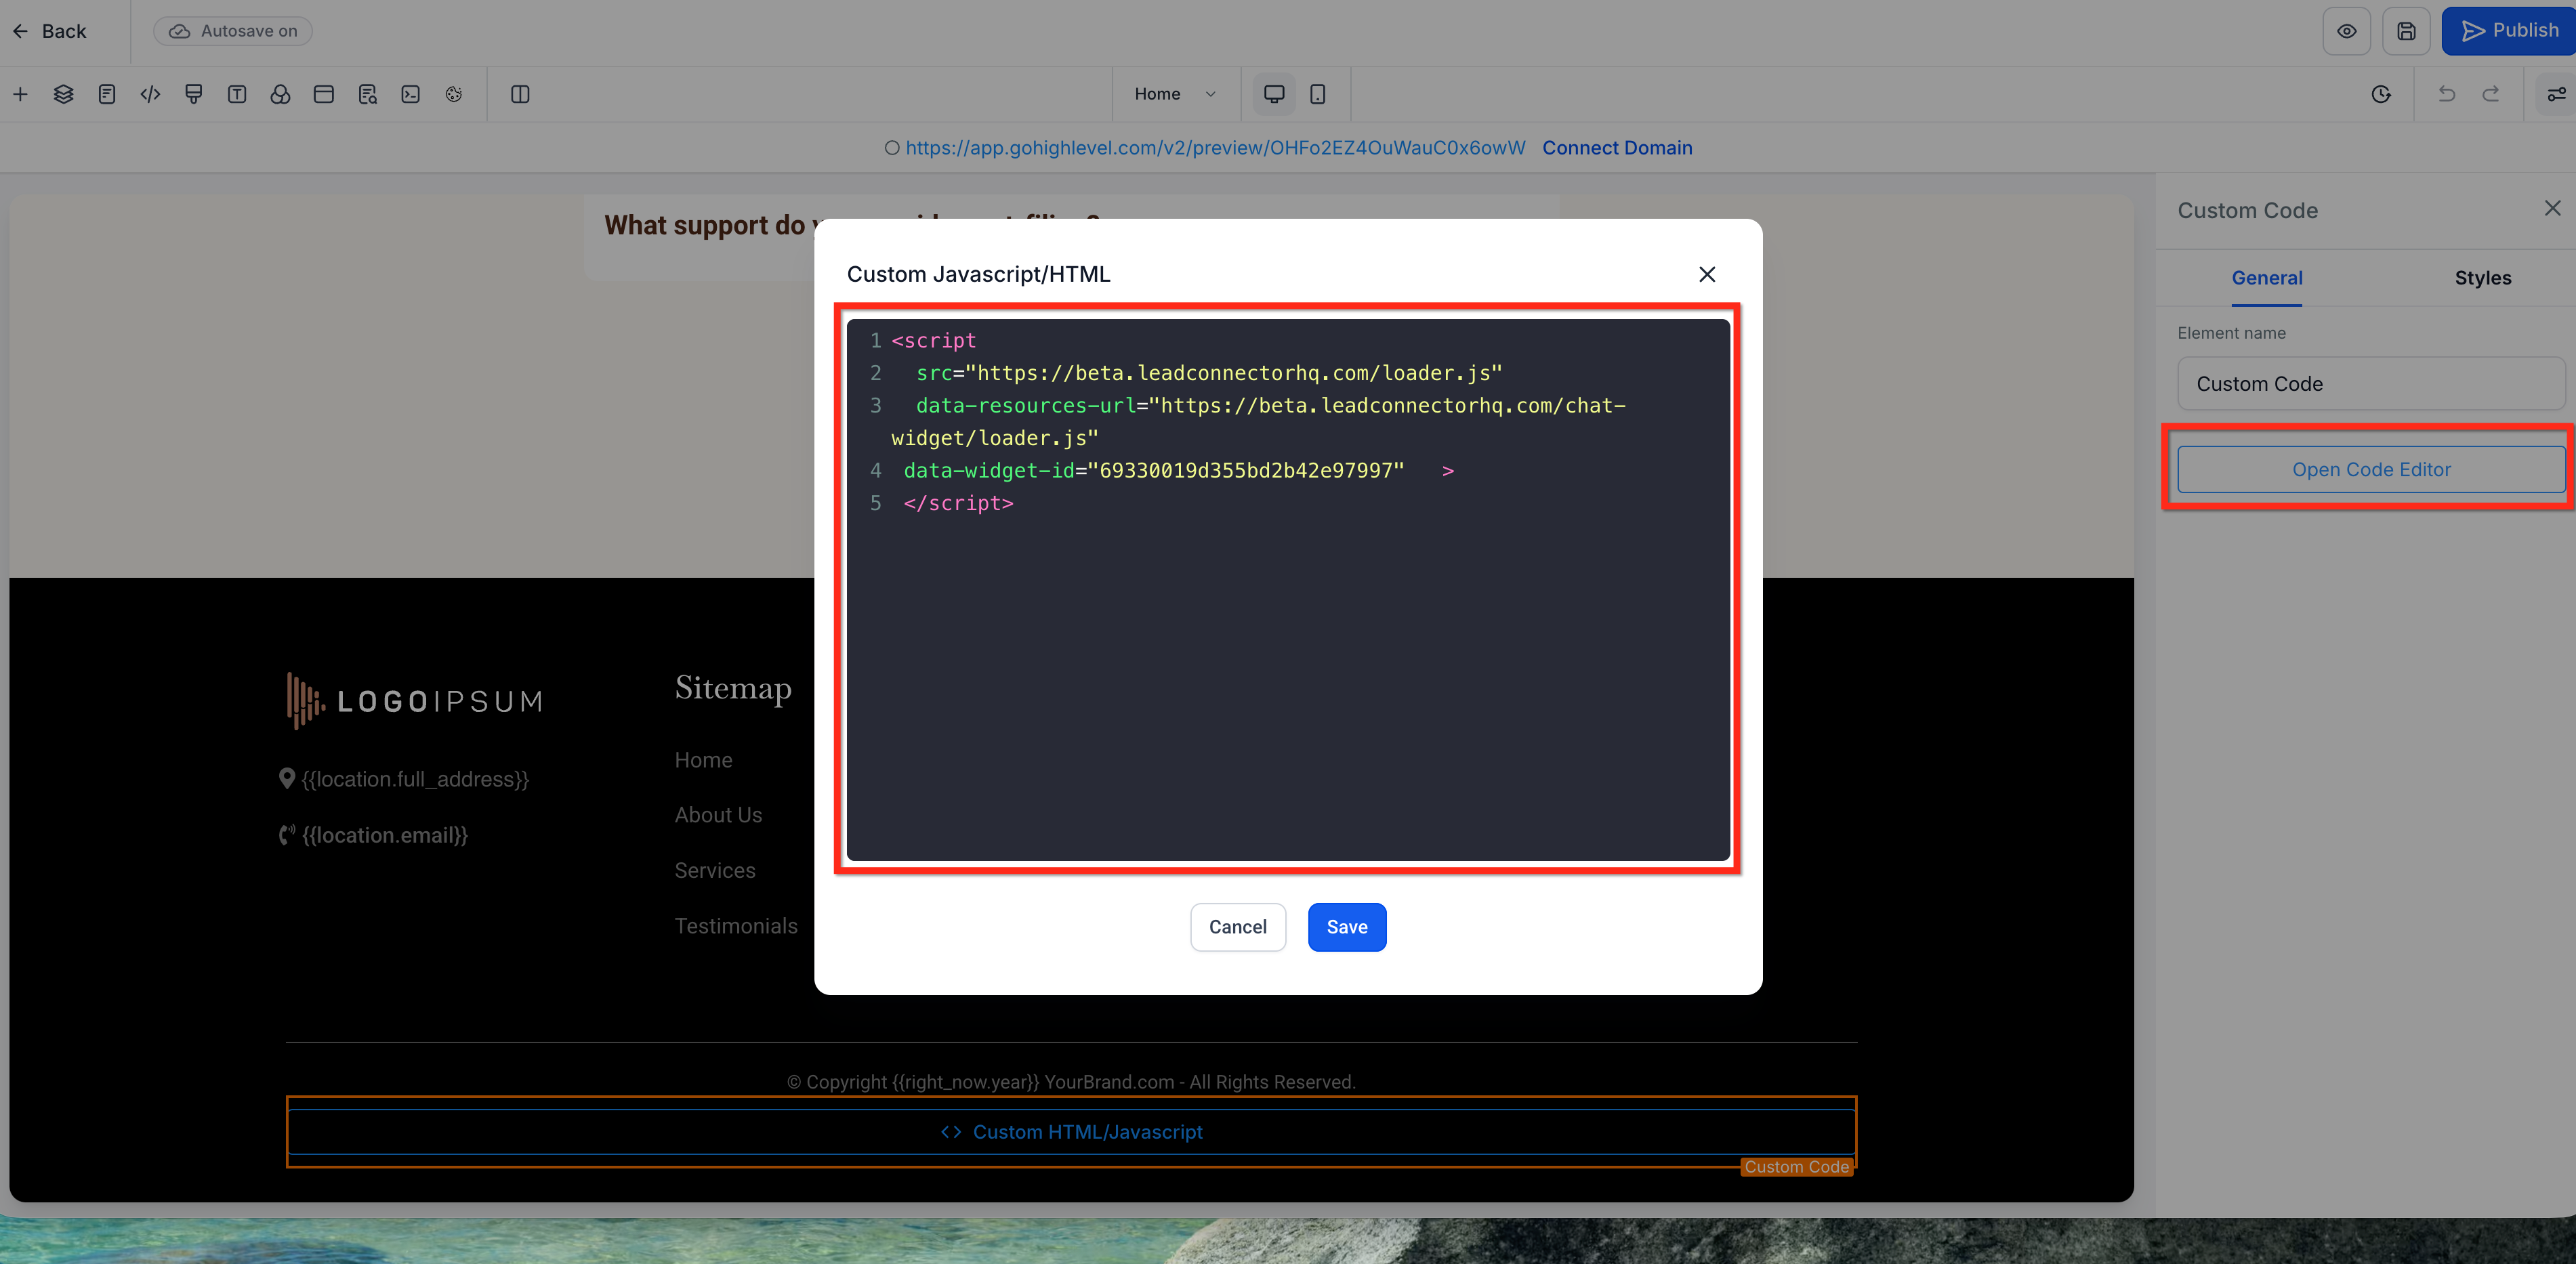
Step 3: Add the Widget to Your Page
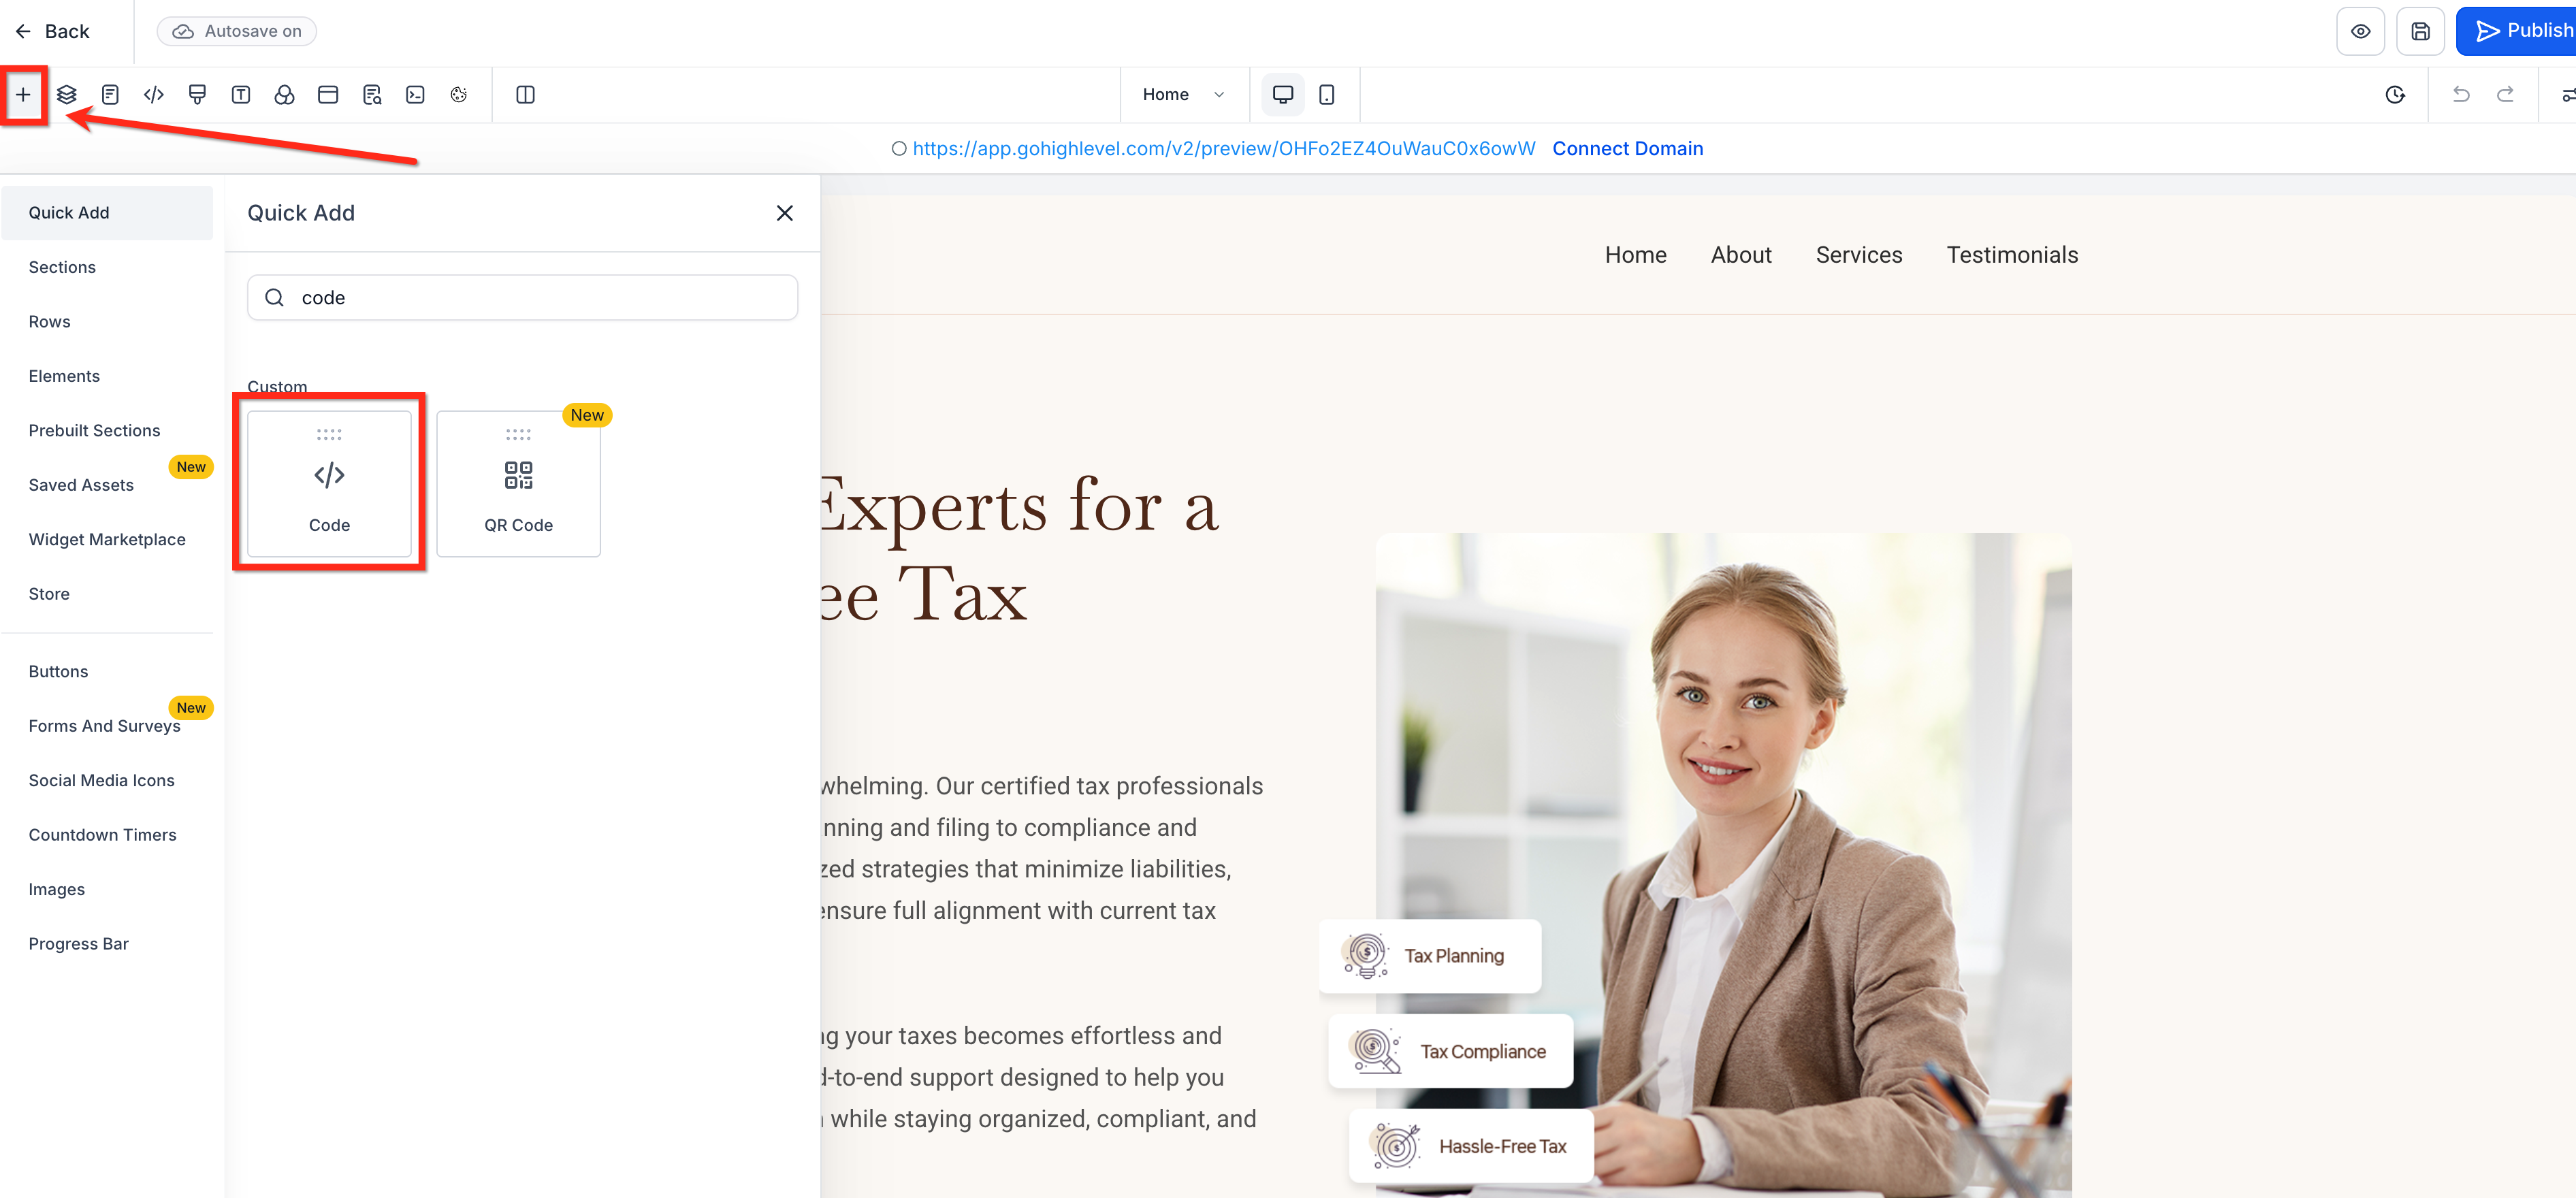
- Open the Page Editor for the page where you want this widget
- Click Add Element (+)
- Find and drag the Code element onto your page
- Select the Code element you just added
- In the right settings panel, click Open Code Editor
- Paste the code snippet you copied
- Click Save
Repeat this process for each page that needs a specific chat widget.
Common Questions
Do I need to reinstall code after changing widget colors or settings?
No. Your chat widget updates automatically when you make changes in Enrollio.
What happens if I set a widget in Settings AND add a code element?
The Settings selection takes priority. Only the widget you selected under Settings will appear. To use page-specific widgets via code, make sure your site-level setting is set to "None."
Will the All-in-One Chat Widget replace my need for multiple widgets?
The All-in-One option combines multiple messaging channels (text, email, Facebook) into a single widget. You might still want multiple widgets if you need different branding, greetings, or call-to-action buttons for different pages.
How do I verify which widget is active on a page?
Use the Preview feature in the page editor to see exactly what parents will see when they visit that page.
Related Articles
- Getting Started with Chat Widget
- How to Use the All-in-One Chat Widget
- How to Install Your Chat Widget
- Chat Widget Business Office Hours