
Adding search and category navigation to your blog helps prospective families find the content they're looking for quickly. It improves your site's organization and makes it easier for parents to explore topics like enrollment tips, classroom updates, and childcare resources.
Adding Search and Category Navigation to Your Blog
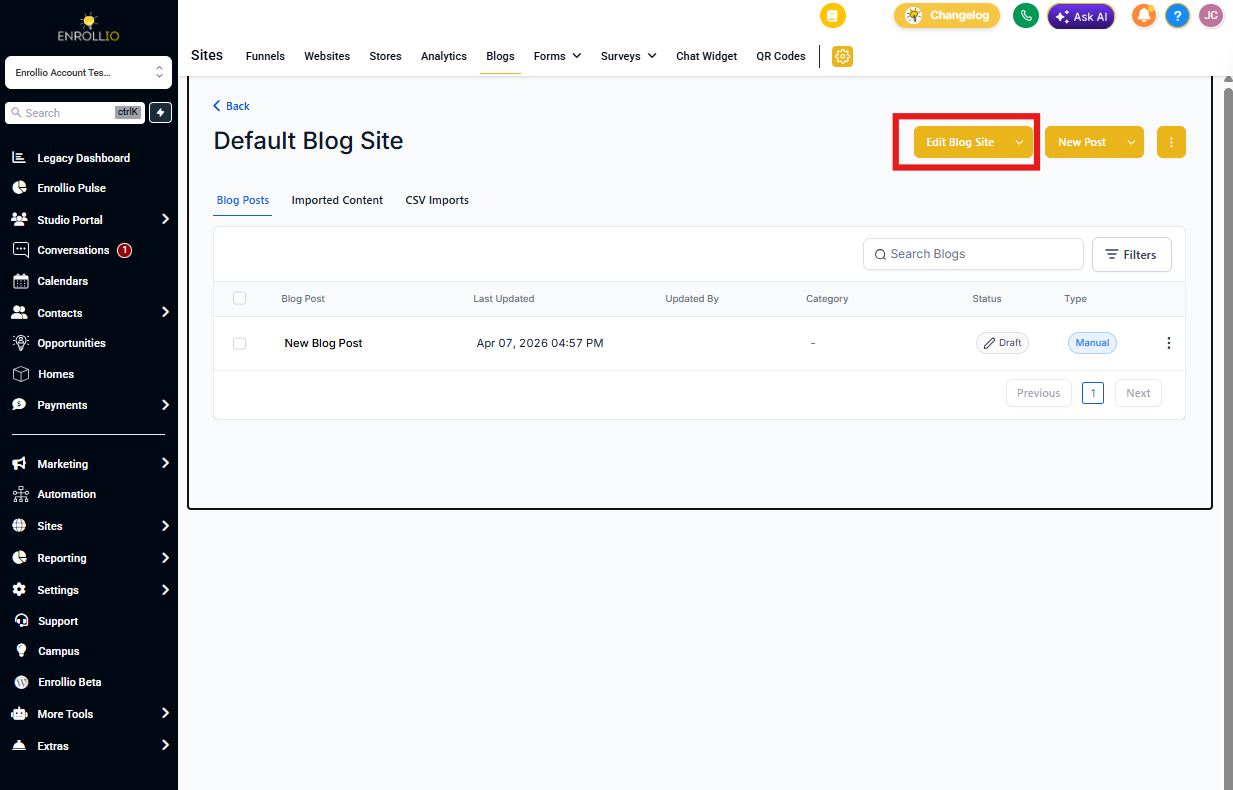
Step 1: Access Your Blog Settings
- Go to Sites in your Enrollio dashboard
- Click Blogs
- Select the blog you want to edit from the list
- Click Edit Site to open the blog editor
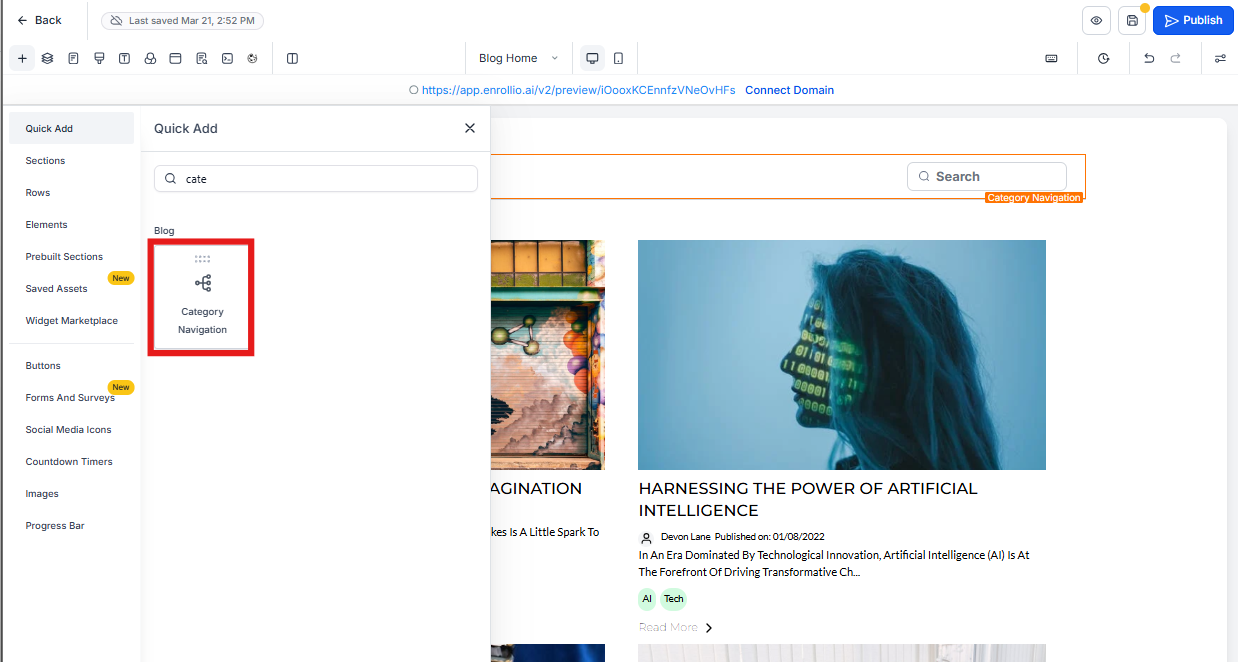
Step 2: Add Category Navigation
- In the blog editor, look for Elements in the sidebar
- Find the Category Navigation element
- Drag and drop it onto your blog page where you want it to appear
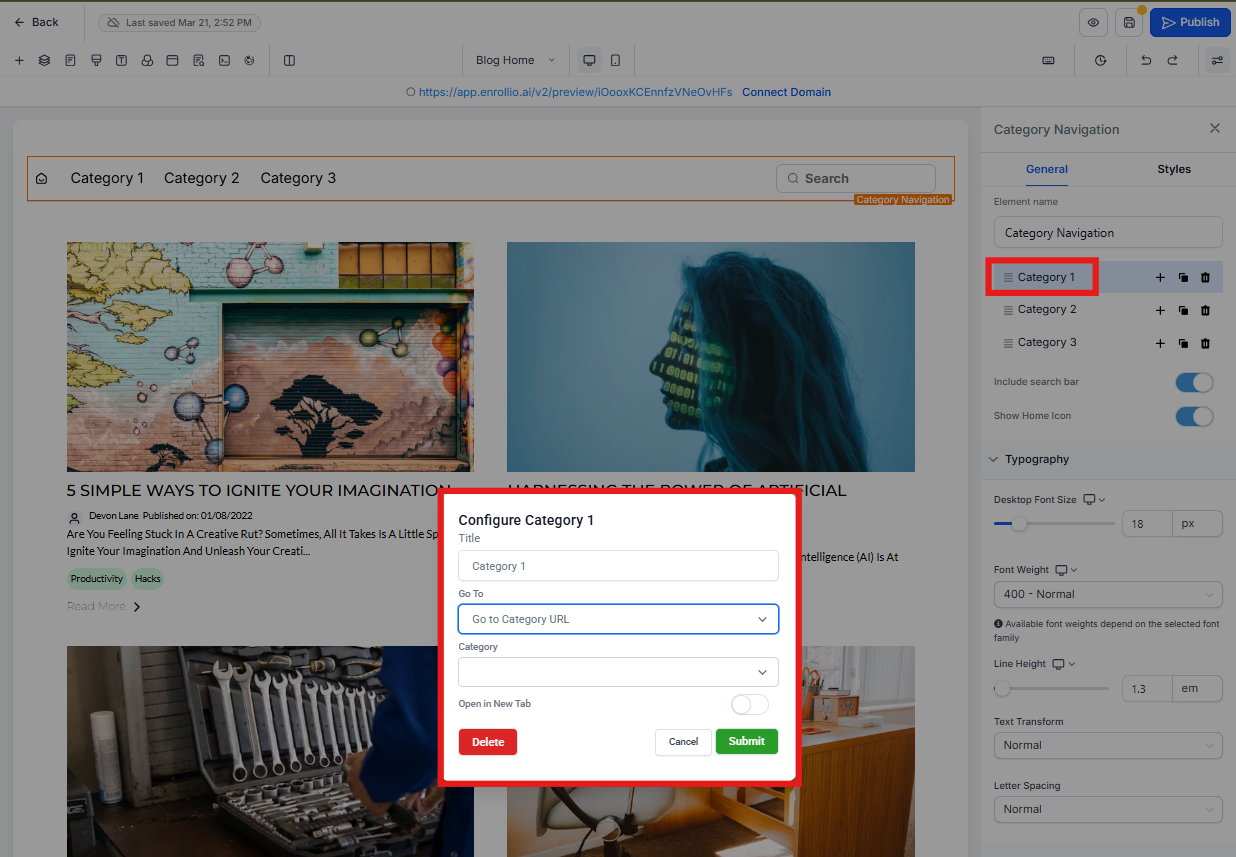
Step 3: Customize Your Categories
Once you've added the category navigation element, you can customize it to match your blog structure.
- Click on Category 1 in the navigation element
- Edit the category name (for example: "Enrollment Tips," "Classroom Updates," or "Parent Resources")
- Link it to the corresponding blog category
- Repeat this process for each additional category
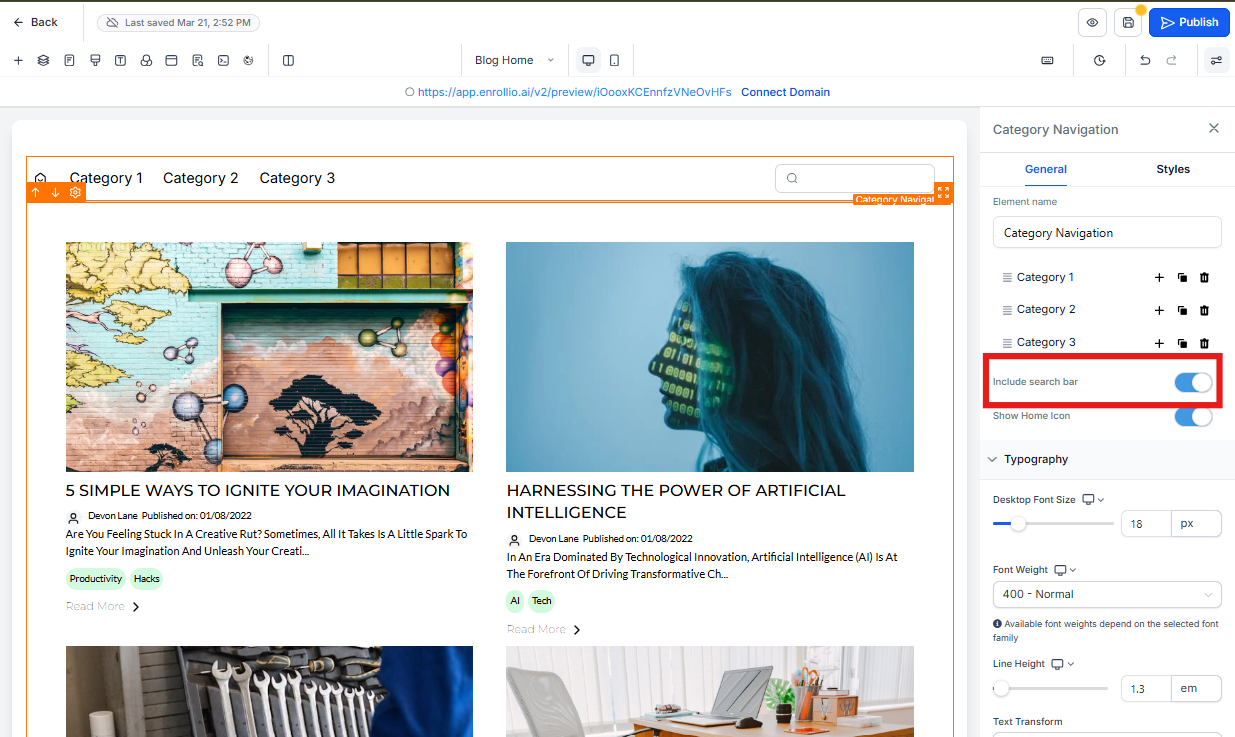
Step 4: Enable Blog Search
The blog search feature lets parents quickly find specific content without scrolling through all your posts.
- In the blog editor, find the Blog Search option
- Toggle it to Enable
- The search bar will now appear on your blog
Why This Matters
Well-organized blog navigation helps prospective families engage with your content more effectively. When parents can easily find answers to their enrollment questions or learn about your program through blog posts, they're more likely to book a tour or start an application.
Category navigation also improves your site's SEO, making it easier for families in your area to discover your childcare center through search engines.