
How to Install Enrollio's Chat Widget
Installing the Enrollio Chat Widget on your website is one of the easiest ways to capture inquiries from prospective families — no advertising spend required. The Chat Widget supports Live Chat (perfect if you have front desk staff ready to respond immediately), text messaging, and WhatsApp messaging (if enabled on your account).
Best of all, installation is simple and requires no technical skills or development knowledge.
Before You Start
Make sure you've purchased a phone number and completed the required A2P registration in your Client Account for text message replies to work properly.
Related: How to Purchase a Phone Number in a Client Account
How to Install the Chat Widget
The Chat Widget can be added to any enrollment page or landing page you've created in Enrollio. Here's how:
- Navigate to Sites in your Enrollio dashboard
- Select the enrollment page or landing page where you want to add the widget
- Open the page editor
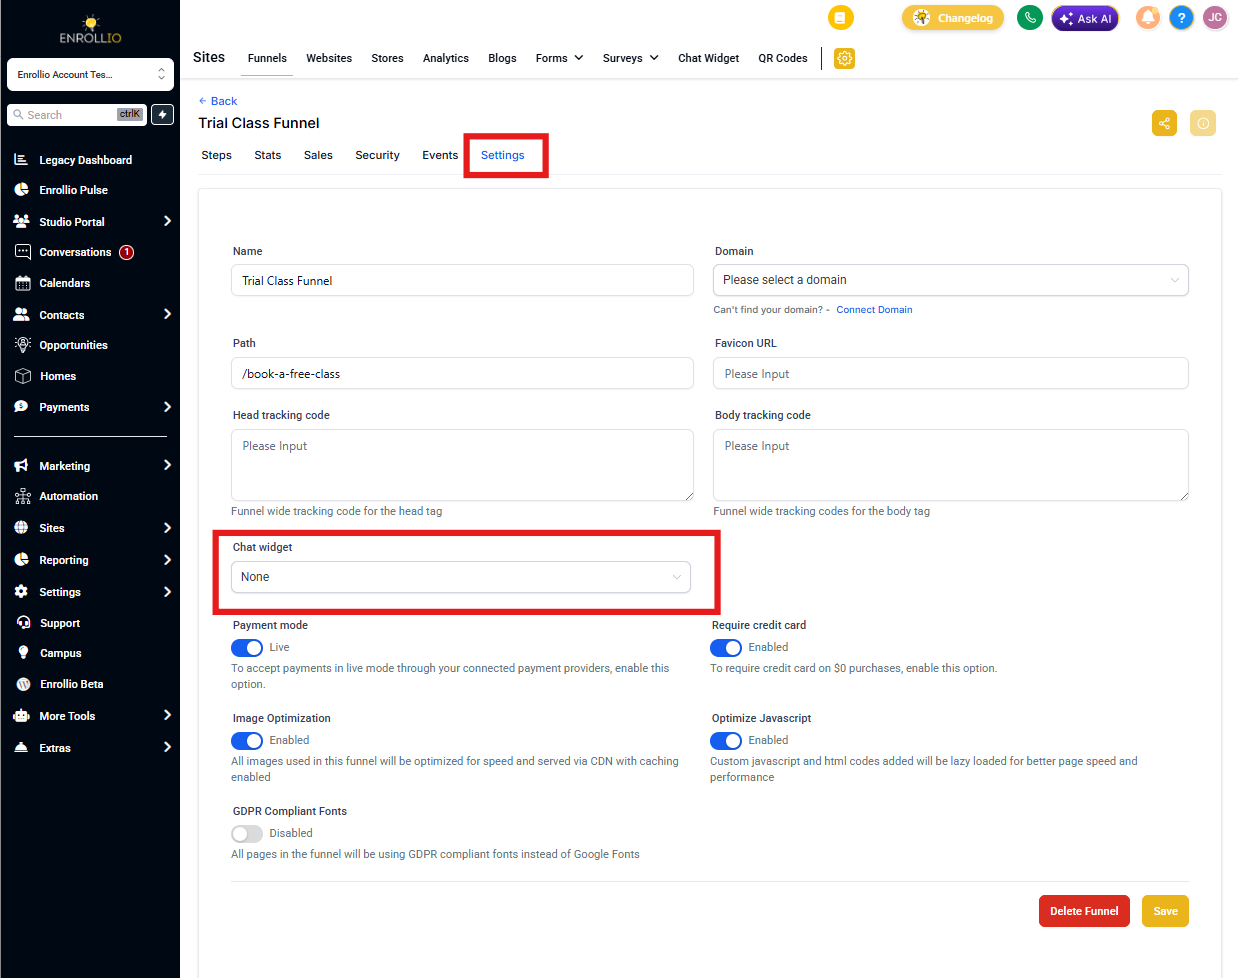
- Click Settings and locate the Chat Widget section
- Toggle the Chat Widget to On
- Customize your widget settings (greeting message, colors, availability)
- Click Save and publish your page
How to Set Up Chat Widget Notifications
Once your Chat Widget is live, you'll want to receive instant notifications when prospective families reach out. Here's how to set that up:
Step 1: Create an Automation Trigger
- Go to Automations in your Enrollio dashboard
- Click Create Automation
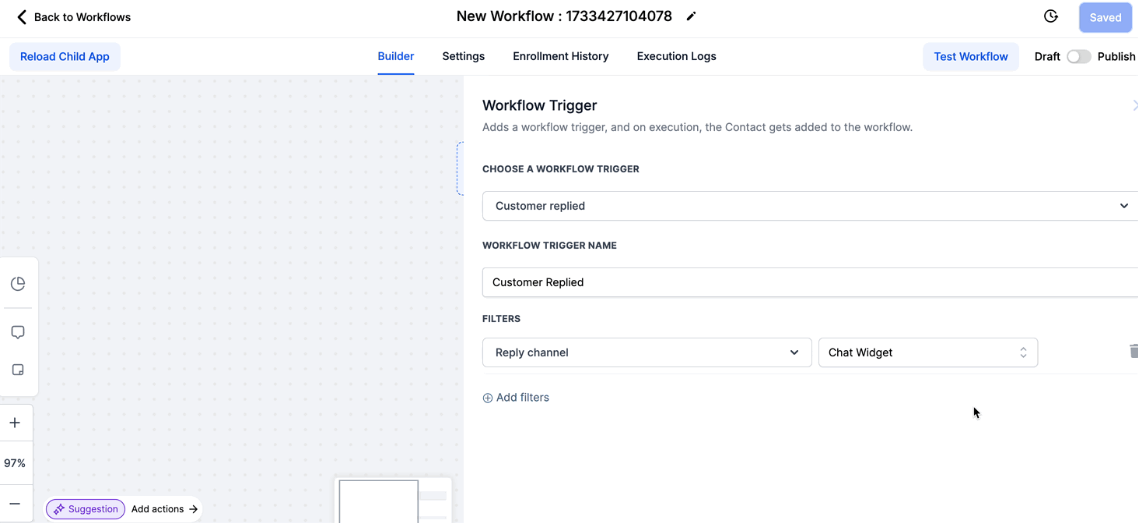
- Set the trigger event to Parent Replied
- Add a filter for Reply Channel and select Chat Widget
Step 2: Add a Notification Action
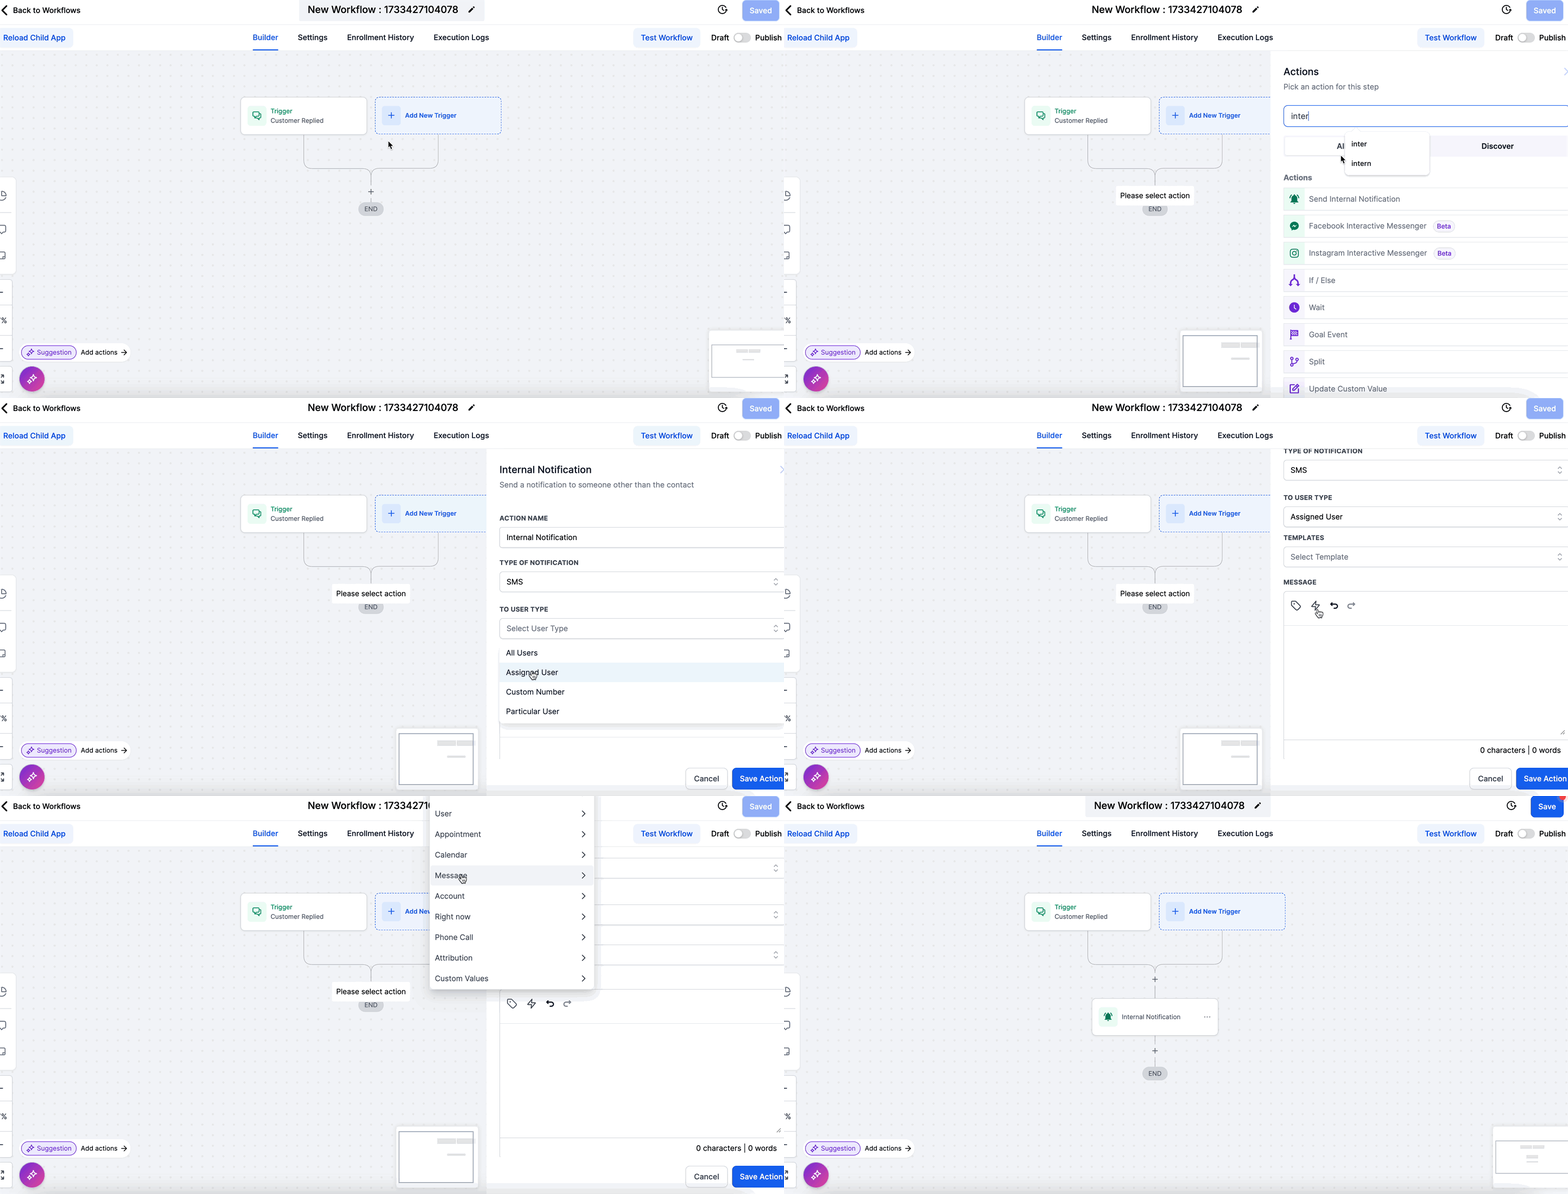
- Click the + button below your trigger
- Search for Internal Notifications
- Choose your notification type:
- Email — Send to specific staff members or a custom email address
- In-app notification — Notify staff via the web or mobile app
- Text message — Send an SMS to specific staff or a custom number
How to Test Your Chat Widget
Before going live, test your Chat Widget to make sure everything works:
- Open your enrollment page in a private/incognito browser window
- Click the Chat Widget icon
- Send a test message
- Verify that your notification arrives as expected
- Check that the conversation appears in your Conversations inbox
If you don't receive the notification, double-check your automation settings and make sure your phone number is properly configured.
Frequently Asked Questions
Can I customize my chat widget messaging per page?
The current Chat Widget configuration uses consistent messaging across all pages. While you can install the widget on multiple enrollment pages, the greeting and initial messaging will remain the same as your setup.
Can I create multiple chat widgets in a Client Account?
Yes! You can create more than one chat widget per Client Account. This is helpful if you manage multiple locations or want different widgets for different types of inquiries.
Related Articles
- Getting Started with Chat Widget
- Overview of Chat Widget Customizations
- Chat Widget — Business Office Hours in Live Chat
- Chat Widget — Send Your Leads to WhatsApp
- Web Chat Inside Conversations