
Create Facebook and Instagram Ad Campaigns
Run Facebook and Instagram ads directly from Enrollio's Ad Manager. This guide walks you through creating Meta campaigns, understanding the Campaign → Ad Set → Ad structure, managing multiple variations, and publishing with confidence.
What You'll Learn
- What Facebook campaign creation means in Enrollio
- Key benefits for childcare centers
- Prerequisites before you start
- How Meta structures campaigns
- Step-by-step campaign creation
What is Facebook Campaign Creation in Enrollio?
Note: Connect your Facebook integration before you begin. See Connect Facebook with Ad Manager.
Facebook campaign creation in Enrollio lets you build and launch Meta ads without leaving your platform. You select a goal, define your audience and budget, add creatives, and publish—all from one streamlined interface.
Meta campaigns created in Enrollio are sent to your connected Meta ad account and follow Meta's publishing and review policies.
Why Use Enrollio's Ad Manager?
Speed: Build campaigns, ad sets, and ads from one place in Enrollio.
Clarity: Stay organized using Meta's hierarchy for clean testing and reporting.
Scalability: Add up to 10 ad sets and 10 ads to expand tests without starting from scratch.
Consistency: Reuse audiences, creatives, and forms to keep your brand messaging consistent.
Control: Publish, pause, duplicate, and edit with simple ellipsis (⋮) menus at each level.
Before You Start
Complete these prerequisites before creating your first campaign:
- Select a pricing model from Enrollio Dashboard → Reselling. Set your reselling offer for Ad Manager to client accounts before proceeding.
- Enable Ad Manager for your client account. Toggle ON the Ad Manager visibility under Client Account → Marketing. It's ON by default for all client accounts.
- Set user permissions. Enable Ad Manager for individual users from Staff → Permissions.
- Connect your Meta ad account. In Ad Manager, connect your Meta ad account and multiple Facebook pages by logging in through the LeadConnector App. You can connect multiple Facebook pages and one ad account.
How Meta Structures Campaigns
Meta campaigns in Enrollio follow a three-level hierarchy:
Campaign → Ad Set → Ad
When you create a campaign, Ad Manager automatically creates 1 ad set and 1 ad to help you get started.
Limits:
- Up to 10 ad sets per campaign
- Up to 10 ads per ad set
How to Create a Meta Campaign
This guided workflow follows the exact order of controls in Enrollio. Move step by step, then review settings before publishing.
Step 1: Create a Campaign
- Go to Marketing → Ad Manager.
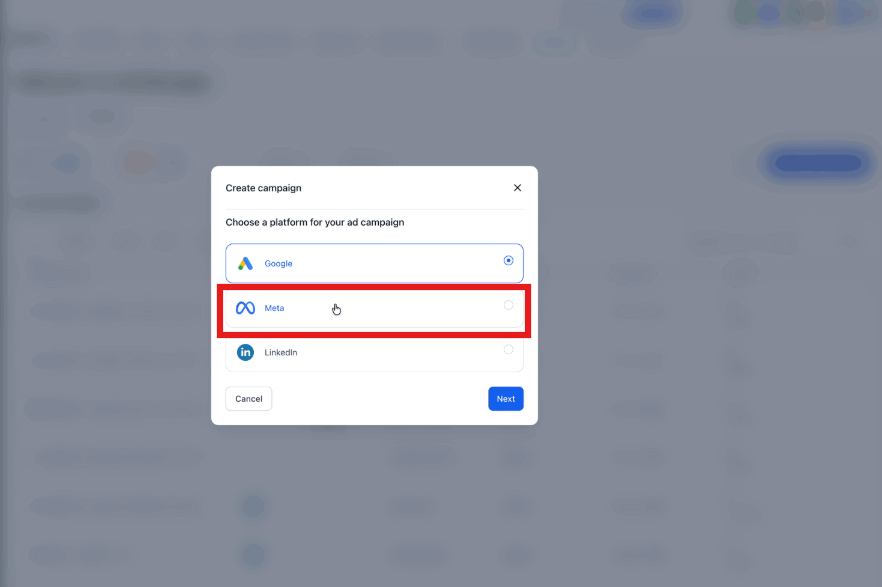
- On the Ad Manager home screen, click + Create Campaign.
- Select Facebook as your platform.
- Click Next.
- Choose to either Start from Scratch or use Ad Manager templates. (See How to create ad campaigns using templates for template guidance.)
- Click Next to start defining your campaign.
Step 2: Select Campaign Objective & Special Ad Category
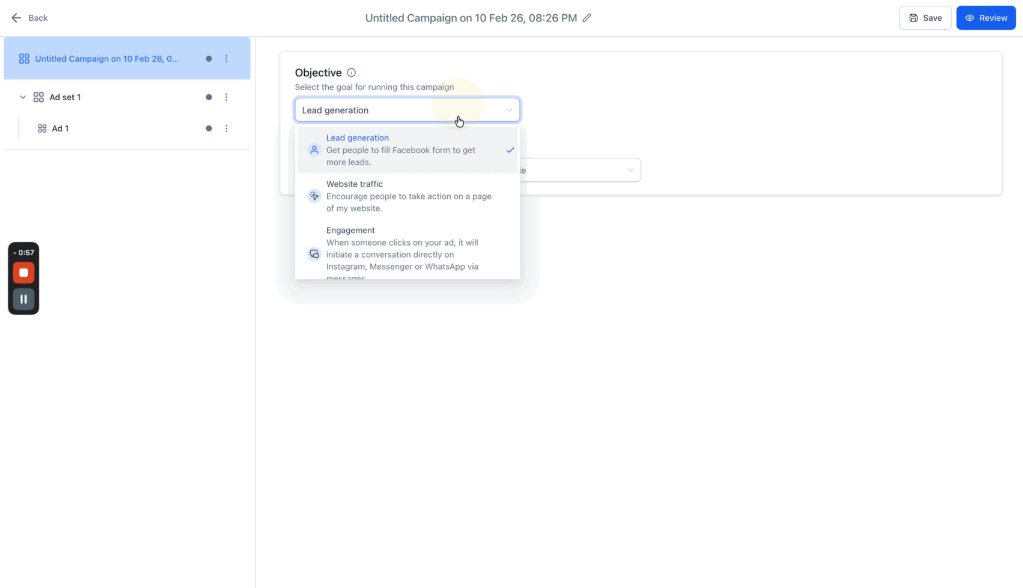
Objective: Choose the goal you want to achieve with your ads. For example, if you want to generate tour requests, select Lead Generation. You can use Facebook form integration to create new forms or use existing ones. Learn how to create Facebook Forms in Ad Manager.
Special Ad Category: If your ad promotes housing, employment, credit, or social issues, select the appropriate category to comply with local laws. Most childcare ads should select NOT APPLICABLE.
⚠️ Special Ad Category Restrictions
Facebook's Special Ad Category has limited targeting options:
- No lookalike audiences (you can create one outside Facebook and upload as custom audience)
- No saved audiences
- No zip codes or postal codes
- Limited demographic, behavior, and interest options
- Age defaults to 18-65+ and can't be edited
- Gender includes all genders only and can't be edited
- Specific locations include a minimum 15-mile or 25km radius
Step 3: Configure Ad Set Details
Note: You can add up to 10 ad sets per campaign.
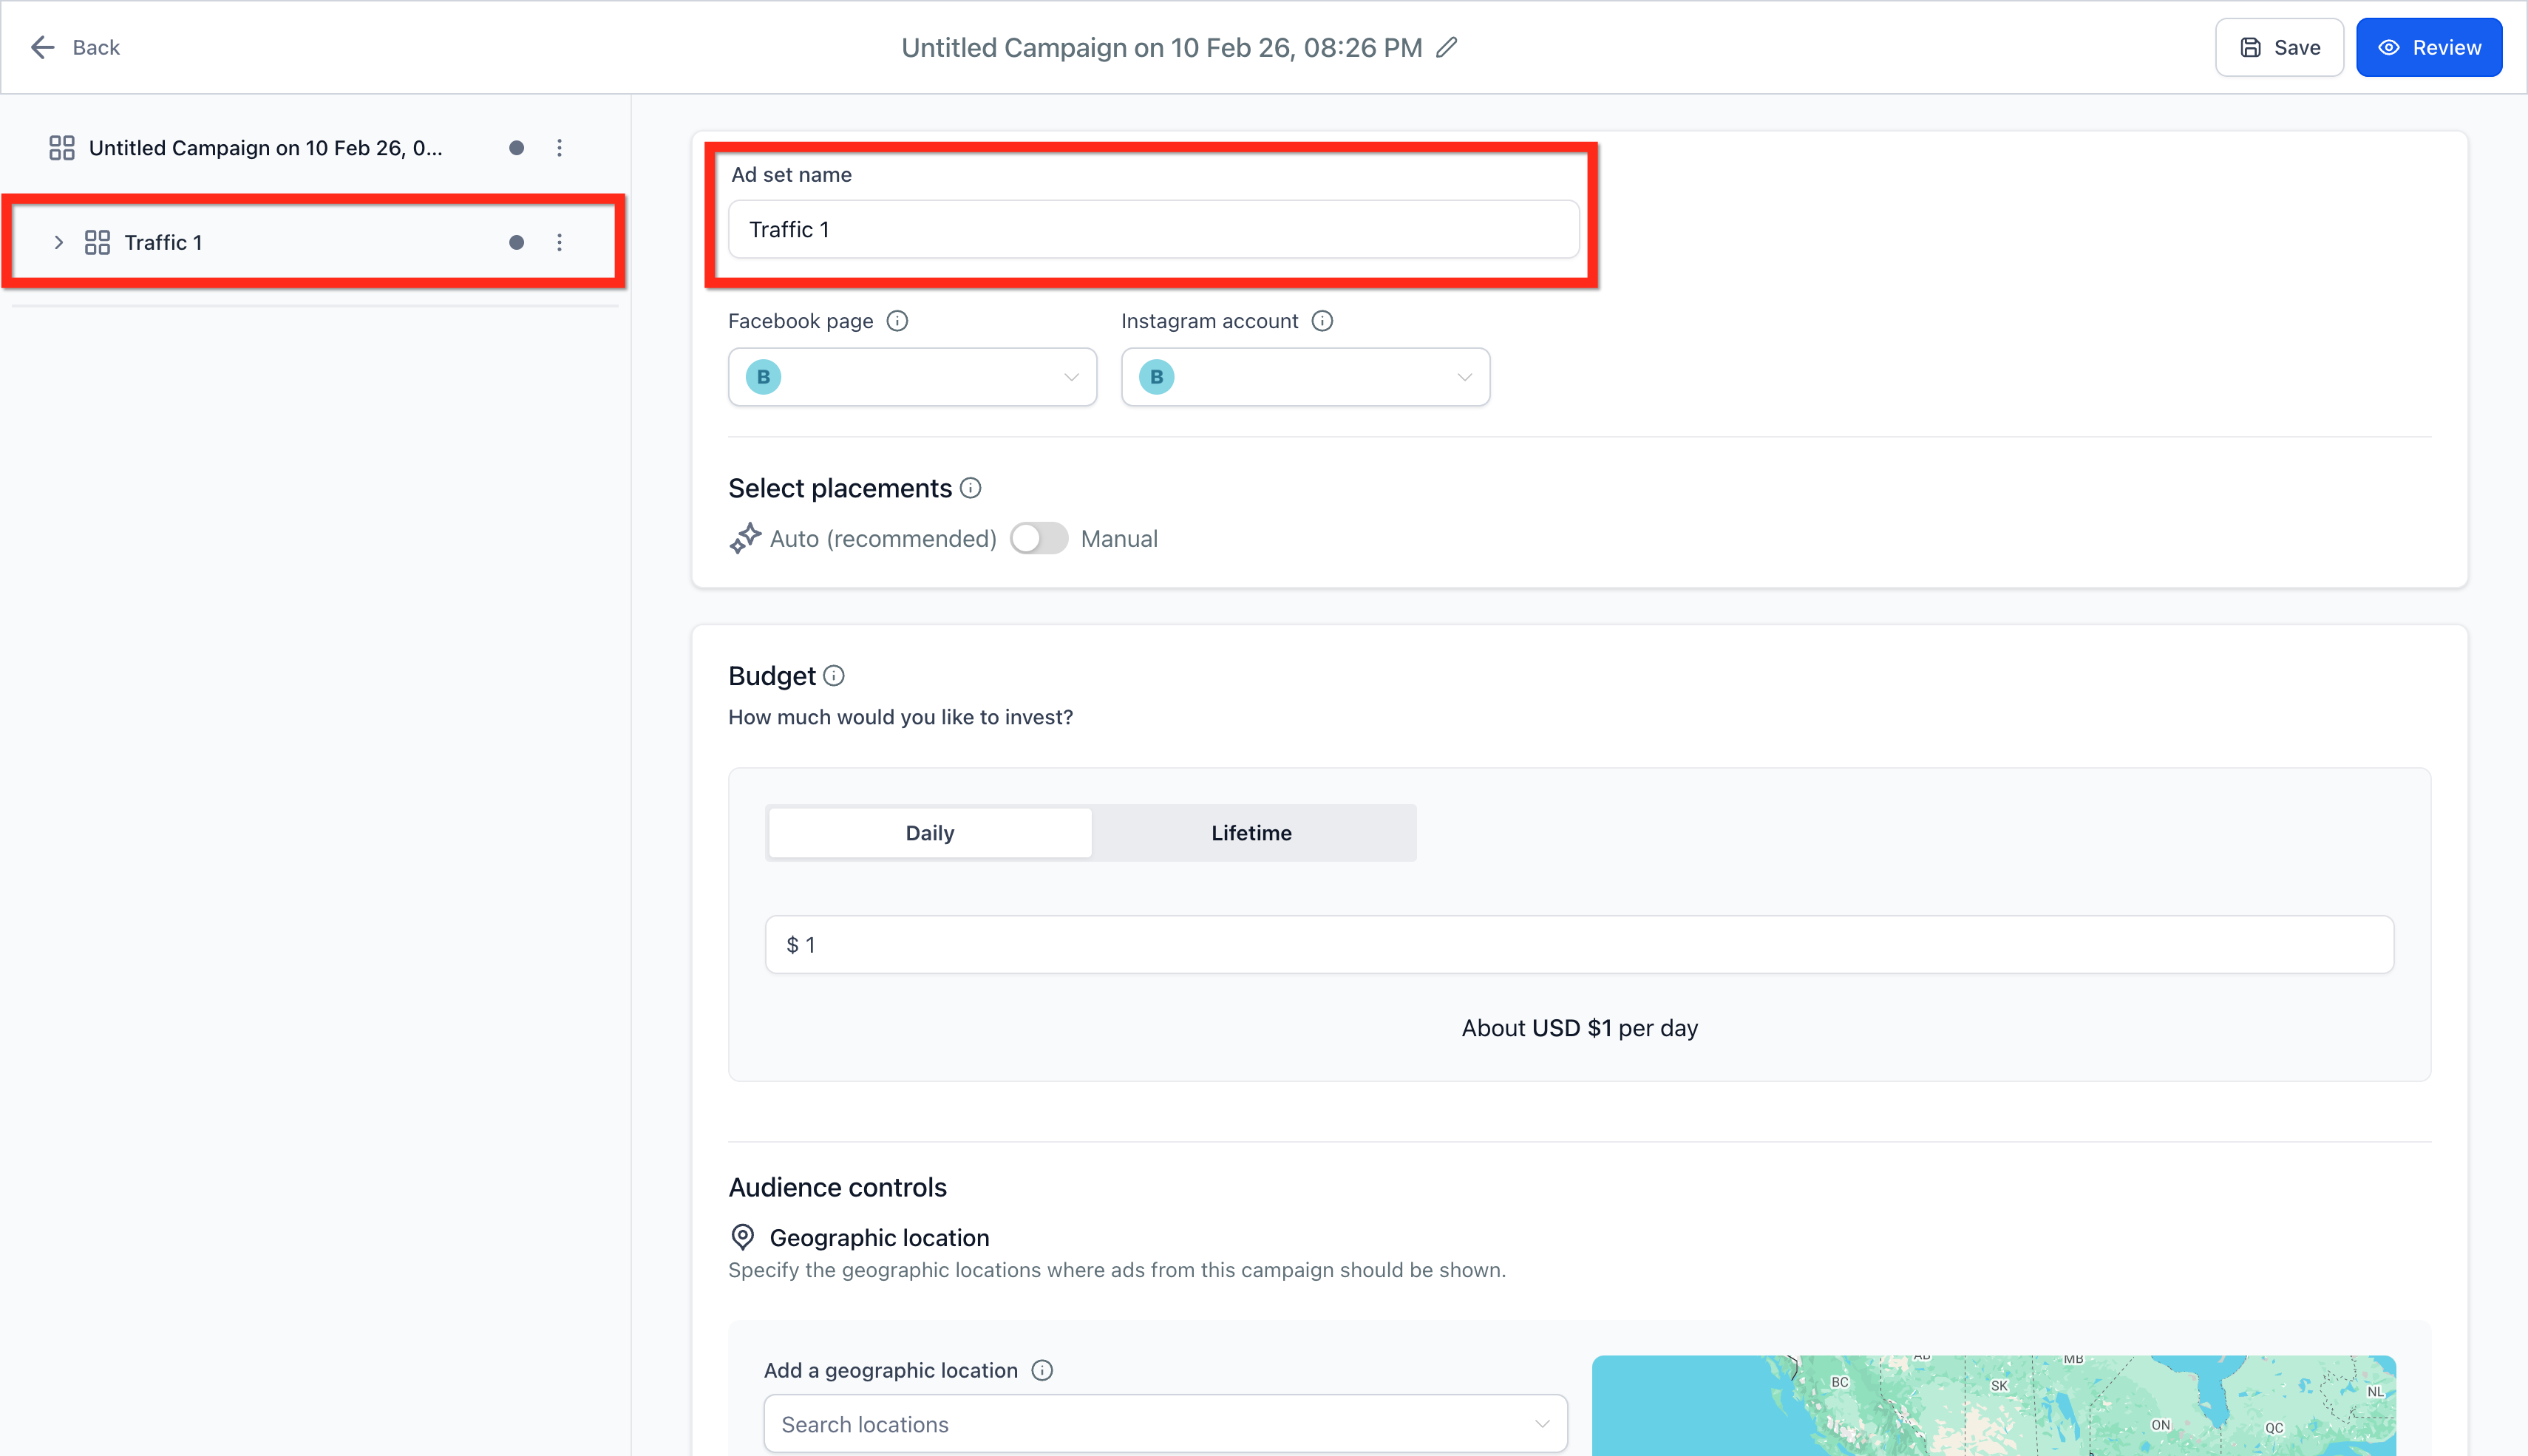
- Name your Ad Set. Use a descriptive name like "Parents-5Mile-Radius" to stay organized.
- Choose your Facebook Page. This represents your childcare center in ads.
- Choose your Instagram Account (optional). If you don't connect one, the ad will use your Facebook Page name, profile picture, description, and follower count.
-
Select Placement:
- Automatic placements: Let Meta show your ads across all default placements for best results and cost control.
- Manual placements: Toggle ON to select specific places where you want your ads to appear.
-
Set Your Budget: Choose either:
- Daily budget: Average amount to spend per day
- Lifetime budget: Total amount to spend over the campaign duration. Select start and end dates using the date pickers.
Note: The currency shown matches your connected Meta ad account. The start-end date timezone reflects your current timezone. You'll be charged from the card on file in your Meta ad account.
💡 Pro Tip
You can increase or decrease lifetime budgets by pausing and editing a campaign.
Step 4: Configure Audience Controls
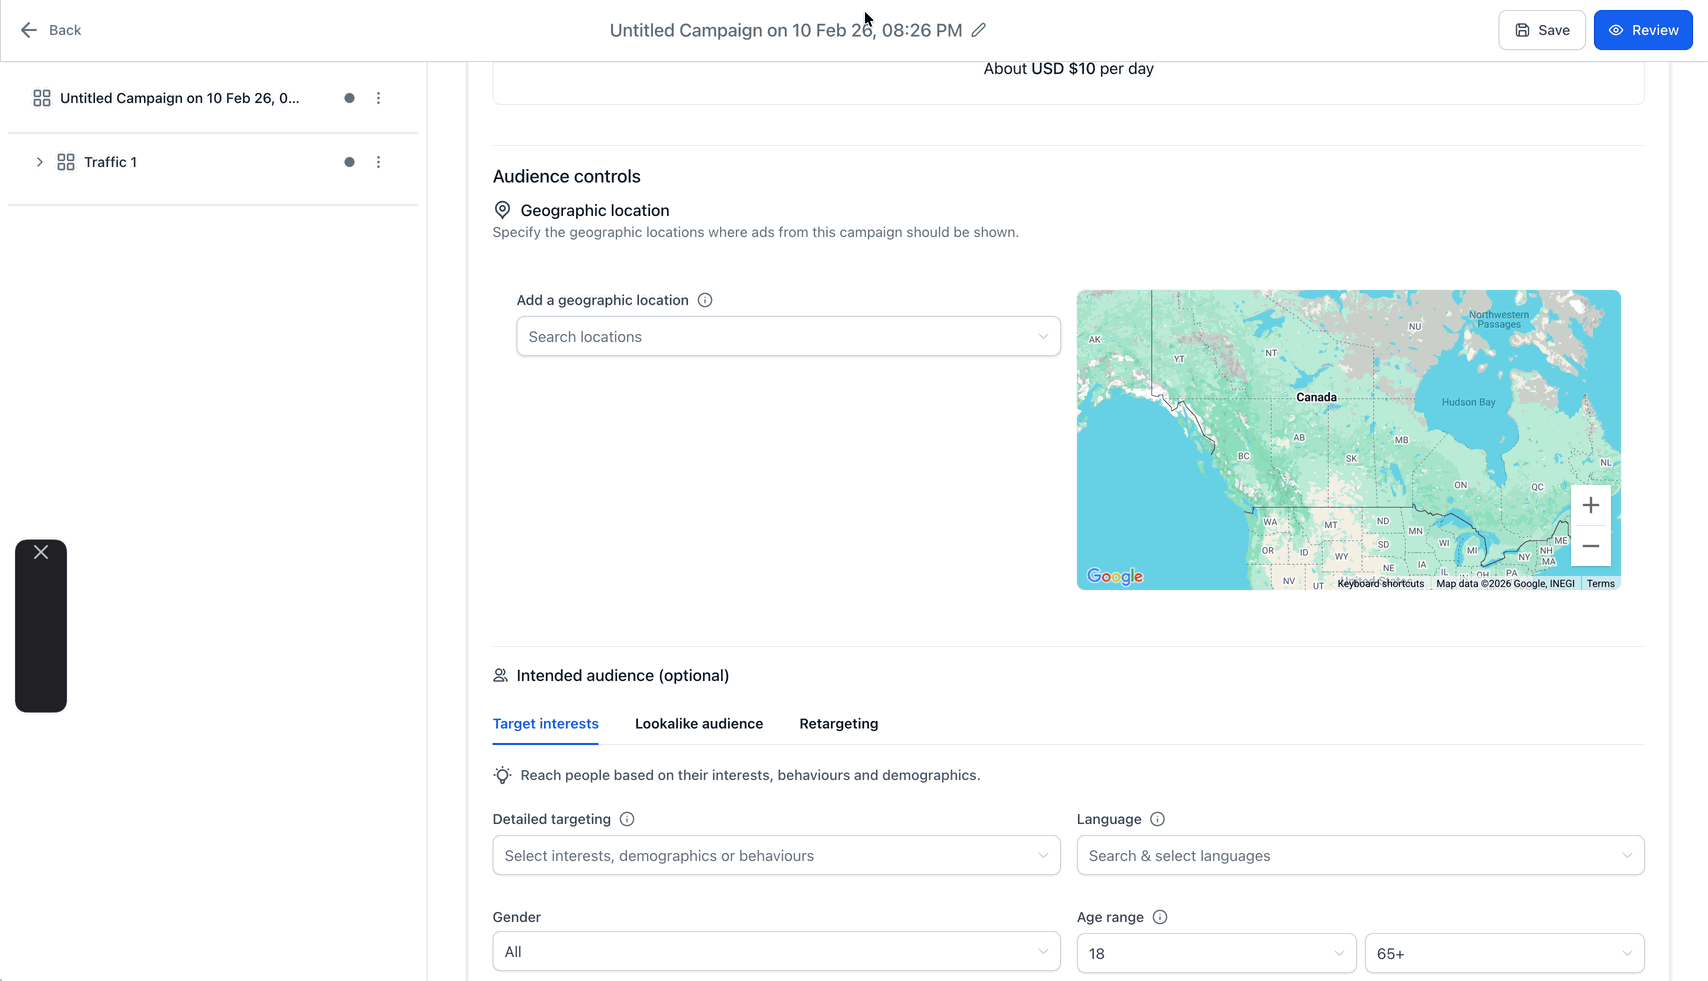
Geographic Location: Target specific locations or exclude areas within a country or state.
💡 Pro Tip
Choosing a broad area (like your entire city or county) instead of several specific neighborhoods often improves results.
Optional: Define Intended Audience
Narrow down your audience with more specific criteria. For detailed guidance on audience targeting, see this article.
Step 5: Configure Ad Details
Note: You can add up to 10 ads per ad set.
- Name your Ad. Use descriptive names like "Open-House-Promo-Video" to track performance.
-
Choose your destination. Depending on your campaign objective, you'll select:
- Website URL (for Website Traffic, Sales)
- Facebook Lead Form (for Lead Generation)
- Conversation Form (for Engagement)
Add Your Ad Content:
- Primary text: Optional, but recommended. Keep it under 125 characters for best display.
- Headline: Catch attention with a clear benefit (e.g., "Tour Our New Classrooms")
- Description: Add supporting details
- Media: Upload images or videos. You can create single image ads or carousel ads with multiple images.
- Call-to-Action Button: Choose a button like "Learn More," "Contact Us," or "Get Offer" (for Lead Generation ads).
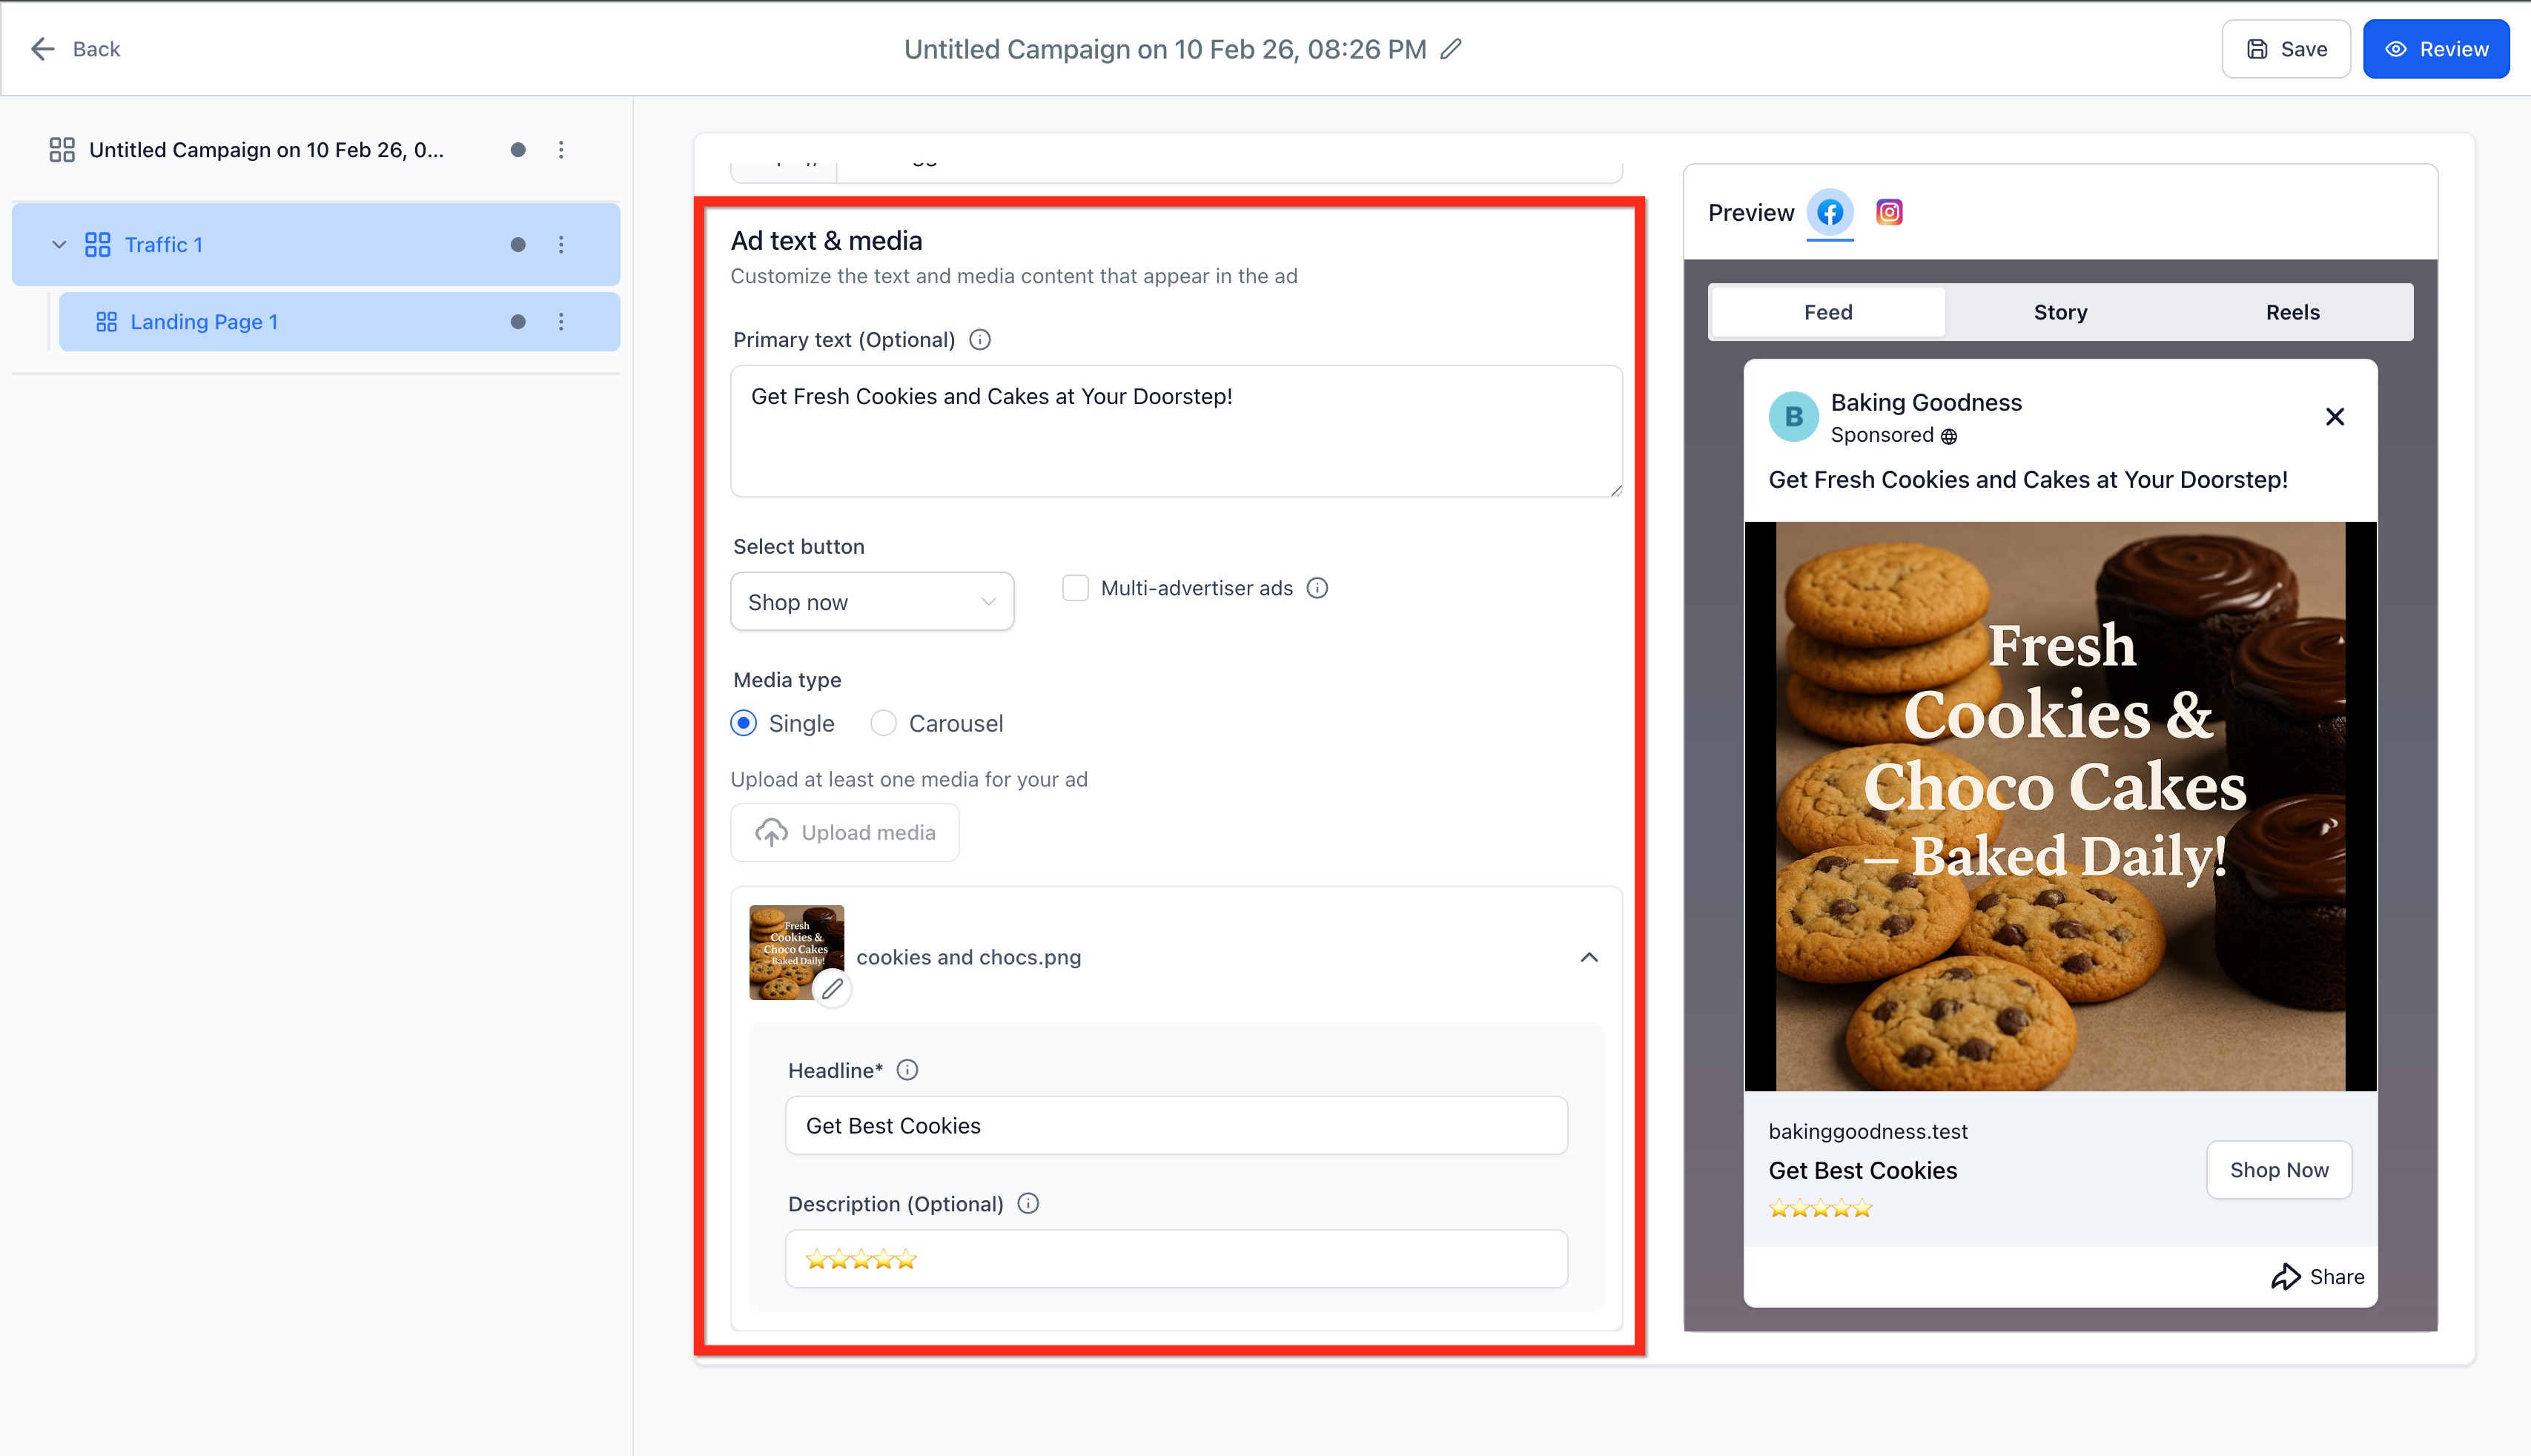
Multi-advertiser ads: This Meta format allows multiple advertisers to showcase their offerings in the same ad space. The checkbox is checked by default and can be turned off.
Review and Publish
Before you publish:
- Review your campaign, ad set, and ad settings for accuracy
- Check that your budget and schedule are correct
- Verify your audience targeting matches your goals
- Ensure your images meet Meta's specs (no excessive text overlay)
- Click Publish
Your campaign will be submitted to Meta for review. Most ads are reviewed within 24 hours.
Managing Your Campaigns
After publishing, you can:
- View campaign performance in Ad Manager
- Pause, edit, or duplicate campaigns using the ellipsis (⋮) menu
- Add more ad sets or ads to test variations
- Adjust budgets and schedules as needed
Frequently Asked Questions
Q: Can I connect multiple Facebook pages?
A: Yes, you can connect multiple Facebook pages but only one Meta ad account per Enrollio account.
Q: Where are my ads charged?
A: All ad spend is charged to the payment method on file in your Meta ad account, not through Enrollio.
Q: How long does ad review take?
A: Most ads are reviewed by Meta within 24 hours. You'll receive a notification once your ad is approved or if changes are needed.
Q: Can I edit a running campaign?
A: Yes, you can pause a campaign and make edits. Some changes (like significant audience or creative updates) may trigger a new review.
Q: What timezone is used for campaign scheduling?
A: The start and end times use the timezone you're in when creating the campaign.