
What You'll Learn
Domain Connect makes connecting your custom domain to Enrollio fast and automatic. Instead of manually configuring DNS records, you can connect domains from GoDaddy, Google Domains, Cloudflare, or IONOS with just a few clicks.
This guide shows you how to use Domain Connect to point your domain to your Enrollio enrollment pages and sites.
Before You Start
Important: Domain Connect is a connection feature, not a domain registration service. You need to already own your domain through GoDaddy, Google Domains, Cloudflare, or IONOS before you can connect it to Enrollio.
If you're using Cloudflare, make sure the automatically created DNS records have the Cloudflare proxy turned off.
Why Use Domain Connect?
Manual DNS configuration can be confusing and error-prone. Domain Connect eliminates that complexity:
- One-click setup: Connect your domain in seconds instead of minutes
- Automatic configuration: No need to manually add DNS records
- Fewer errors: The system handles the technical details for you
- Secure connections: Uses trusted infrastructure from major domain providers
How to Connect Your Domain
Step 1: Start the Domain Connection Process
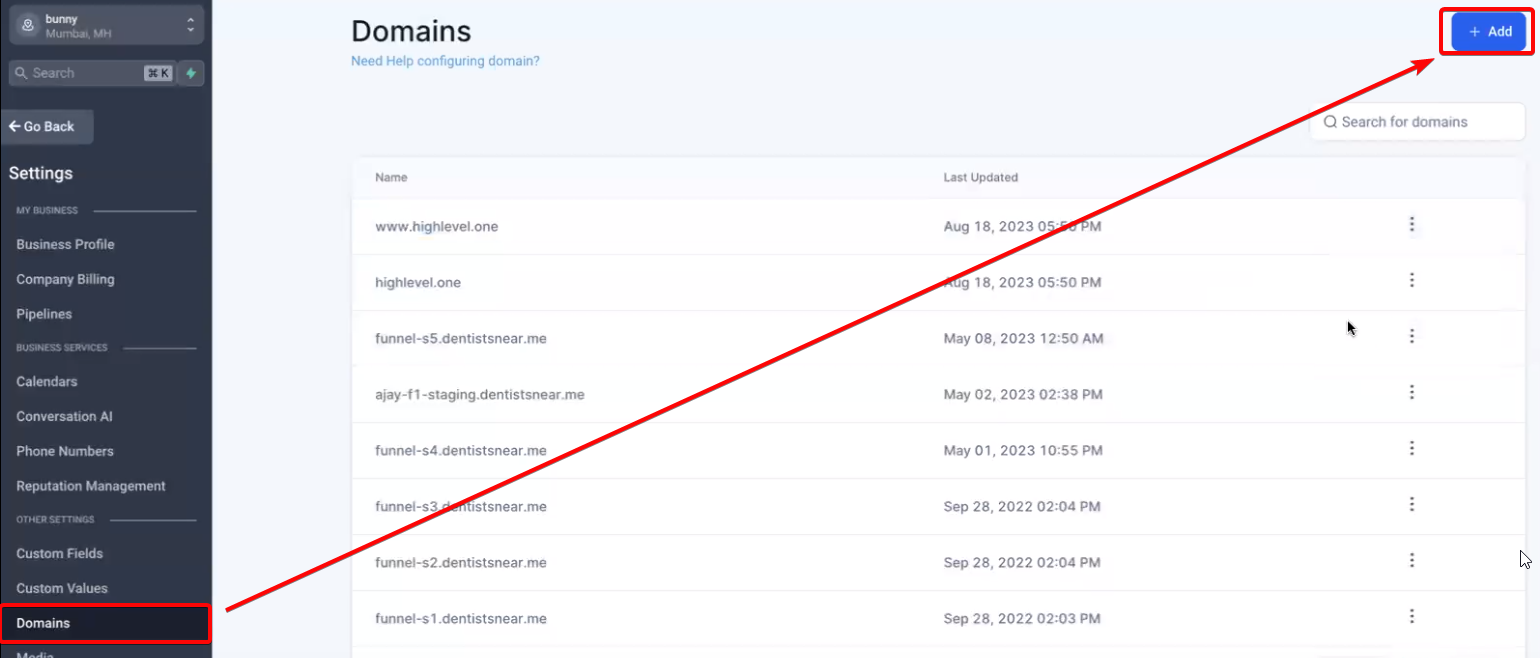
- Click Settings in your Enrollio dashboard
- Go to the Domains tab
- Click Add Domain
Step 2: Enter Your Domain
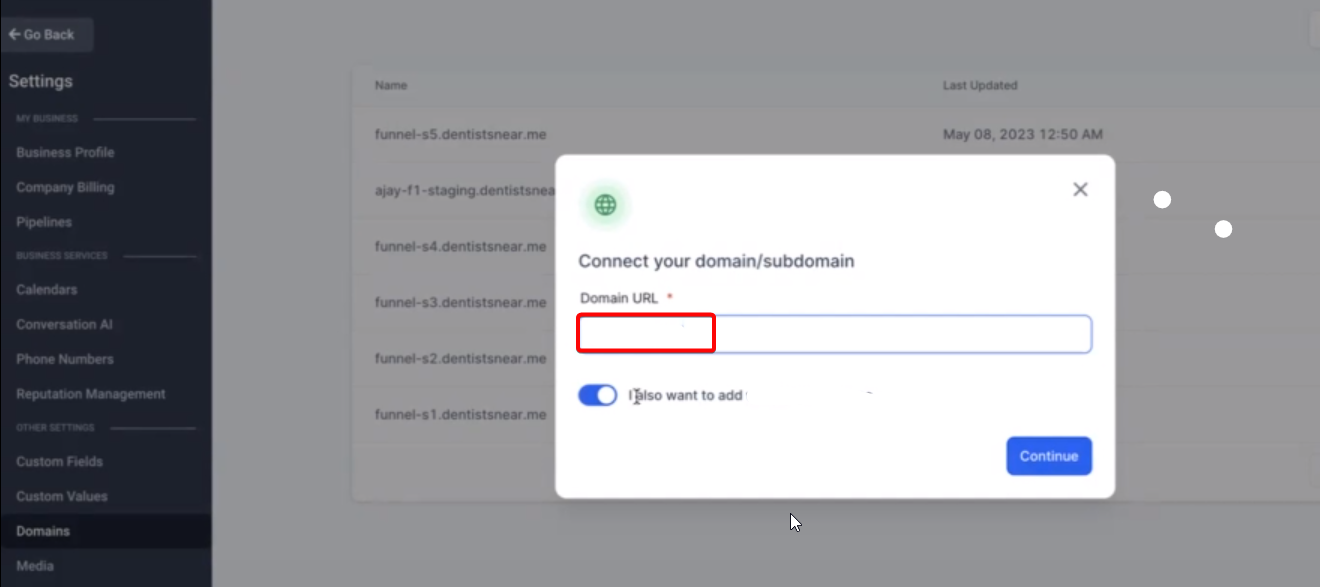
- Type your domain name in the field (for example:
mychildcare.comorenroll.mychildcare.com) - If you want to add the "www" version of your domain automatically, check the box for "Also add www domain"
- Click Continue
Step 3: Authorize the Connection
If your domain is with GoDaddy, Google Domains, Cloudflare, or IONOS, you'll see an Authorize button.
- Click Authorize
- A new tab will open with your domain provider's authorization page
- Follow the prompts to grant Enrollio permission to configure your DNS settings
- Once authorization is complete, close that tab
- Return to your Enrollio dashboard
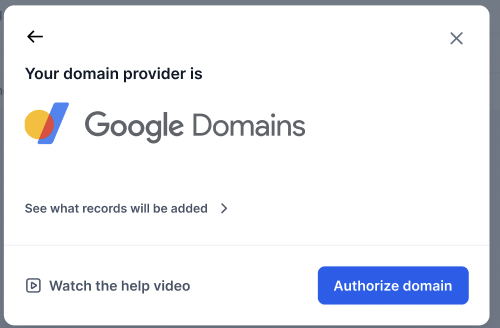
Note for Google Domains users: The authorization won't complete until you close the provider tab and return to Enrollio.
Step 4: Verify the Connection
After authorization, Enrollio automatically adds the required DNS records. The system will verify that your domain is properly connected.
DNS changes typically take 30 seconds to a few minutes to take effect. If you see an error message, double-check that you completed the authorization process and closed the provider tab.
Manual Configuration (If Needed)
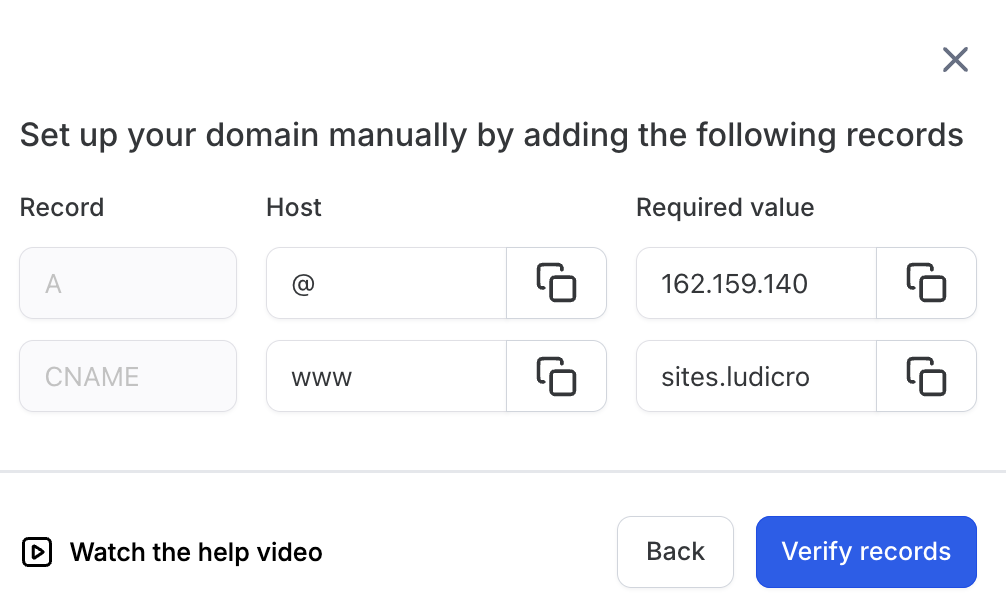
If your domain provider isn't supported by Domain Connect, you can still connect your domain manually. Enrollio will display the DNS records you need to add in your domain provider's settings.
Common Questions
Can I still manually configure my domain if I don't want to use Domain Connect?
Yes. If you prefer manual setup or your provider isn't supported, you can add DNS records yourself. Enrollio will show you exactly which records to create.
What if my domain provider isn't GoDaddy, Google Domains, Cloudflare, or IONOS?
You'll need to manually add the DNS records. The process is straightforward — Enrollio provides the exact records you need to copy into your domain provider's DNS settings.
What happens if my www subdomain is already pointed to another service?
Enrollio will create a CNAME record for your www subdomain, but it won't delete existing records pointing elsewhere. You'll need to manually remove the old CNAME or A record in your domain provider's settings for the www version to work with Enrollio.
Troubleshooting
If you see an error after authorization:
- Make sure you closed the provider authorization tab
- Wait 30-60 seconds for DNS changes to propagate
- Check that you authorized the correct domain
- For Cloudflare users, verify that proxy settings are turned off for the DNS records