
When a new family submits an enrollment inquiry or tour request, you want to make sure someone on your team follows up quickly. This guide shows you how to set up an automation that automatically assigns new prospective families to your staff in a round-robin style and notifies them immediately.
Step 1: Create a New Automation
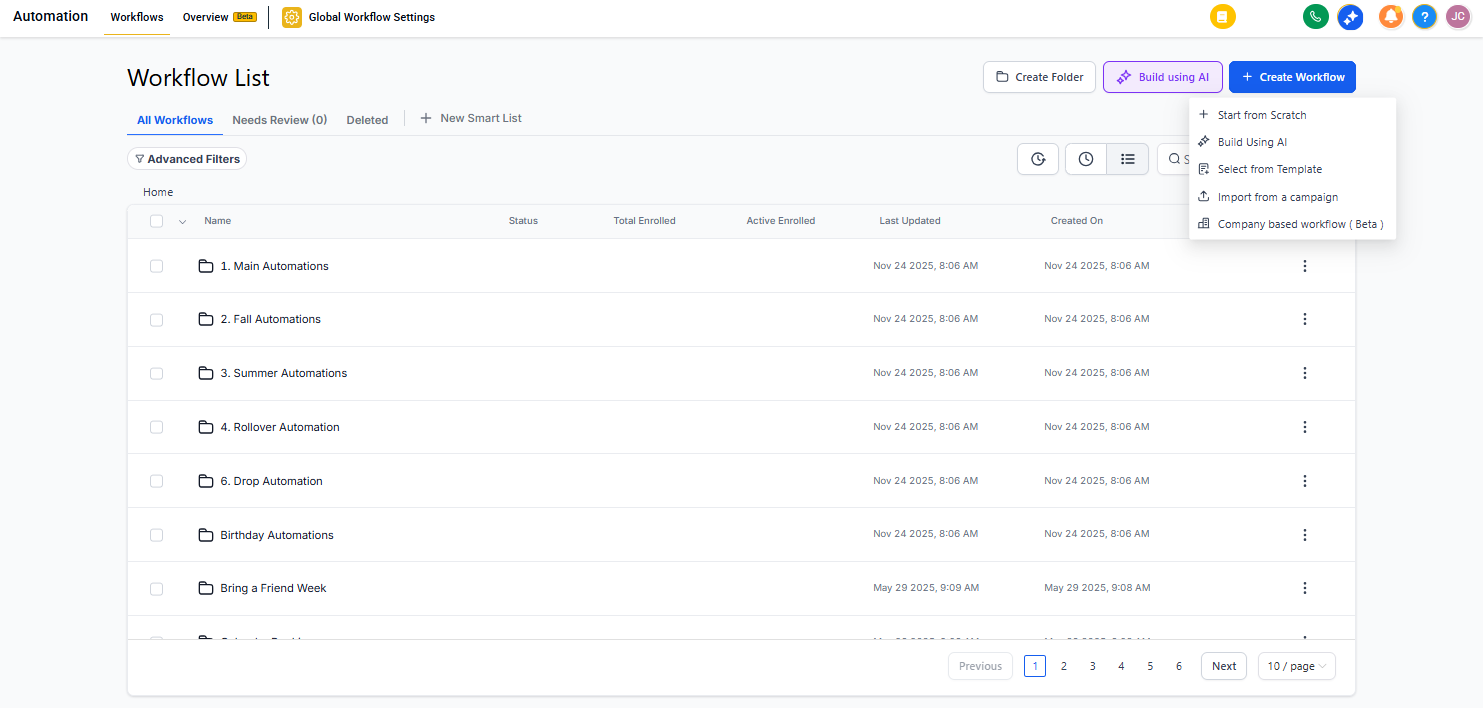
Navigate to Automations in your Enrollio dashboard and click Create Automation.
Select Start from Scratch to build a custom automation.
Step 2: Set Your Trigger
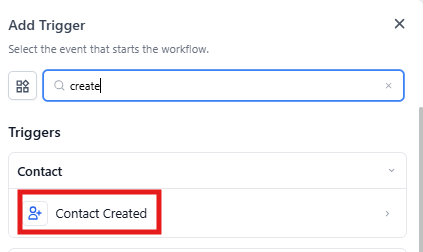
Choose when this automation should run. For this example, we'll use Parent/Family Created as the trigger — this means the automation runs every time a new prospective family enters your system.
You can also trigger this based on specific forms, landing pages, or enrollment inquiries depending on your needs.
Step 3: Add the Assignment Action
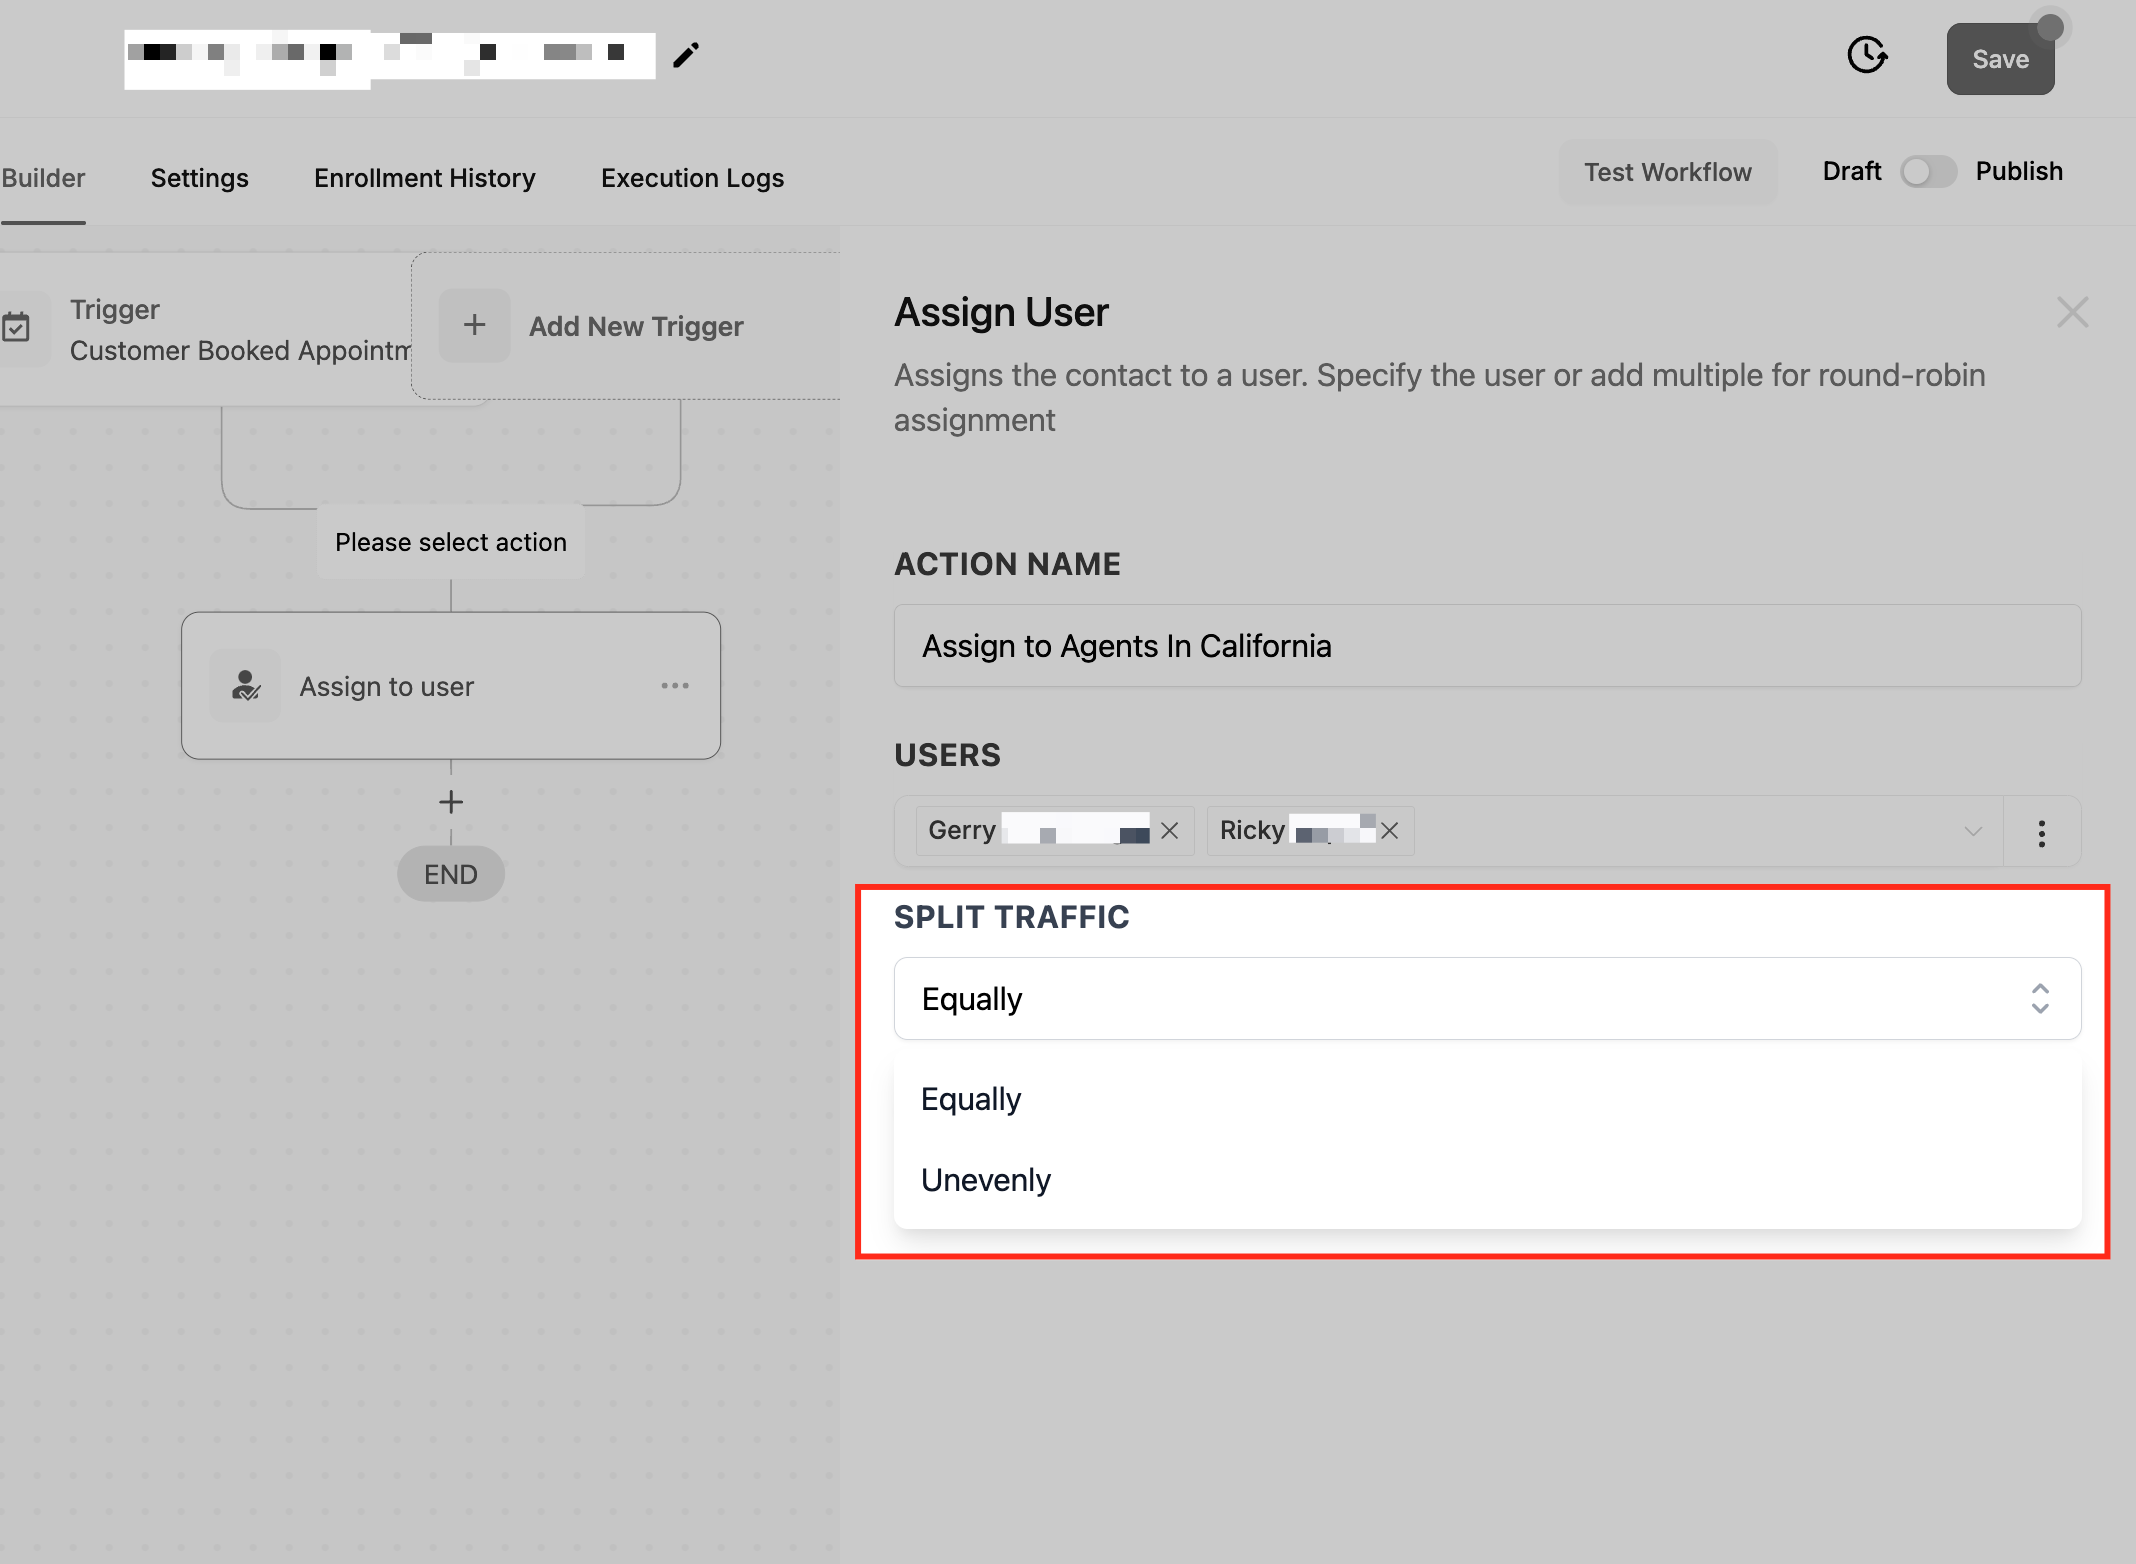
Click the + button to add an action and select Assign to User.
This action distributes new prospective families evenly across your team members in a round-robin pattern.
Configure Your Assignment Settings:
- Select Team Members: Choose which staff members should receive assignments
- Distribution Method: Keep the split traffic set to Equally to ensure everyone gets a fair share of leads
Pro Tip: If certain team members handle more enrollments than others, you can adjust the distribution percentages instead of using equal distribution.
Step 4: Notify Your Team
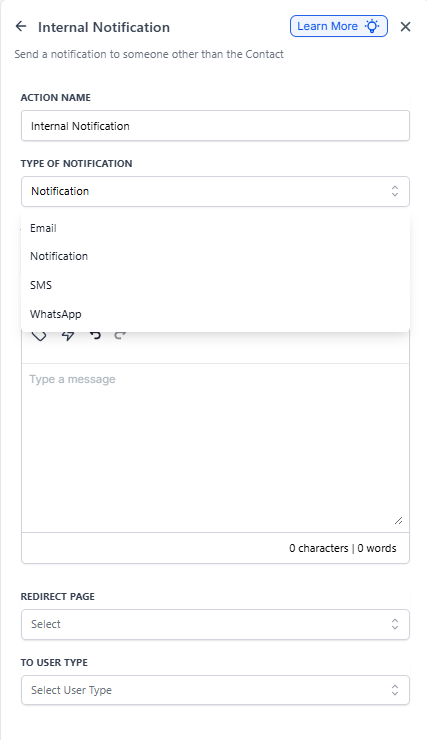
Now that families are being assigned, you need to notify your staff. Add an Internal Notification action below the assignment action.
Configure Your Notification:
- Notification Channel: Choose how staff should be notified — in-app notification, text message, email, or all three
- User Type: Select Assigned User to ensure only the person who received the assignment gets notified
- Message: Customize the notification message with details about the new prospective family
Important: Make sure the Internal Notification action comes after the Assign to User action in your automation. If the notification comes first, the system won't know who to notify yet.
Step 5: Publish Your Automation
Once you've configured everything, toggle Publish to ON at the top right of the screen, then click Save.
Your automation is now active and will start assigning new prospective families to your team immediately.

What Happens Next
Every time a new prospective family enters your system:
- They're automatically assigned to the next available team member
- That team member receives an immediate notification
- Your team can follow up quickly, improving your enrollment conversion rates
Need help setting this up? Contact our support team — we're here to help you maximize your enrollment success.