
Overview
SmartLists let you create customized views of your custom object data and share them with your team. Whether you're tracking program applications, staff credentials, or facility maintenance requests, SmartLists help you organize and filter your data exactly how you need it.
Save your favorite views, share them with specific team members, and switch between different perspectives instantly.
What You Can Do with SmartLists
Create and Customize Views
- Build SmartLists: Create customized views for any custom object
- Search SmartLists: Quickly find saved lists using the search function
- Switch Views: Move seamlessly between different SmartLists
- Resize Columns: Adjust column widths and save your preferences
Share with Your Team
- Share Lists: Give access to your entire team or specific members
- Set Permissions: Choose who can view or edit each list
- Direct Links: Share lists via links so everyone sees the same view
Stay Organized
- Duplicate Lists: Copy existing SmartLists to create variations
- Rename, Export, Delete: Manage your lists as your needs change
- Admin Controls: Administrators can oversee all SmartLists in your account
How to Create a SmartList
Step 1: Navigate to Your Custom Object
Go to the custom object you want to work with (for example, if you've created a custom object for "Program Applications" or "Staff Certifications").
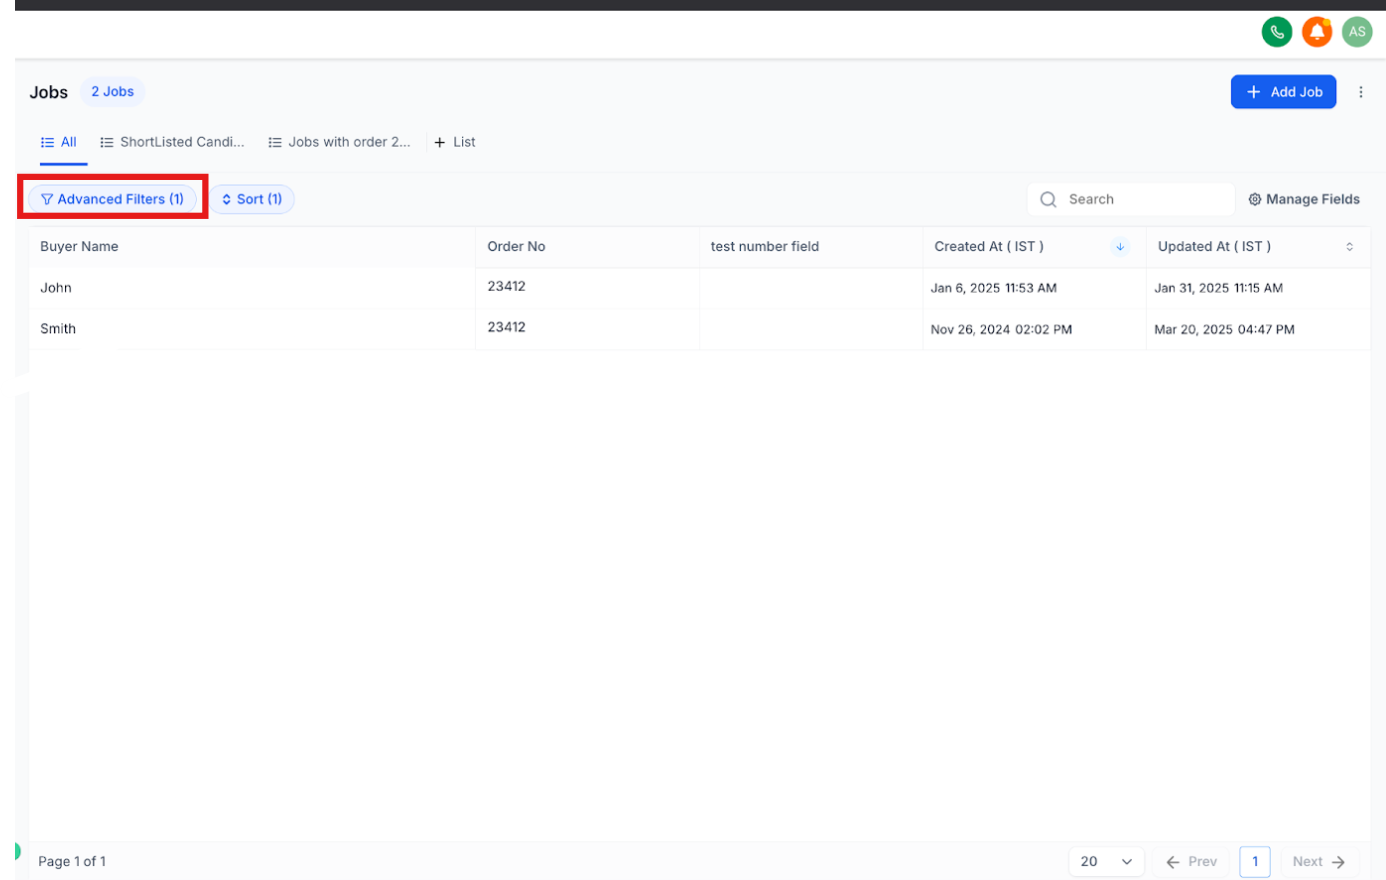
Step 2: Configure Your View
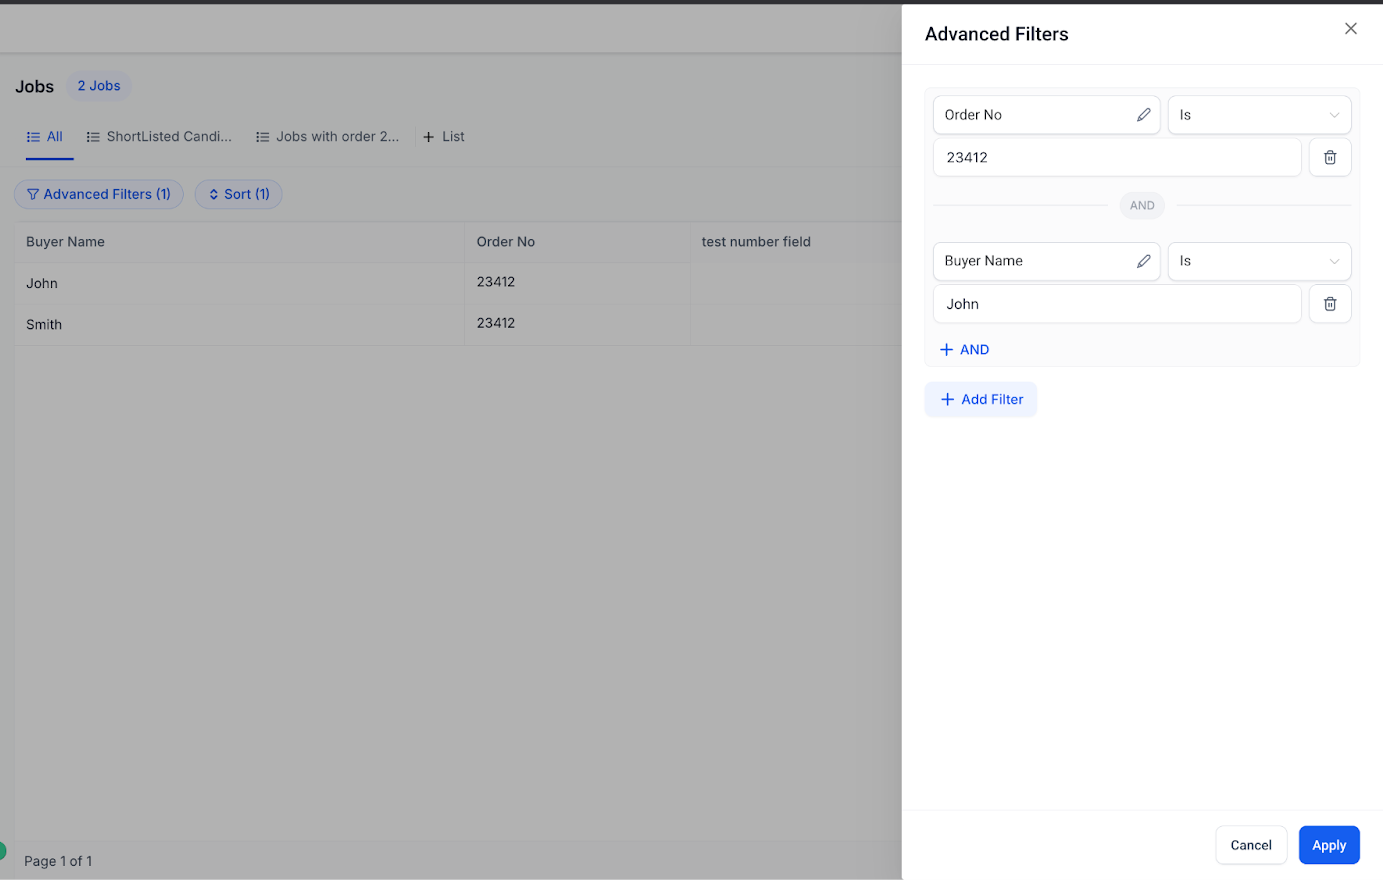
SmartLists combine filters, sorting, and column selection to give you exactly the data you need.
- Click Advanced Filters
- Choose your filter criteria (for example, "Status = Pending" or "Expiration Date is within 30 days")
- Select which columns you want to display
- Set your sort order
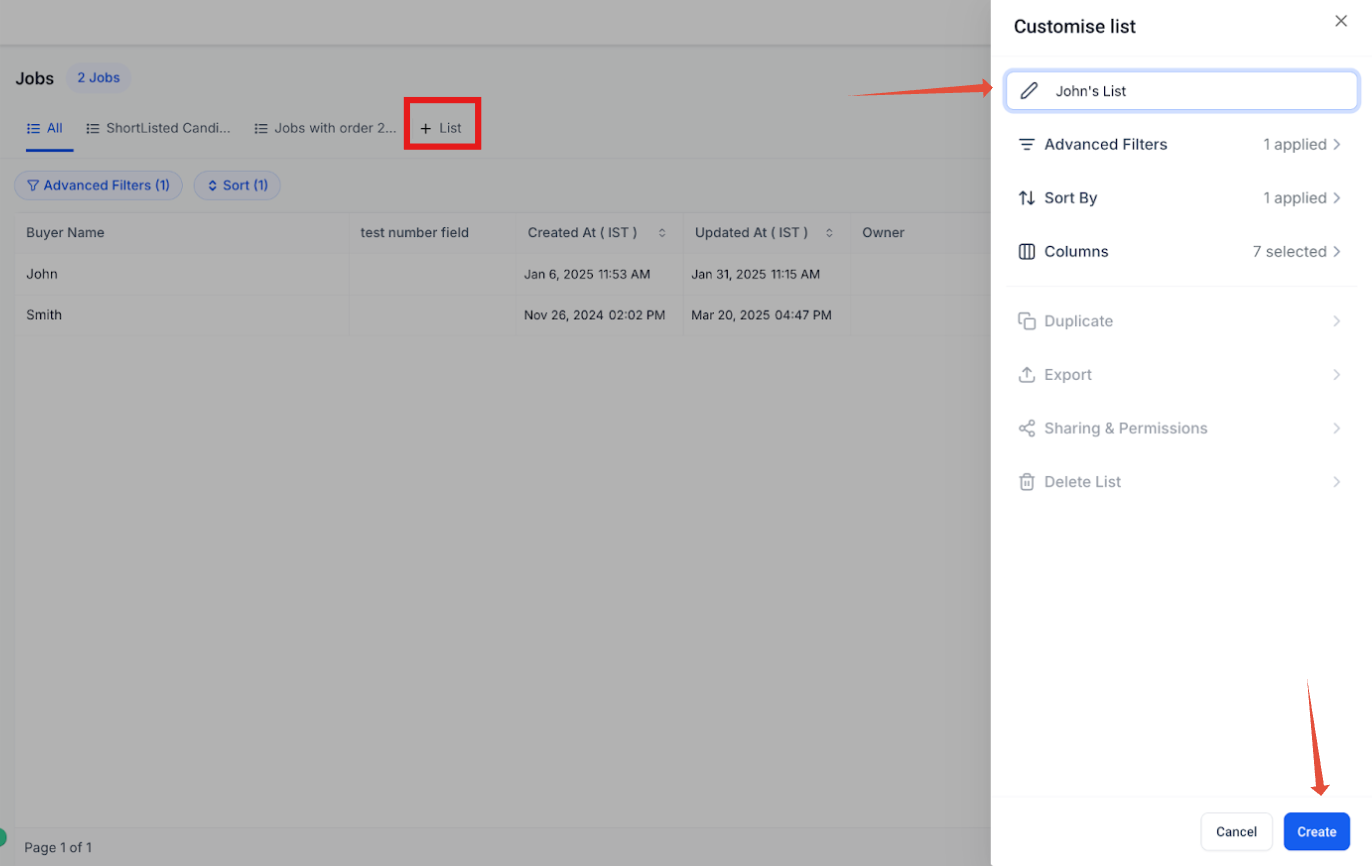
Step 3: Save as SmartList
- Click the + List icon
- Enter a descriptive name for your list
- Review your filters, columns, and sorting
- Click Create
Managing Your SmartLists
Edit a SmartList
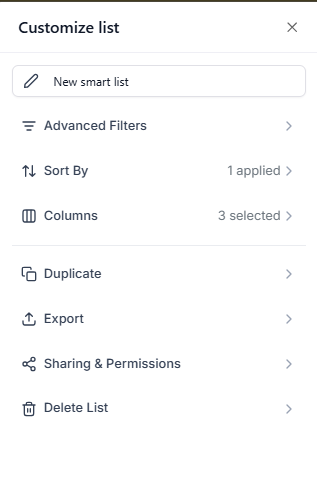
Click Customize List to adjust filters, sort order, or columns.
Duplicate a SmartList
- Select Duplicate
- Enter a new name
- Click Create
This is helpful when you want to create similar views with slight variations.
Export Data
Click Export to download your list data as a spreadsheet.
Delete a SmartList
Use the Delete option to remove lists you no longer need.
Sharing SmartLists with Your Team
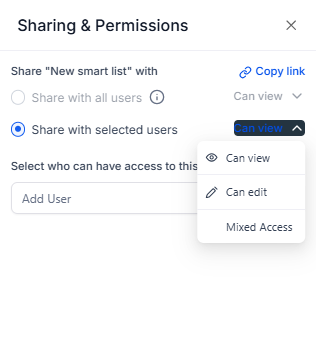
By default, administrators and standard users in your account can see SmartLists. You can customize access for specific lists:
- Click Share on the SmartList you want to share
- Select which team members should have access
- Choose their permission level:
- View: They can see the list but not modify it
- Edit: They can change filters, columns, and settings
- Share the direct link if needed
Quick SmartList Creation
Already have the perfect filters applied? Save them as a SmartList in two clicks:
- Apply your Advanced Filter
- You'll see "Unsaved Changes" appear at the top right
- Click Unsaved Changes
- Select Save as New SmartList
- Name your list and click Create
Search Across SmartLists
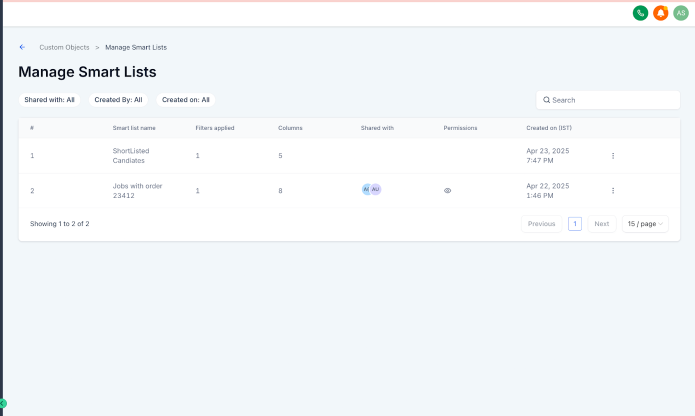
When you have many SmartLists, use search to find the right one quickly:
- Click the ••• menu
- Select Manage Smart Lists
- Use the search box to enter keywords from the list name
Best Practices
- Use clear names: "Expired Background Checks" is better than "List 3"
- Review permissions regularly: Make sure the right people have access as your team changes
- Create templates: Duplicate successful SmartLists as starting points for new views
- Share strategically: Don't overwhelm your team — share lists that help them do their specific jobs
Common Use Cases for Childcare
- Program Applications: Create lists for "Pending Review," "Approved - Awaiting Start," "Waitlisted"
- Staff Certifications: Track "Expiring in 30 Days," "Expired," "Up to Date"
- Facility Maintenance: Organize by "Urgent," "Scheduled," "Completed This Month"
- Family Records: Filter by program type, enrollment status, or payment plan