
Enrollio offers two calendar widget styles—Classic and Neo—that control how your booking calendar looks when parents and families schedule tours or appointments. The right style ensures a smooth scheduling experience that matches your center's needs.
What Are Calendar Widget Styles?
Calendar widget styles determine the appearance and functionality of your booking calendar when you share it with prospective families. You can choose between the Classic widget (simple and straightforward) or the Neo widget (modern with advanced customization).
Classic Widget
The Classic widget is designed for straightforward appointment booking with a clean, simple layout. It's perfect if you need a basic calendar without extra customization.
Best for:
- Quick setup with minimal configuration
- Single staff member or unassigned calendars
- Centers that prefer a traditional booking layout
Neo Widget
The Neo widget is the modern option, built for flexibility and customization. It's automatically used for Group Calendars and includes features that give you more control over the booking experience.
Features include:
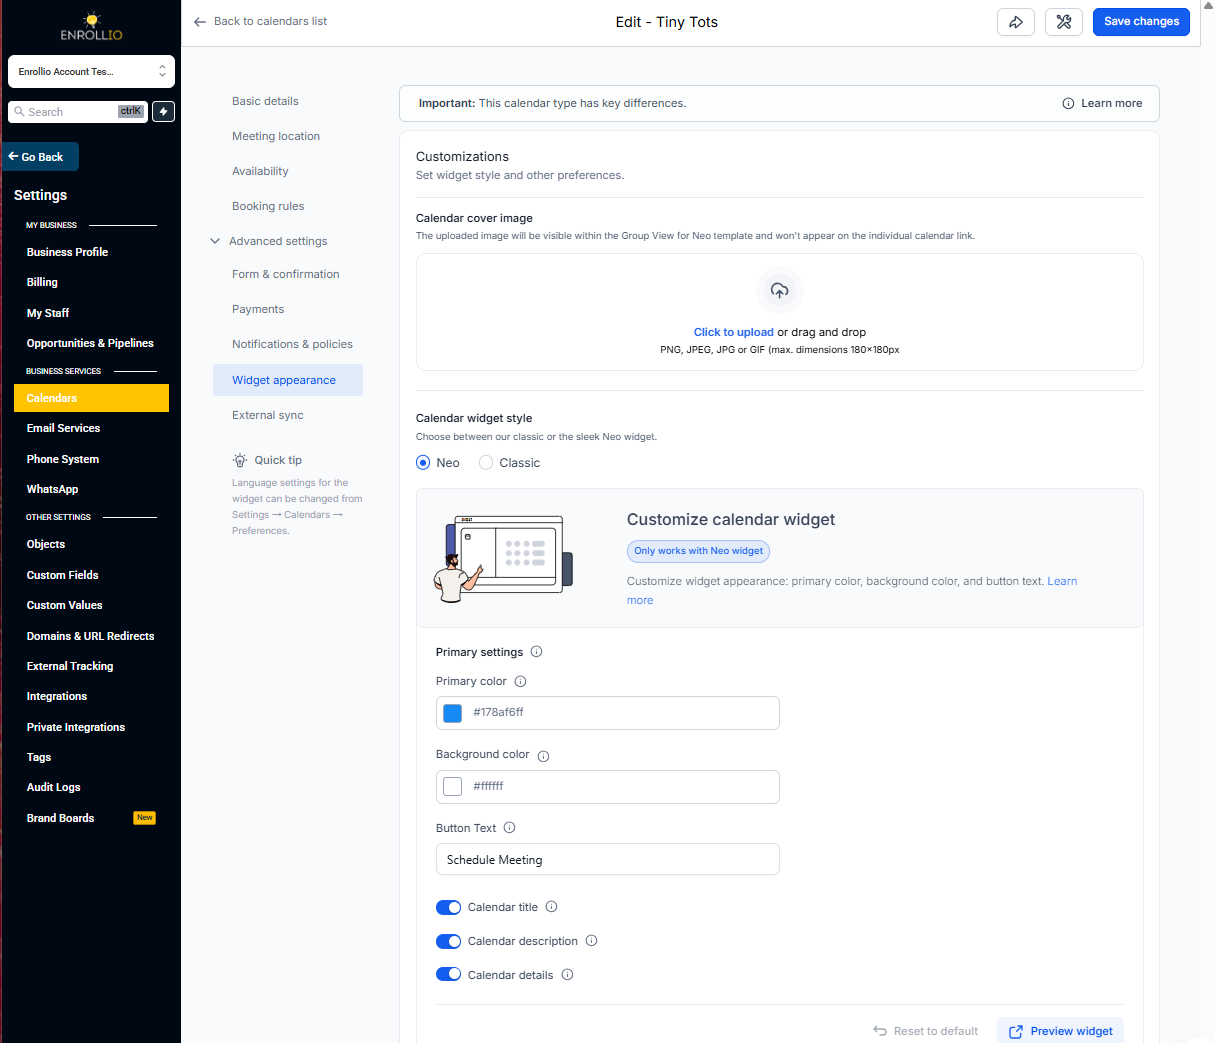
- Customizable colors, backgrounds, and buttons to match your brand
- Reorder booking steps (Form, Date & Time, Payment) to fit your workflow
- Staff selection for Round Robin calendars
- Seat display for class bookings (like toddler music classes or parent workshops)
- Sleek, modern interface that feels current
Key Differences at a Glance
| Feature | Classic | Neo |
|---|---|---|
| Color customization | Limited | Full control |
| Reorder booking steps | No | Yes |
| Staff selection (Round Robin) | No | Yes |
| Seat display (Class Booking) | No | Yes |
| Payment collection | Yes | Yes |
How to Set Up Your Calendar Widget Style
You can choose your widget style when creating a new calendar or change it anytime on an existing calendar. Your existing bookings won't be affected.
Step 1: Open Settings
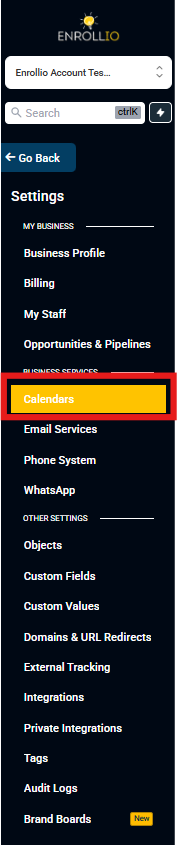
Click Settings in the left sidebar to access your account configuration.

Step 2: Go to Calendars
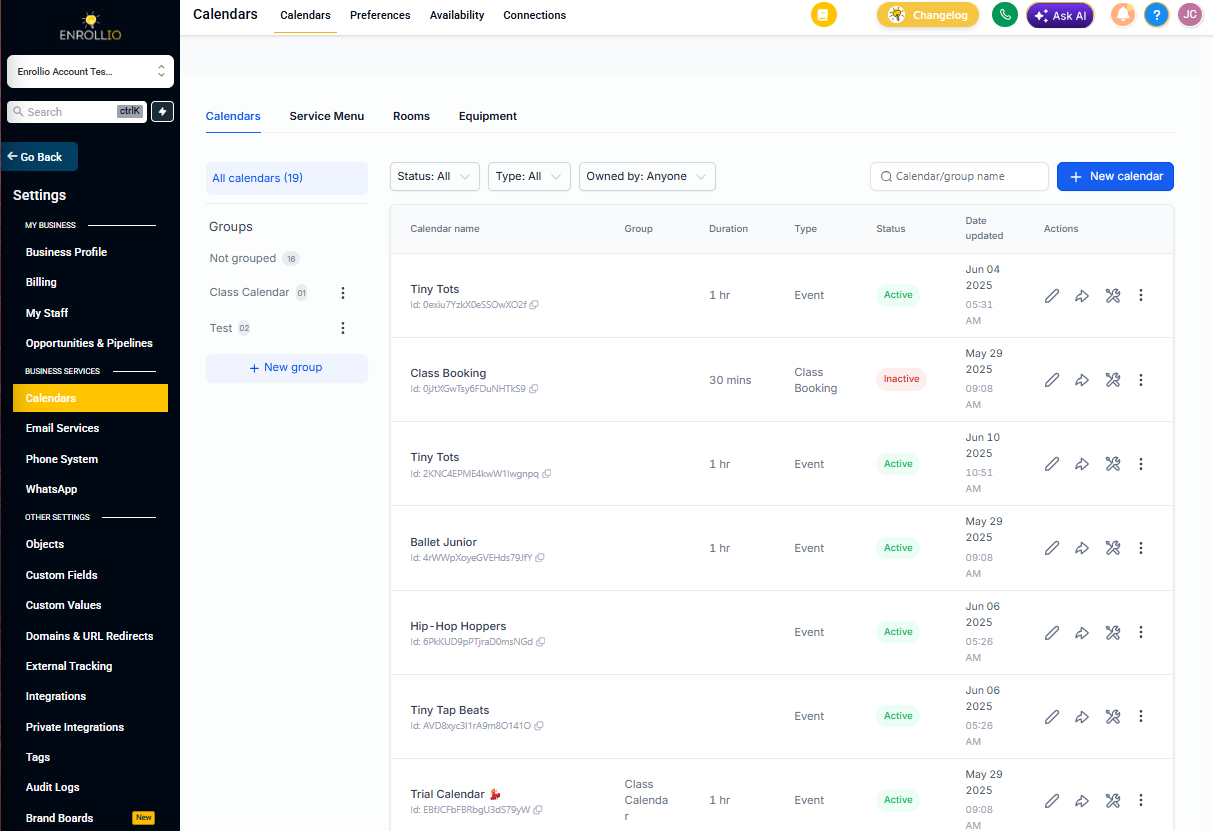
Under the Business Services section, click Calendars. You'll see all your existing calendars listed here.
Step 3: Create or Edit a Calendar
Click New Calendar to create a fresh one, or click the edit icon next to an existing calendar to update its settings.
Step 4: Select Your Widget Style
Go to the Customizations tab. Under Calendar Widget Style, choose either Classic or Neo. Remember that Neo is automatically set for Group Calendars.
Step 5: Save Your Changes
Click Save to apply your widget style. Your booking page will immediately reflect the new design.
Frequently Asked Questions
Can I switch from Classic to Neo after creating a calendar?
Yes. Edit your calendar anytime and change the widget style in the Customizations tab. Your existing bookings won't be affected.
Which widget should I use for tour bookings?
Either works for basic tour scheduling. If you want to customize colors to match your center's branding or let families choose a specific tour guide, use Neo.
Why is Neo the default for Group Calendars?
Neo supports advanced features like staff selection and modern layouts that work better when multiple team members share a calendar.
Which widget do I need for class bookings with seat limits?
Use Neo. It's the only widget that displays available seats per time slot—perfect for parent workshops or toddler classes with capacity limits.
Can I customize colors in both widget styles?
No. Full color customization (backgrounds, buttons, text) is only available in the Neo widget. Classic offers limited color options.
Does payment collection work in both styles?
Yes. You can collect tour deposits or registration fees in both Classic and Neo widgets.