
Overview
You can collect payments directly when families book tours or appointments through your Enrollio calendar. This is perfect for enrollment deposits, tour fees, or any payment you require upfront to secure a slot.
Supported Payment Providers
Enrollio supports six payment gateways for calendar payments:
- Stripe
- PayPal
- Square
- Authorize.net
- NMI
- Razorpay
Step 1: Connect Your Payment Gateway
Before you can collect payments through calendars, you need to connect at least one payment provider to your account.
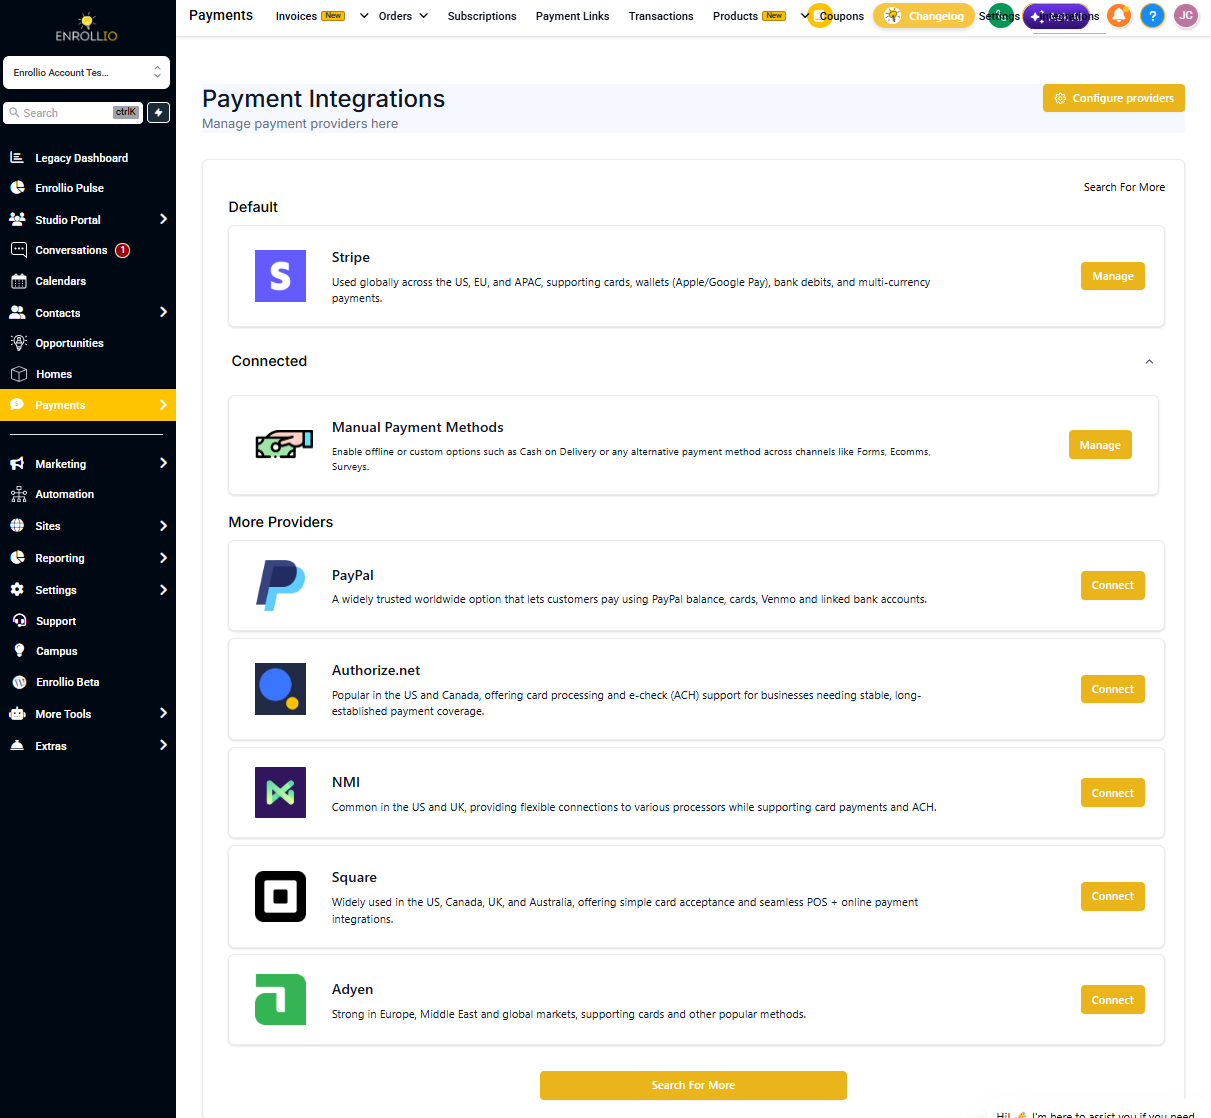
- Go to Payments → Integrations
- Click Connect next to your preferred payment gateway
- Follow the prompts to authorize the connection
Connecting Square
Square requires a special connection process:
- Open a new tab and log in to your Square account at app.squareup.com/login
- Keep that tab open and stay logged in
- Return to Enrollio and go to Payments → Integrations
- Click Connect for Square Live Mode
- Enrollio will automatically detect your logged-in Square account and complete the connection
Step 2: Enable Payments on Your Calendar
Once your payment gateway is connected, you can turn on payments for any calendar.
- Go to Calendars in your navigation menu
- Click the three dots next to an existing calendar and select Edit, or create a new calendar
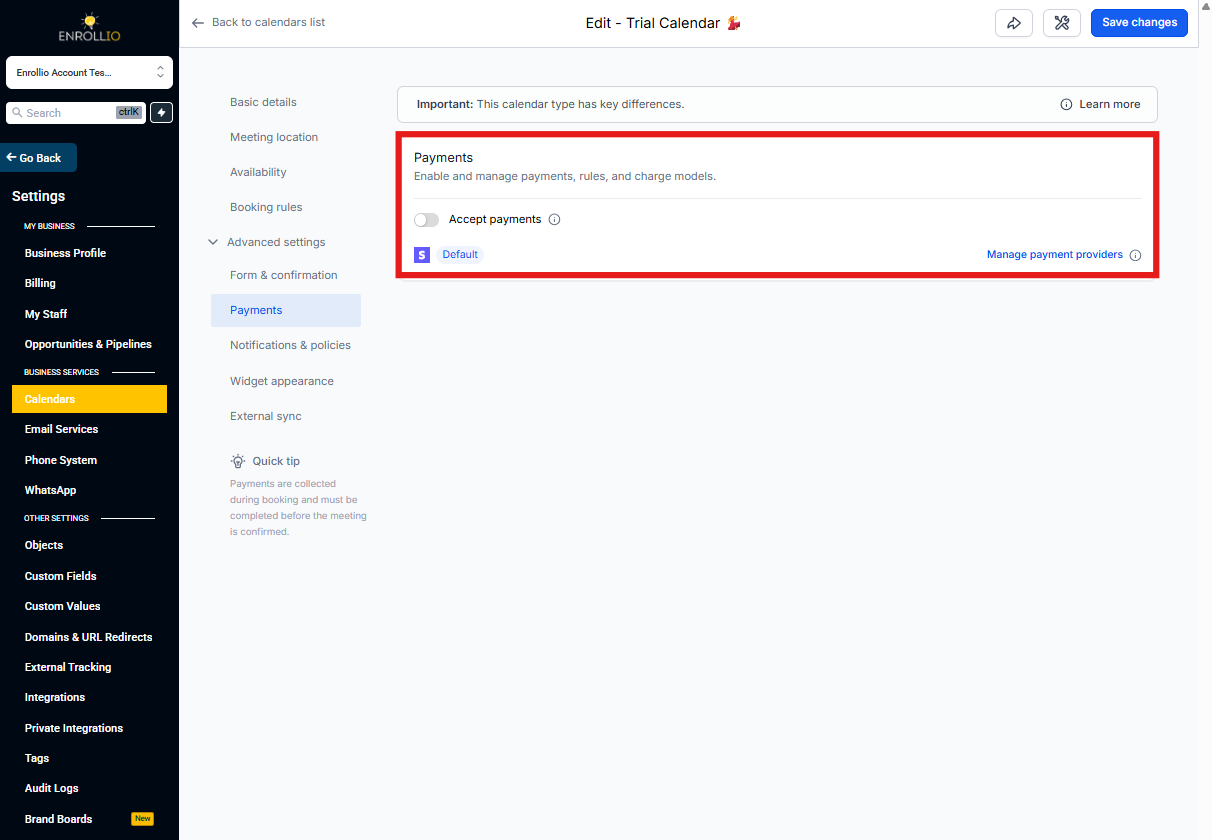
- Scroll to the Forms & Payments section
- Toggle on Accept Payments
Configure Payment Settings
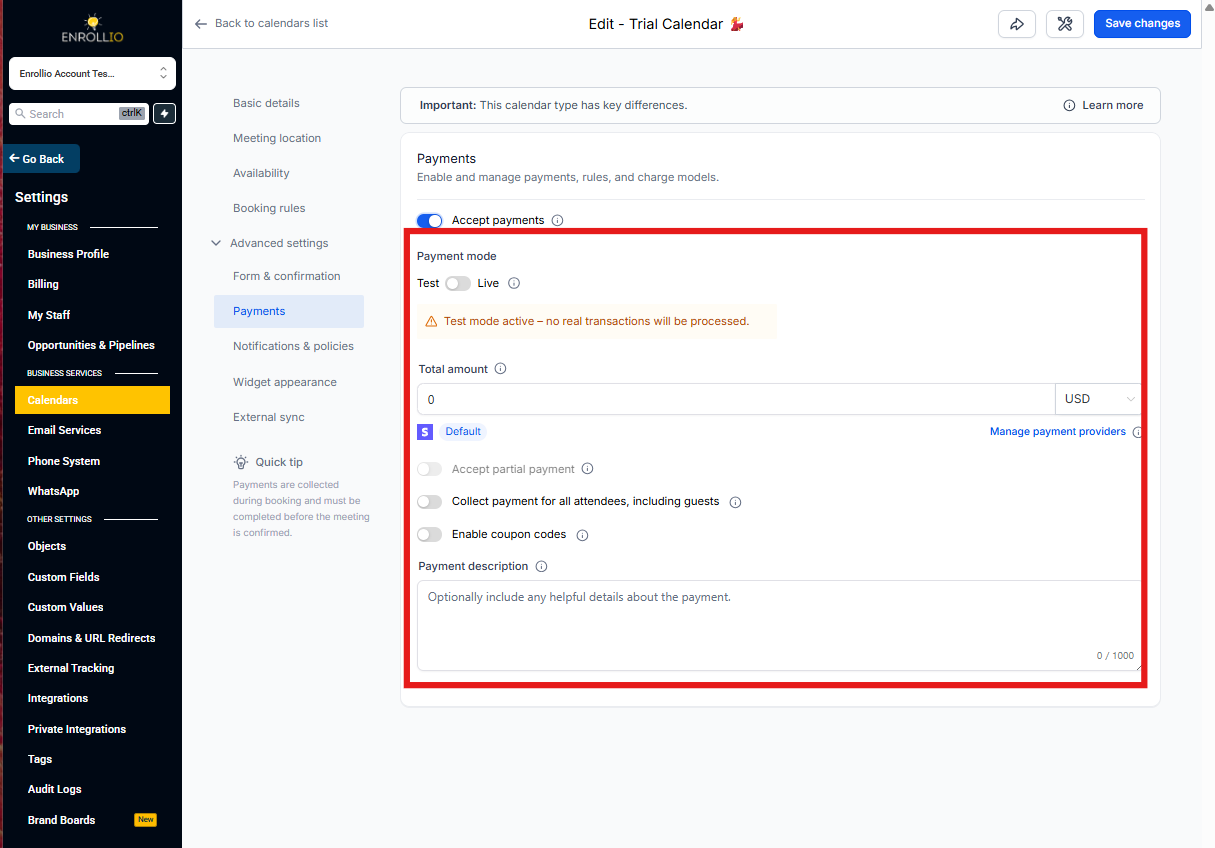
After enabling payments, you'll see these options:
- Amount: Enter the payment amount and select your currency
- Description: Add a description that families will see (e.g., "Tour deposit" or "Enrollment fee")
- Payment Mode: Toggle between Test Mode and Live Mode
Important Limitations
- Partial payments are not supported for recurring calendars
- If you don't see payment options in your calendar settings, it means you haven't connected a payment gateway yet — go back to Step 1
What Families See
When a parent books an appointment on a payment-enabled calendar, they'll be prompted to enter their payment information before confirming the booking. The appointment is only confirmed after successful payment.
Common Use Cases:
- Require a tour deposit to reduce no-shows
- Collect enrollment fees when families book their enrollment appointment
- Charge for special event registrations or open house RSVPs
Related Articles
- Setting Up Tour Calendars
- Calendar Notifications and Reminders
- Using Coupon Codes in Calendars