
Make your booking page easy to browse by organizing your services into clearly labeled categories. This article shows you how to create, edit, share, delete, and reorder service categories so parents can quickly find what they need.
What are Categories?
Categories help you group related services together on your booking page. Parents see organized sections with each service listed under its category.
For example, a childcare center might have categories like "Tours," "Enrollment Appointments," "Parent-Teacher Conferences," and "Special Events" — with specific appointment types listed under each.
Why Use Categories?
Better Organization: Group services into named sections that appear on your booking page.
Faster Booking: Help parents quickly find the appointment type they need.
Direct Sharing: Share a link that shows only one category's services (perfect for tour-only booking links).
Display Control: Arrange categories in the order that makes most sense for your families.
Built-in Safety Net: A Default Category ensures services always remain bookable, even if you delete or reorganize categories.
Understanding the Default Category
Every Enrollio account includes a Default Category that:
- Cannot be deleted (though you can rename it)
- Automatically receives any new service you create without assigning a category
- Holds services from any category you delete, keeping them bookable
This ensures every service always belongs somewhere on your booking page.
Creating a New Category
Set up a category to group related services and create a shareable booking link.
- Navigate to Calendar → Calendar Settings → Services
- In the left sidebar, click + New Category
- Enter a Category Name
- Define the Category URL — this creates a direct share link for just this category
- Click the blue Create Category button
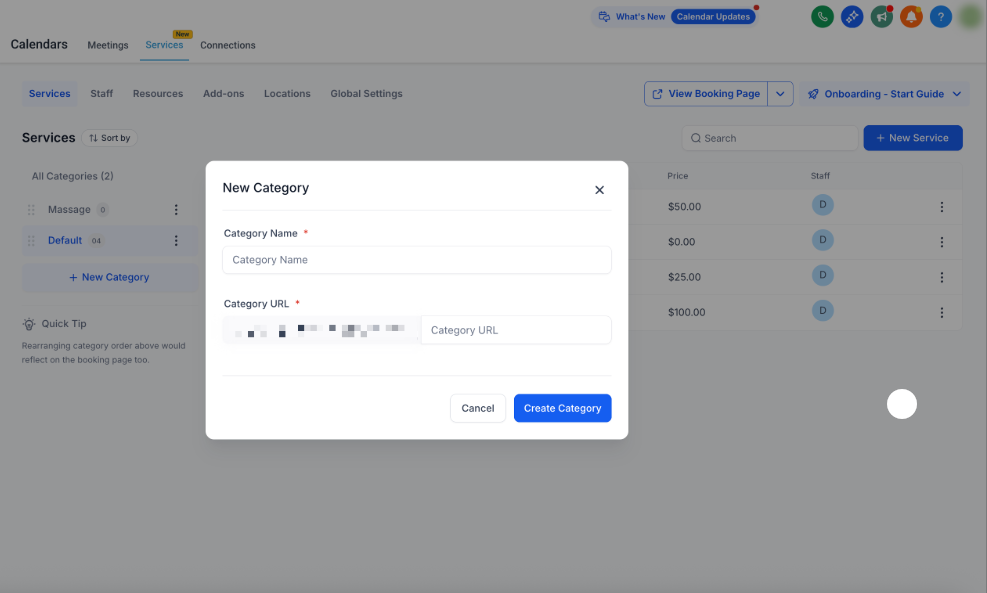
If you already have services created, you can assign them to this new category after saving.
Assigning Services to Categories
Place each service under the right category so it appears in the correct section on your public booking page.
- Click the three-dot menu next to a service
- Select Edit
- Use the Category dropdown to select where this service belongs
- Click the blue Save Changes button in the top right
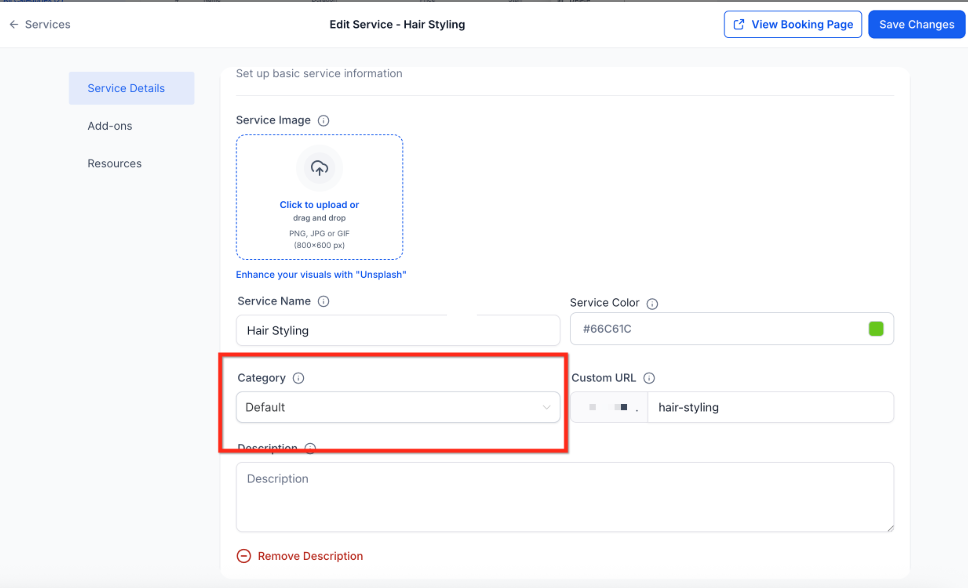
Unassigned services automatically appear in the Default Category. Services from deleted categories also move there automatically — you can reassign them whenever needed.
Editing a Category
Update your category name or shareable URL as your offerings change.
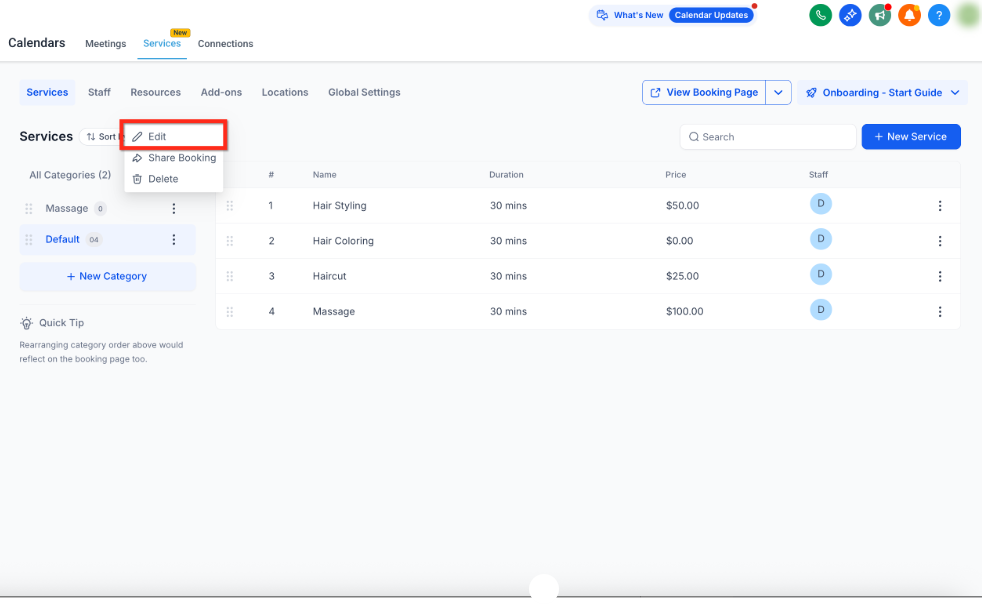
- Click the three-dot menu next to the category
- Select Edit
- Update the Category Name or Category URL
- Save your changes
Sharing a Category Link
Each category has its own booking link. This is perfect when you want to promote specific services — like sharing a "Tours Only" link on your website or in enrollment emails.
- Click the three-dot menu next to the category
- Select Share Booking
- Copy and share the link
Parents who click this link will only see services within that category.
Deleting a Category
Remove categories you no longer need while keeping all services accessible to parents.
You can delete any category except the Default Category. When you delete a category:
- All services in that category automatically move to the Default Category
- Services remain bookable — nothing is lost
- You can reassign those services to other categories if needed
To delete a category:
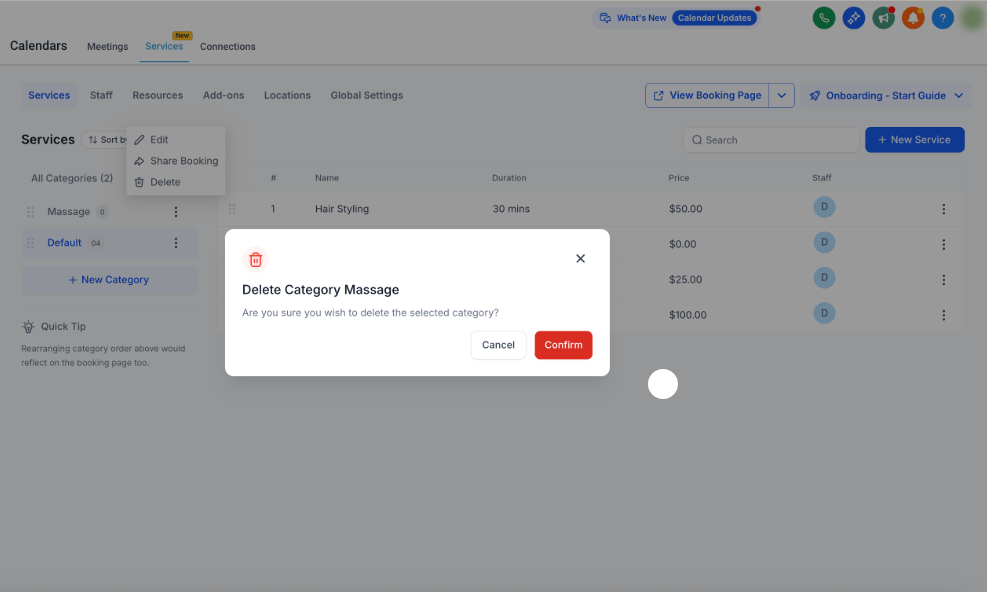
- Click the three-dot menu next to the category
- Select Delete
- Confirm by clicking the red Delete button
Reordering Categories
Control the order parents see categories on your booking page.
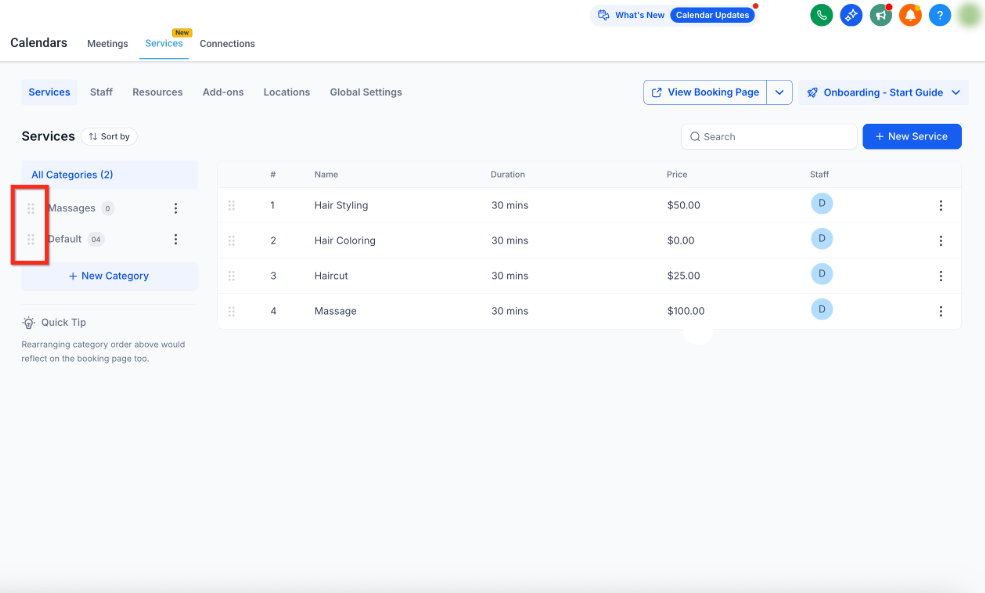
Simply drag and drop categories in the left sidebar. Your new order appears immediately on the booking page parents see.
Best Practices
- Use clear names: "Center Tours" is better than "Type A Appointments"
- Think about parent priorities: Put your most-booked categories at the top
- Rename the Default Category: Make it specific to your center instead of leaving it as "Default"
- Create category-specific links: Use them in email campaigns, social media, and on different pages of your website
- Keep it simple: Too many categories can be overwhelming — group logically
Frequently Asked Questions
Q: Can I change a category's URL later?
Yes. Click the three-dot menu next to the category, select Edit, and update the Category URL.
Q: Will private services appear when I share a category link?
No. Private services stay hidden from public booking pages. If you need to share a private service, copy and share its direct link instead.
Q: What happens to services when I delete their category?
They automatically move to your Default Category and remain bookable. You can reassign them to other categories anytime.
Q: Can I have a service in multiple categories?
No. Each service belongs to only one category at a time. If you need the same service in multiple places, create separate service entries.