
Track where your enrollment inquiries come from by filtering your dashboard widgets with attribution and UTM parameters. This lets you see which marketing efforts are bringing families to your center — whether it's Google ads, Facebook campaigns, or referral links.
You can filter data by first or last touchpoint, group results by traffic source or medium, and create custom reports that show exactly which channels are driving tours and enrollments.
What You Can Do With Attribution Filters
- Filter by touchpoint: See which marketing channel first brought a family to you, or which one they last interacted with before enrolling
- Group by source: Create donut or line charts showing enrollment inquiries by traffic source (Google, Facebook, referral, etc.)
- Export detailed reports: Add UTM parameters as columns in table widgets and CSV exports
- Track campaign performance: See which specific ads or campaigns are generating the most interest
Available Attribution Fields
You can filter and group by these properties:
- UTM Campaign
- UTM Campaign ID
- UTM Content
- UTM Keyword
- UTM Match Type
- UTM Medium
- UTM Ad ID
- UTM Ad Group ID
- UTM Source
- Session Source
- Medium
Add Attribution Filters to Any Widget
Use attribution filters to show only families who came from specific marketing channels.
Step 1: Enter Edit Mode
Click the edit icon at the top of your dashboard.
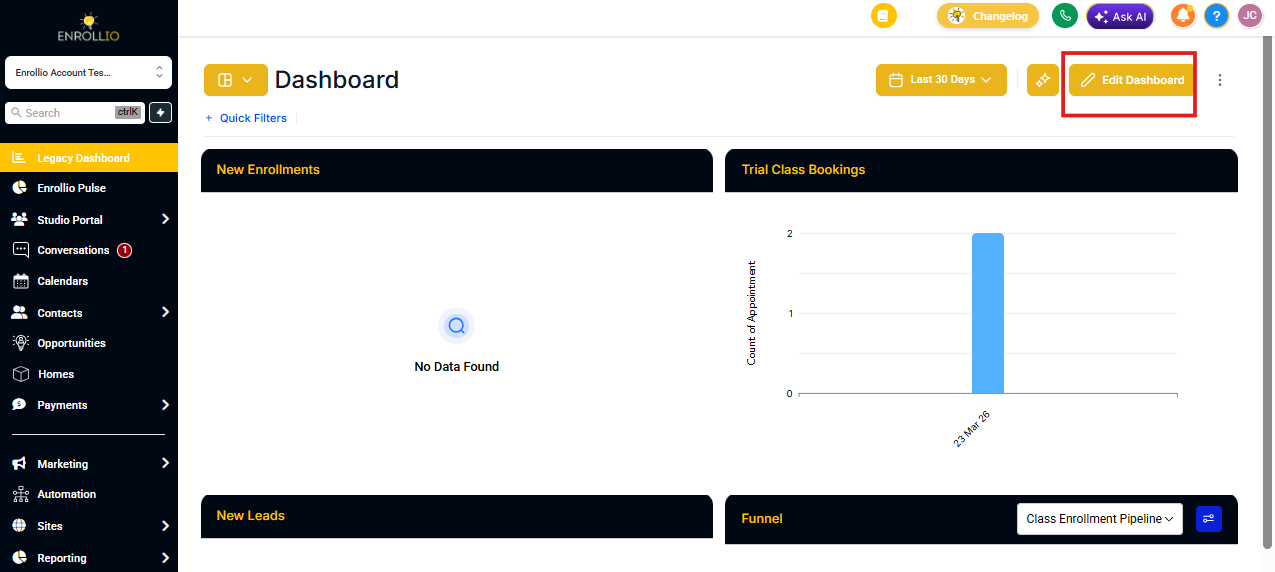
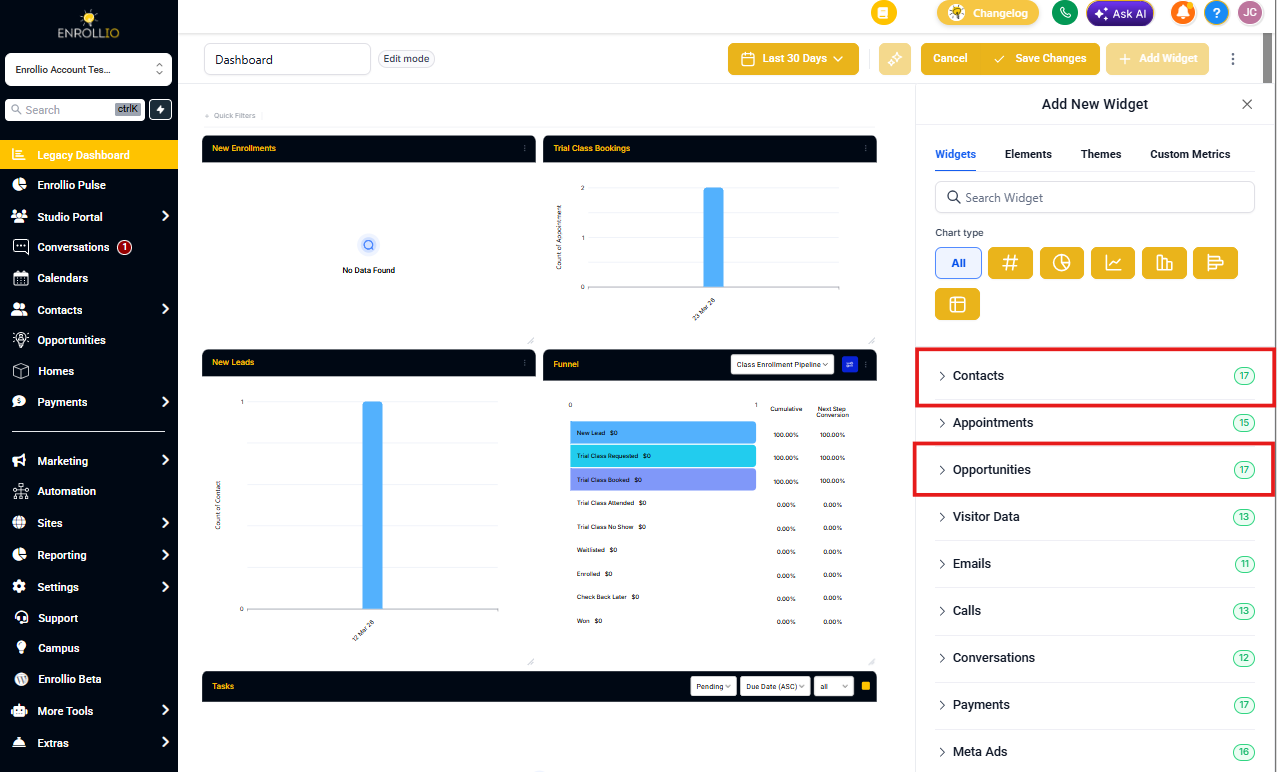
Step 2: Add a Widget
Click Add Widget and choose any widget from the Parent/Family or Enrollment Opportunity categories.
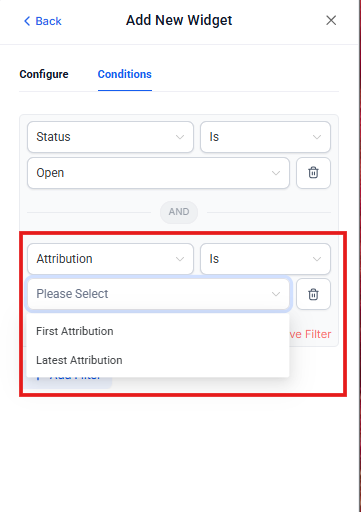
Step 3: Add an Attribution Condition
- Switch to the Conditions tab
- Click Add Condition
- Select Attribution from the dropdown
- Choose whether to filter by First or Latest attribution
First attribution shows the original source that brought the family to you. Latest attribution shows the most recent touchpoint before they took action.
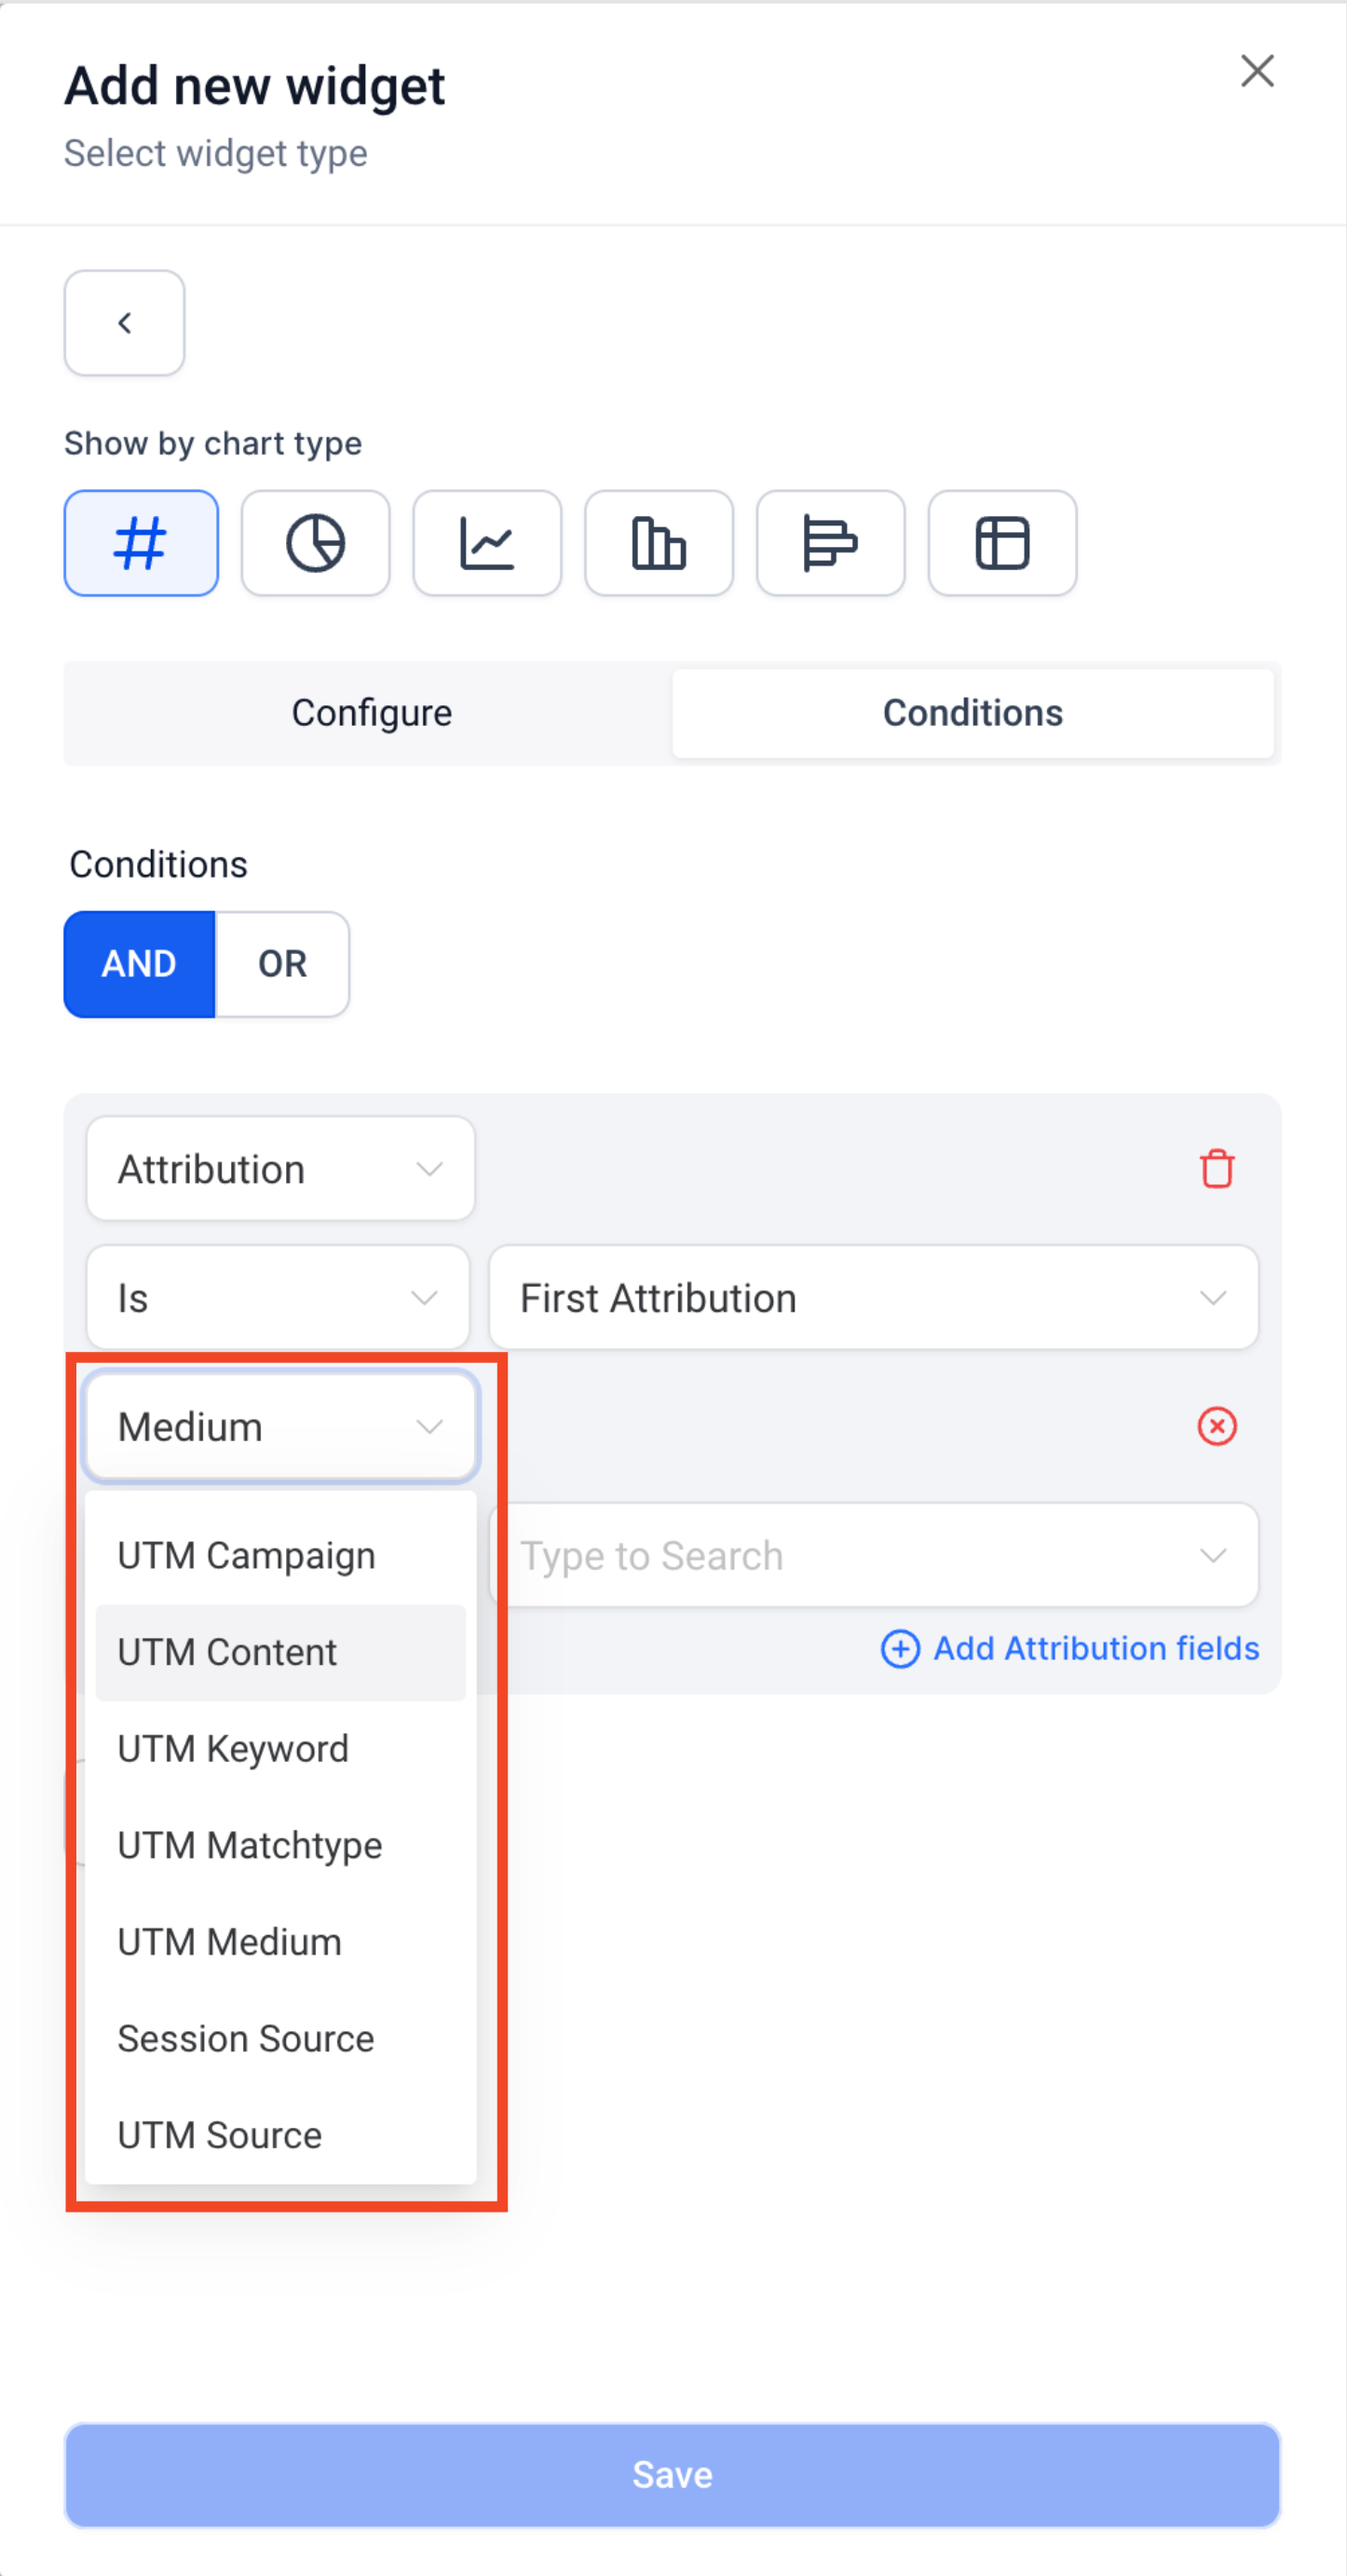
Step 4: Select Attribution Fields
- Click Add Attribution Fields
- Choose the property you want to filter by (like UTM Source or UTM Campaign)
- Add more fields if needed by clicking Add Attribution Fields again
Step 5: Save Your Widget
Click Save to apply your filters. Your widget now shows only families matching your attribution criteria.
Create Charts Grouped by Traffic Source
Visualize where your inquiries are coming from with donut or line charts grouped by marketing channel.
Step 1: Enter Edit Mode
Click the edit icon at the top of your dashboard.
Step 2: Add a Widget
Click Add Widget and choose any Parent/Family or Enrollment Opportunity widget.
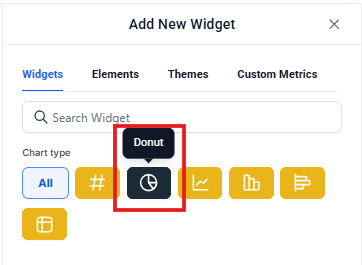
Step 3: Choose Your Chart Type
Select Donut or Line Graph from the chart selector.
Step 4: Add Attribution Conditions
- Go to the Conditions tab
- Click Add Condition
- Select Attribution
- Choose First or Latest attribution
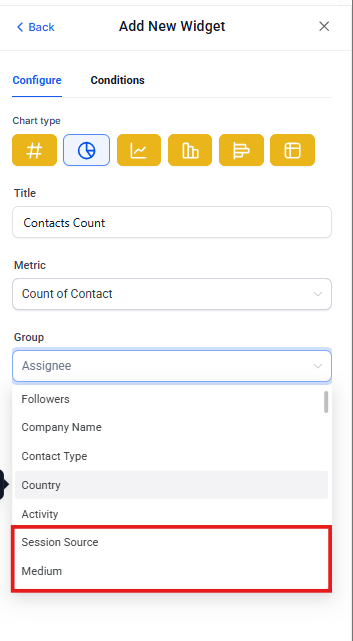
Step 5: Group by Source or Medium
- Switch to the Configuration tab
- In the Group By/View By dropdown, select Session Source or Medium
- Save your widget
Your chart now shows enrollment data broken down by where families found you — like Google organic search, Facebook ads, or direct visits.
Add Attribution Data to Table Widgets
Include UTM parameters as columns in your table widgets for detailed, exportable reports.
Step 1: Enter Edit Mode
Click the edit icon at the top of your dashboard.
Step 2: Add a Widget
Click Add Widget and choose a Parent/Family or Enrollment Opportunity widget.
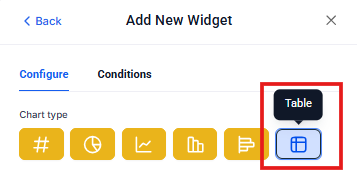
Step 3: Choose Table Chart
Select Table Chart from the chart selector.
Step 4: Add Attribution Conditions First
Before you can see UTM columns, you need to add an attribution condition:
- Go to the Conditions tab
- Click Add Condition
- Select Attribution
- Choose First or Latest
Step 5: Select Your Columns
- Go to the Configuration tab
- Click Select Columns
- Choose which attribution fields to display (UTM Source, UTM Campaign, Medium, etc.)
- Save your widget
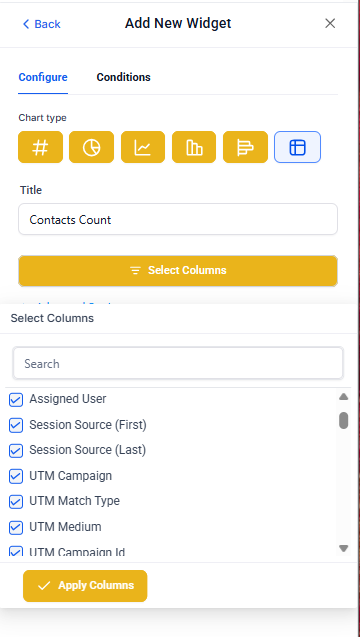
Your table now shows UTM data for each family, making it easy to see exactly which campaigns are bringing in inquiries. You can export this data to CSV for further analysis.
Important:
- UTM fields only appear in tables and detailed views after you add an attribution condition (First or Latest) to your widget
- Session Source and Medium grouping options only become available after adding an attribution condition