
If you serve families in countries with GDPR or similar privacy laws, you'll need explicit consent before collecting personal information. The Custom Checkbox field in Enrollio's Form Builder makes this easy — and keeps you compliant.
Step 1: Add a Custom Checkbox Field to Your Form
Open your form in the Form Builder and navigate to Custom Fields in the top right.
Click the Orange Box to add a new custom field, then select Checkbox from the menu.
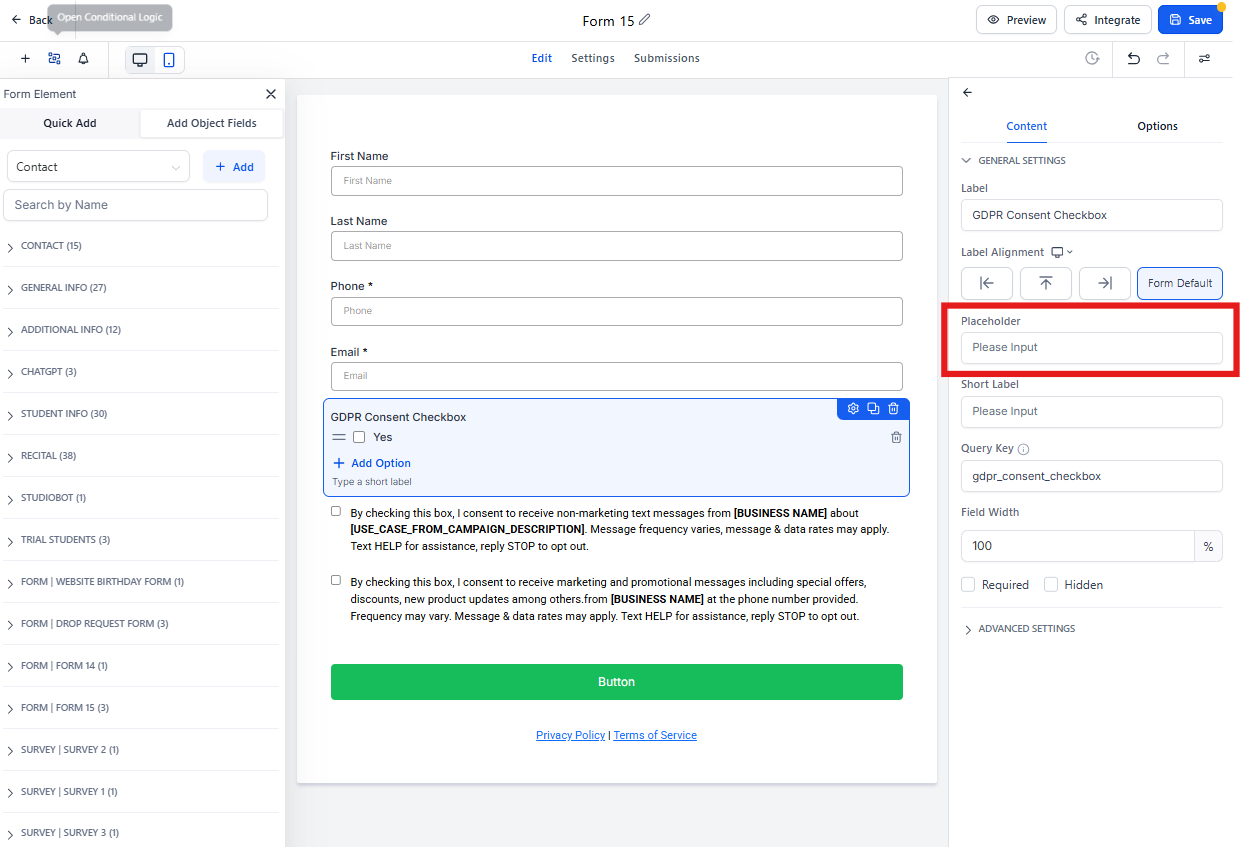
Give your field a clear name like "GDPR Consent Checkbox" — this is for your internal reference.
In the Placeholder field, enter your consent statement. This is what parents will see on the form.
Step 2: Make the Checkbox Required
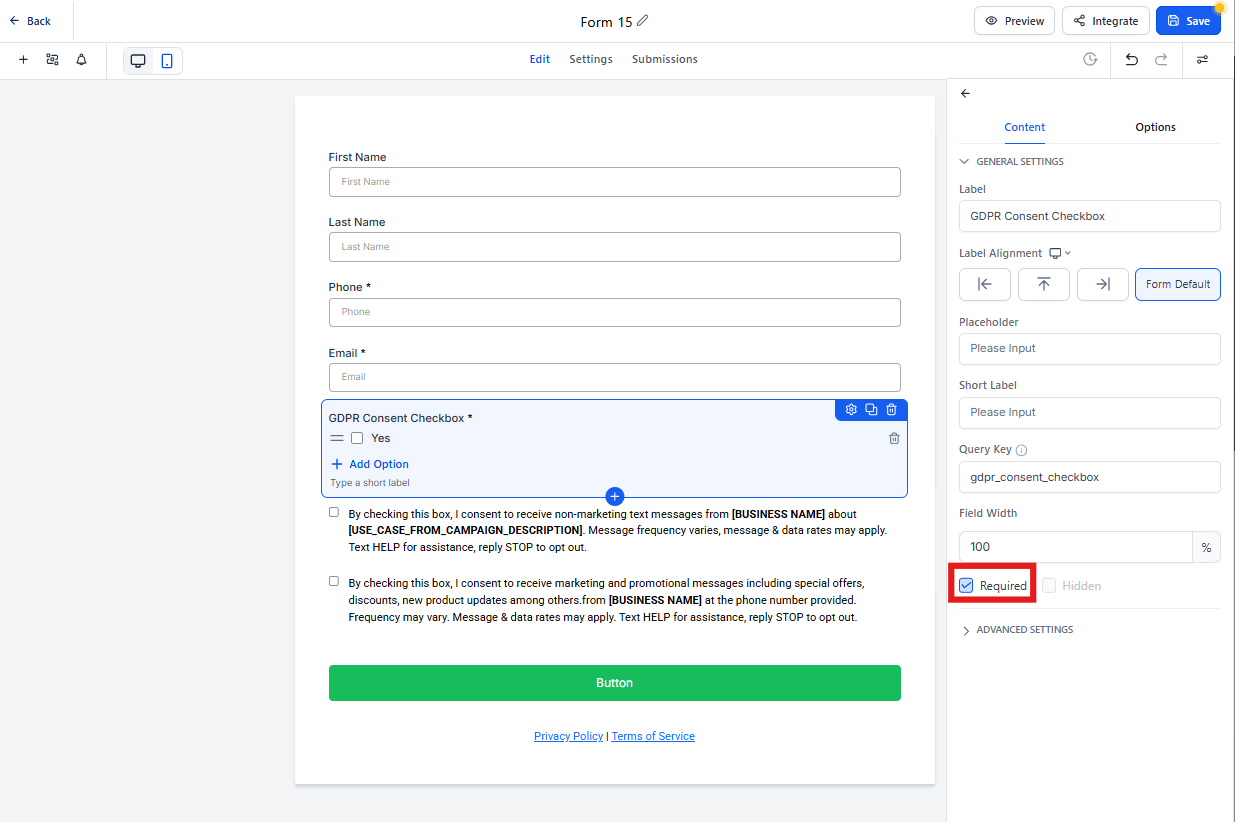
Click on your GDPR Checkbox field in the form preview.
On the right-hand side, check the Required box. This ensures parents must give consent before submitting the form.
Step 3: Create an Automation to Track Consent
Navigate to the Automations panel and click Create New Automation in the top right.
Select Start From Scratch, then give your automation a clear name like "GDPR Consent Tracking."
Step 4: Set Up the Trigger
Click Add New Trigger.
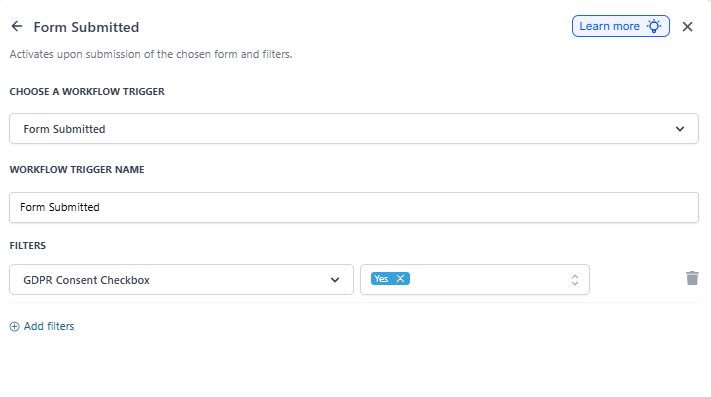
In the third column, select Form Submitted from the trigger options.
Choose your custom checkbox field and set the condition to Yes.
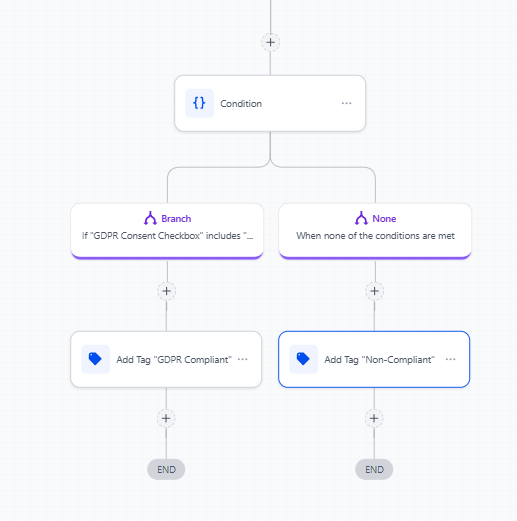
Step 5: Add a Conditional Action
Click the + sign below your trigger to add an action.
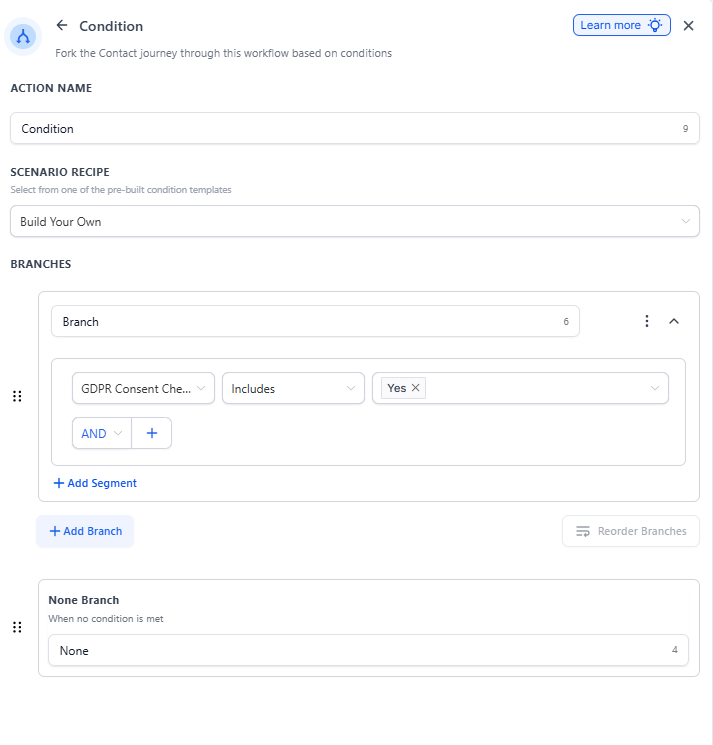
Scroll to Conditions and Automation and select If / Else.
In the condition builder, click Select and choose Parent/Family Details, then scroll to Custom Fields and select your GDPR checkbox.
Set the operator to includes and the value to Yes.
Click Save.
Step 6: Tag Families Based on Consent
Under the Yes path, click the + sign.
Select Add Parent/Family Tag from the CRM section.
Choose or create a tag called "GDPR Compliant" and click Save.
Under the No path, follow the same steps but use a tag like "Non-Compliant" instead.
Step 7: Create Smart Lists to View Compliant Families
Go to Parents/Families Smart Lists.
On the right side, click Filters, then type "tag" in the Add Filter box.
Select the "GDPR Compliant" tag from the dropdown.
Click the + button above to save this smart list.
Repeat the process to create a smart list for "Non-Compliant" families if needed.