
Editing a Design Kit
Keep your brand consistent everywhere you build in Enrollio. This article explains how to edit a Design Kit (within Brand Boards), including how to update colors, logos, and fonts so your branding always stays up to date.
What is a Design Kit
A Design Kit is the saved set of brand assets—colors, logos, and fonts—stored inside a Brand Board in Enrollio. When you create enrollment pages, landing pages, and emails, Enrollio pulls from your default Brand Board's Design Kit so you can work faster and stay on-brand without recreating styles every time.
Editing the Design Kit lets you refresh colors, swap logos, or adjust typography so future pages and emails use the latest brand assets. Note that existing content remains unchanged when you update your Design Kit.
When Do You Need to Edit Your Design Kit?
Brand Logo Changes: Your childcare center might evolve, leading to a redesign of your logo. Updating your Brand Board ensures that the new logo is consistently used across all platforms.
New Color or Font: Introducing a new color palette or font can be part of a rebranding effort or simply an update to refresh your look. Editing your Brand Board ensures these changes are accurately reflected in all your marketing materials.
Consistency in Brand Elements: Even minor changes in fonts or colors need to be updated in your Brand Board to maintain visual consistency and reinforce brand recognition with families.
How to Edit Your Design Kit
Step 1: Navigate to Brand Boards
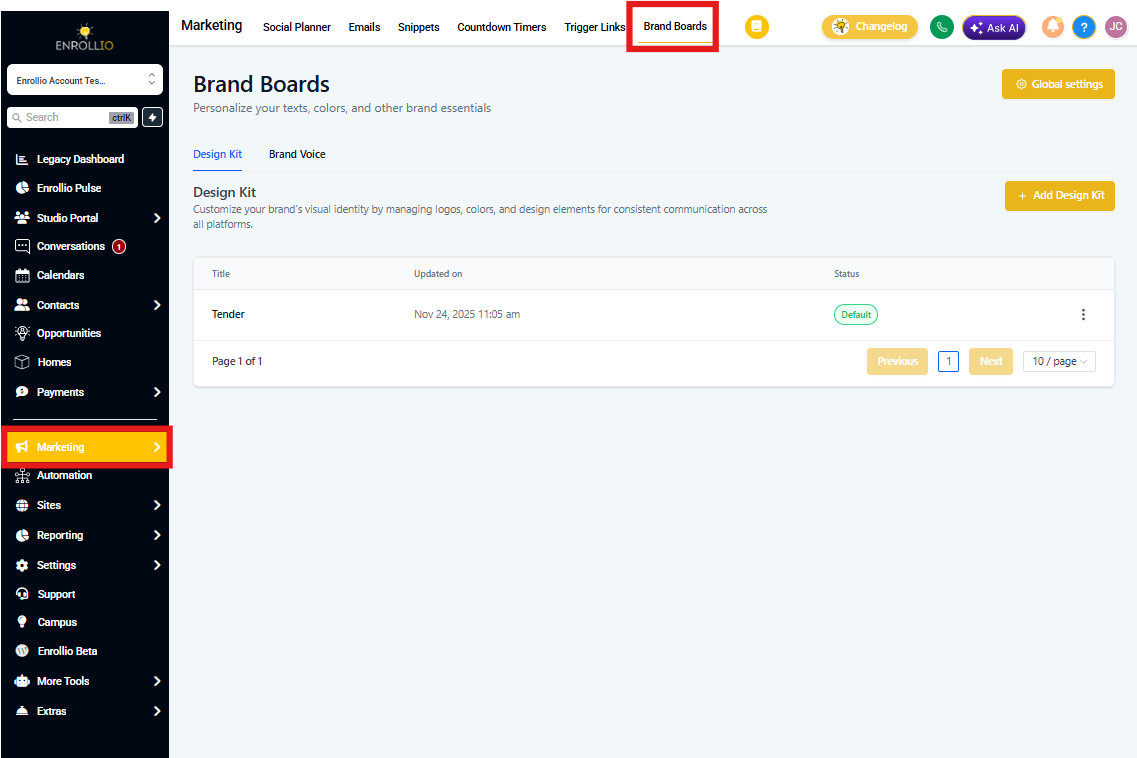
Go to Marketing → Brand Boards (or Settings → Brand Boards)
Step 2: Open the Brand Board
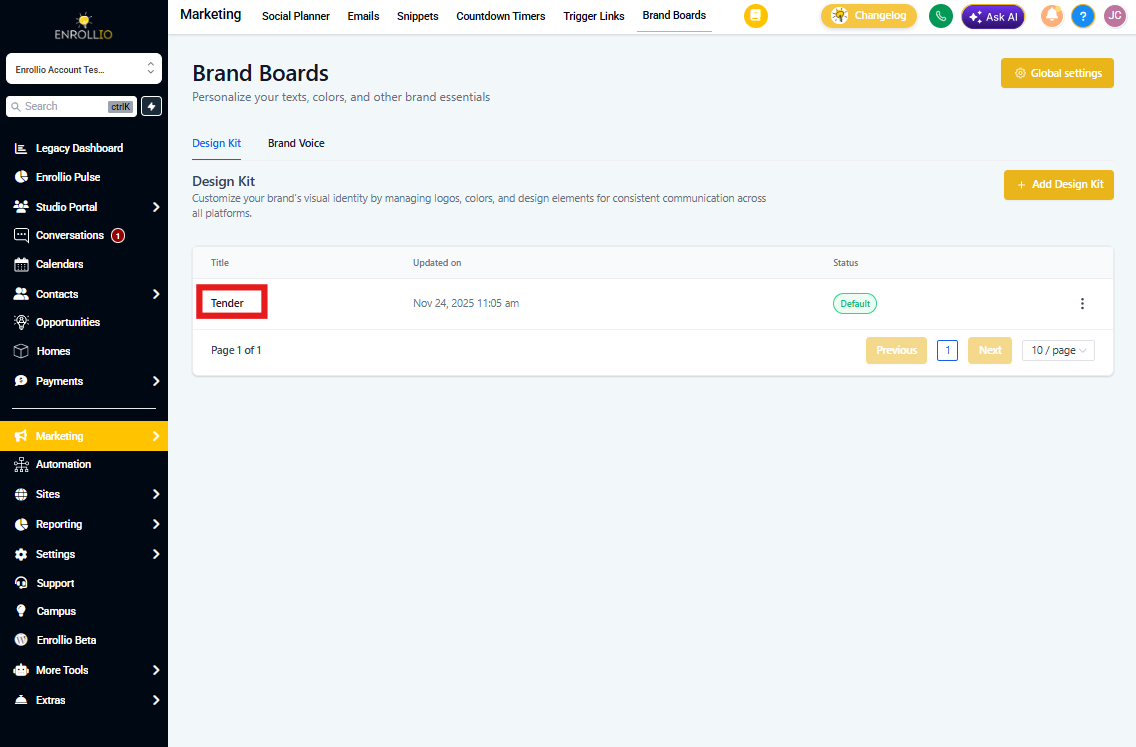
Click on the Brand Board that you would like to edit.
Step 3: Update Logos
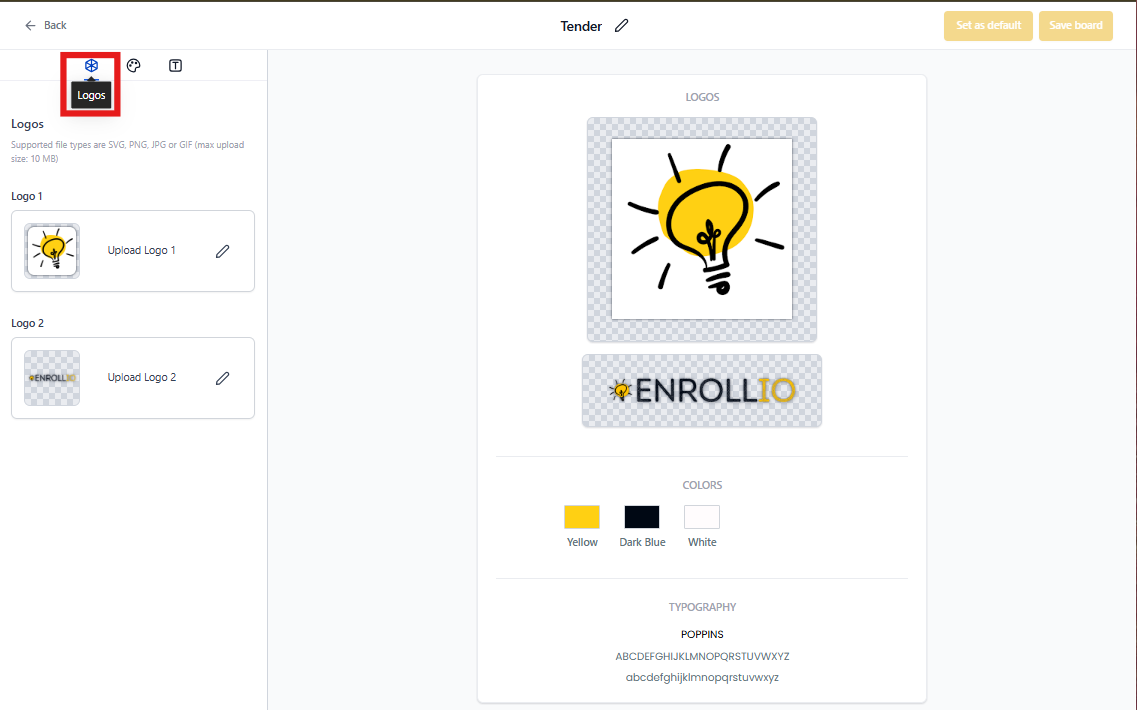
- Click the Logos tab at the top left of the editor
- Click the Edit (pencil) icon next to Logo 1 or Logo 2 to replace or upload a logo
Note: To delete previous logos from the media library, you'll need to do that separately from the media library itself.
Step 4: Update Colors
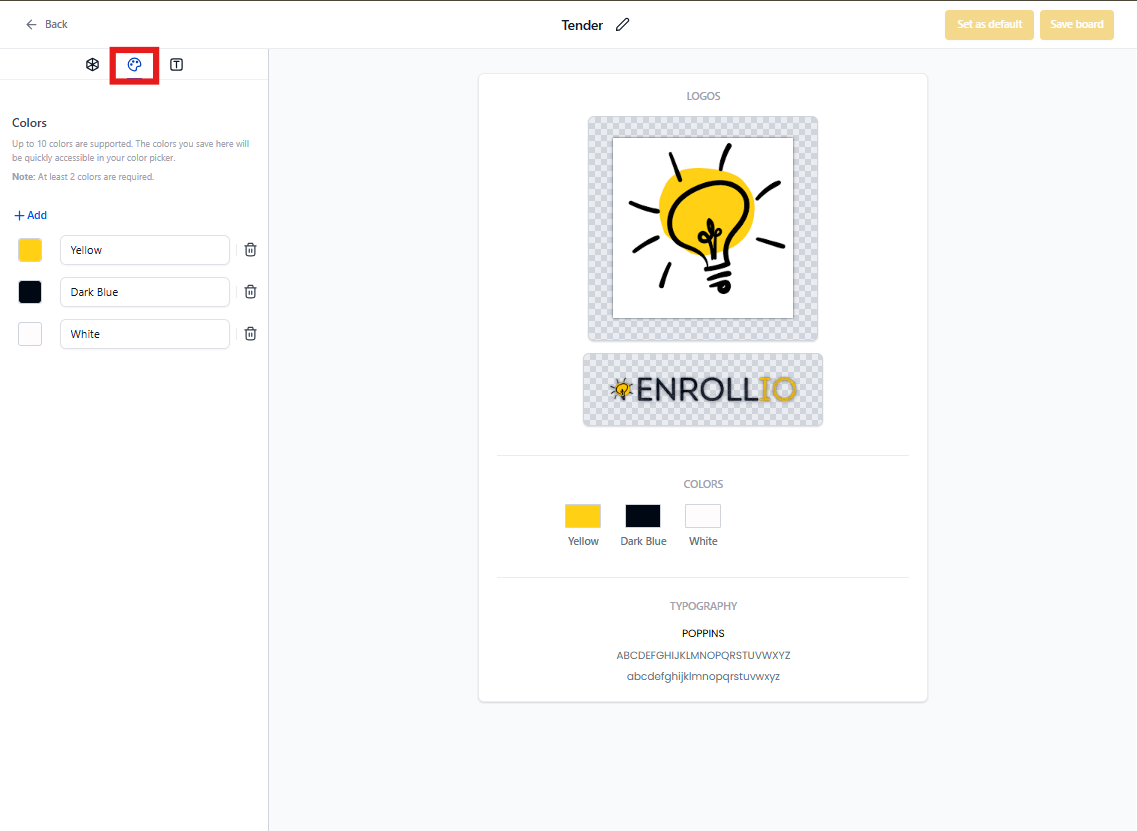
- Click the Colors tab at the top-left of the editor
- To add a new color, click + Add
- To change a color, click on the color square to the left of the color name, then select the new color
- Rename a color by clicking its name field
- Delete a color by clicking the trash icon
Step 5: Update Fonts
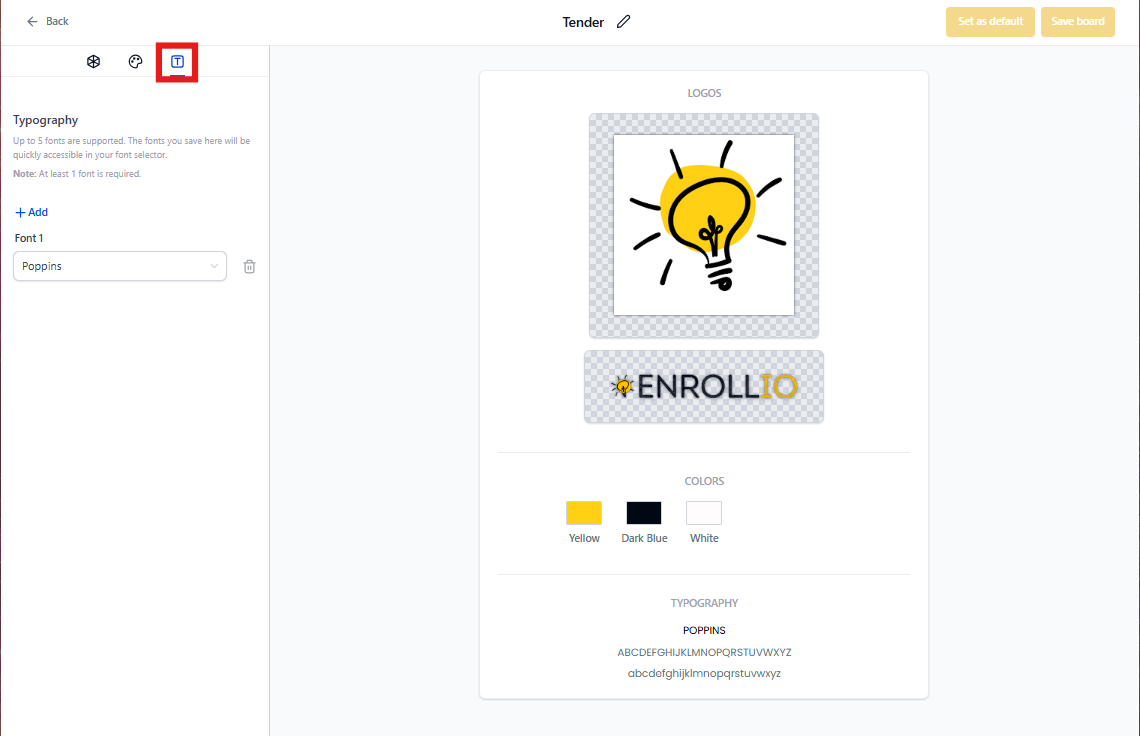
- Click the Typography tab at the top-left of the editor
- Click + Add to add fonts (up to 5). At least 1 font is required
- Use the drop down to change the chosen font
- Remove a font by clicking the trash icon
Step 6: Save Changes
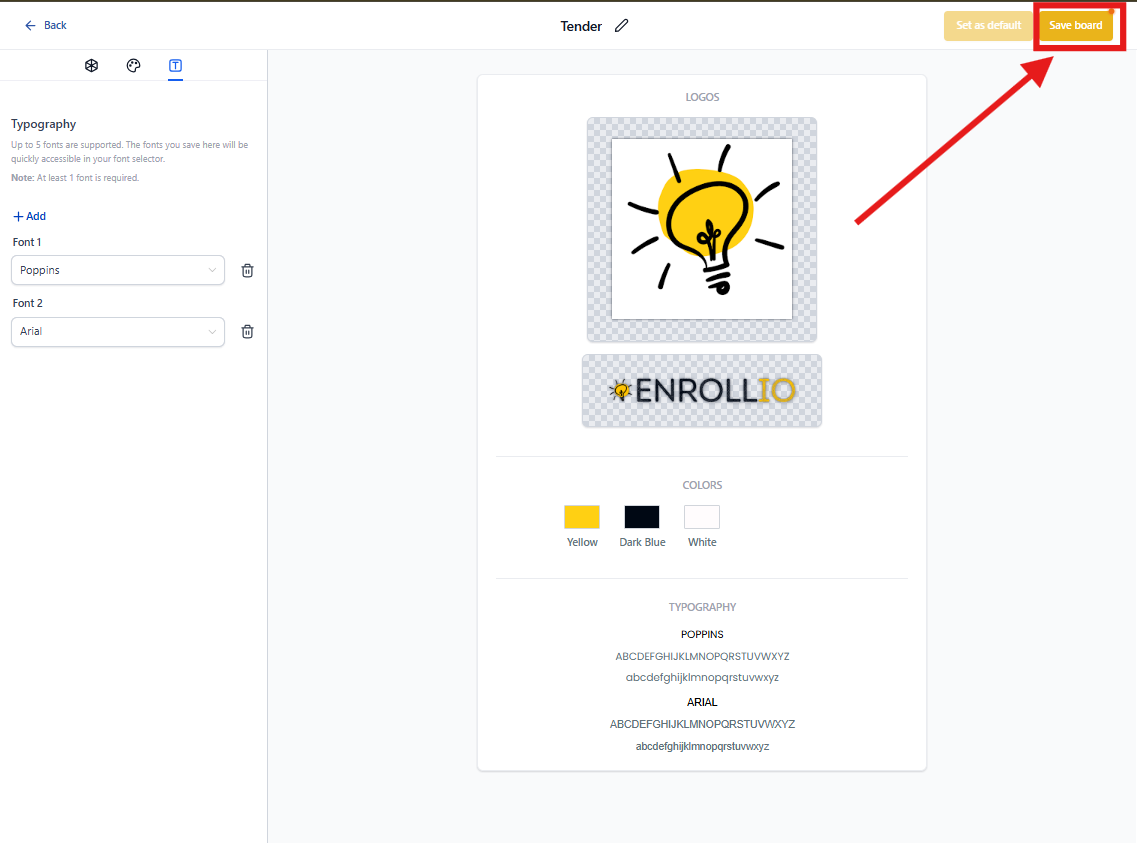
After making your adjustments, be sure to save the changes by clicking the blue Save Board button in the upper right corner.
Frequently Asked Questions
Q: Do Design Kit edits update existing pages or emails automatically?
No. Edits affect what you see in pickers for future edits. Existing assets don't change automatically.
Q: Why don't my colors appear in the page or email color picker?
Only the default Brand Board populates pickers. Set the correct board as default and check that your colors are saved. Click here to learn how to set a default Brand Board.
Q: Which color formats can I enter?
HEX and RGB are supported for brand colors. Click on the "HEX" or "RGBA" label in the bottom left corner of the color picker to switch between the two.
Q: Will updating my Brand Board change my Payment Links?
If your Payment Links use Brand Board theming, color updates can be reflected across links.
Q: How do I switch which board is shown in my builders?
Set the desired board as Default. The default board controls which Design Kit assets appear in pickers.
Related Articles
- How to use Brand Boards in Landing Pages and Enrollment Sites
- How to use Brand Boards in emails
- How to change default Brand Board
- How to Create a Brand Board