
How to Set Up Email Sender Preferences
Sender Preferences let you set default details like From Name, From Email, Reply-To, and Test Recipients for all your email campaigns and test sends. Setting these up once saves you time on every campaign and keeps your communications professional and consistent.
In this guide, you'll learn what Sender Preferences are, why they matter for your childcare center's communications, and how to configure them step by step.
What are Sender Preferences?
Sender Preferences allow you to define default settings for emails you create in Enrollio's Email Builder. Instead of typing the same sender information every time you create a newsletter, enrollment reminder, or parent update, you set it once and these defaults automatically populate in all new campaigns.
You can still override these defaults for individual campaigns when needed — for example, if a specific email needs to come from your director instead of your general center address. Updates to Sender Preferences only apply to new campaigns you create; existing drafts and scheduled emails keep their current settings unless you update them manually.
Why Sender Preferences Matter
Save Time — Stop retyping sender details for every parent newsletter or enrollment campaign. Your defaults auto-fill instantly.
Reduce Errors — Avoid typos or inconsistent sender information. Defaults ensure every campaign starts with accurate, center-approved details.
Build Trust — Present a consistent sender identity to families. When parents always see emails from the same recognizable name and address, it strengthens their trust in your communications.
Streamline Testing — Store your team's QA email addresses as Test Recipients, so proof emails always go to the right people without manual entry.
How to Configure Sender Preferences
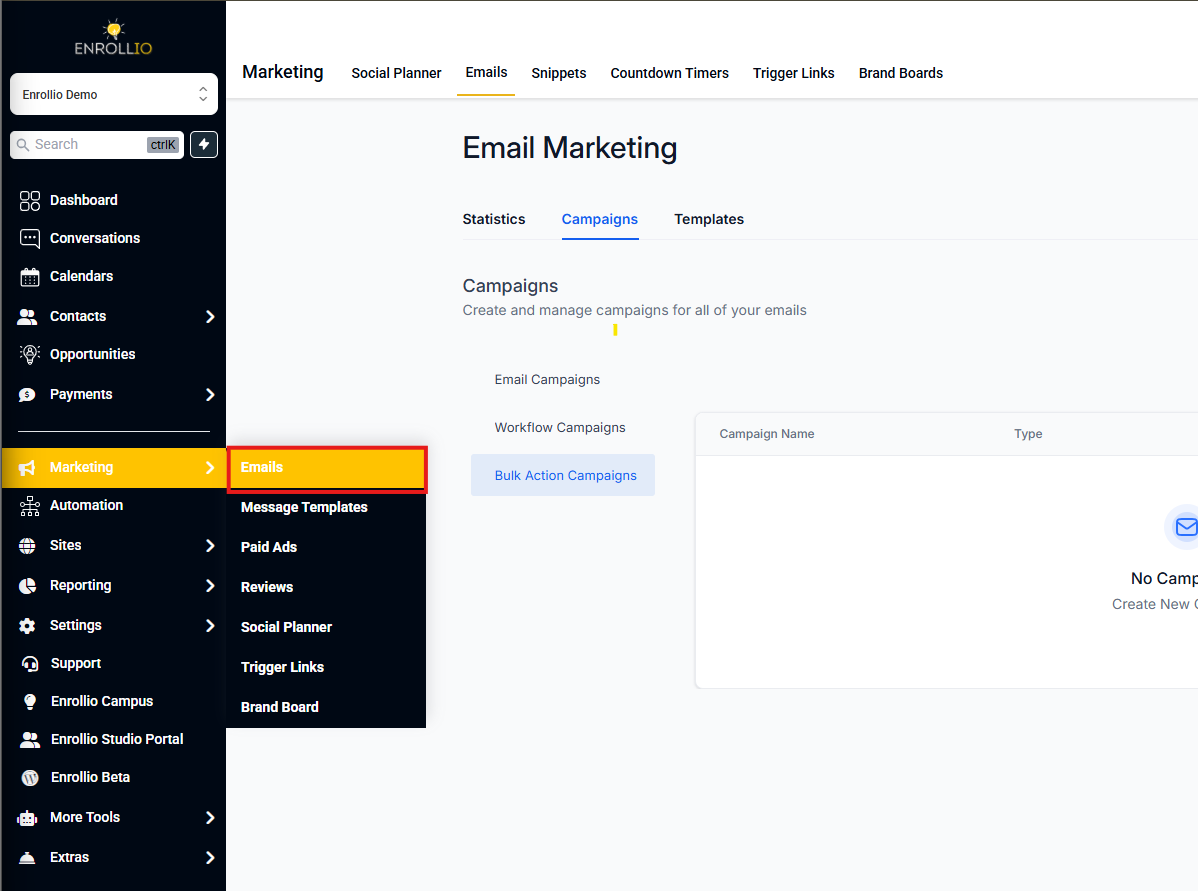
Step 1: Open Email Marketing
From your dashboard, click Marketing in the left-hand menu, then select Emails at the top. This takes you into the Email Builder where you create and manage all your parent communications.
Step 2: Navigate to Campaigns
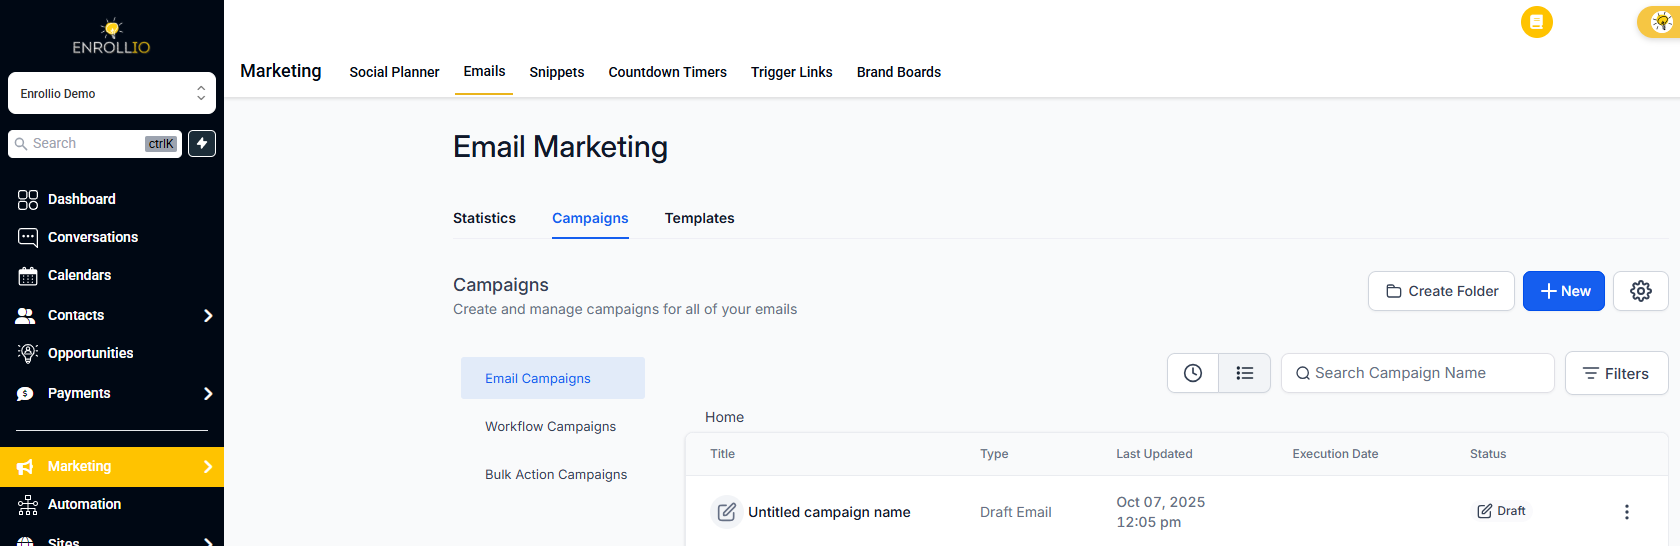
Inside Email Marketing, click the Campaigns tab at the top. This section lists all your active and draft campaigns.
Step 3: Access Settings
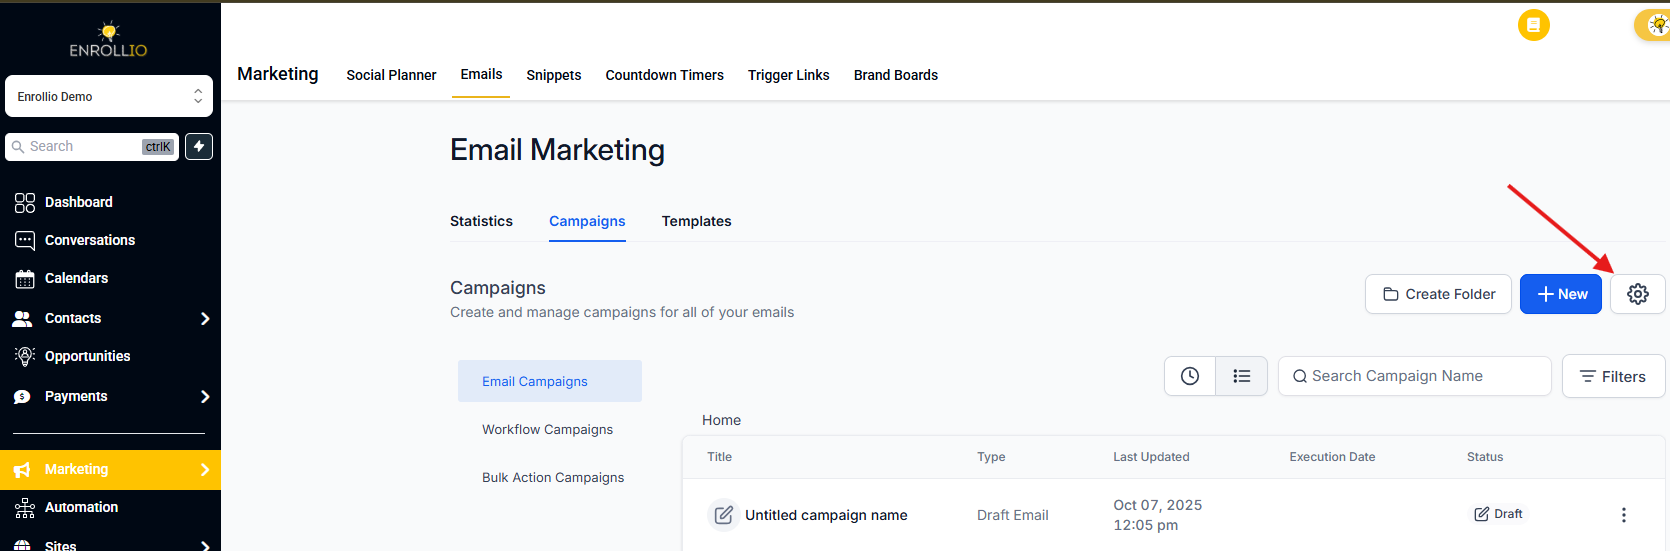
In the Campaigns view, click the gear icon (Settings) in the top-right corner. This opens the configuration panel where you manage your email preferences.
Step 4: Select Sender Preferences
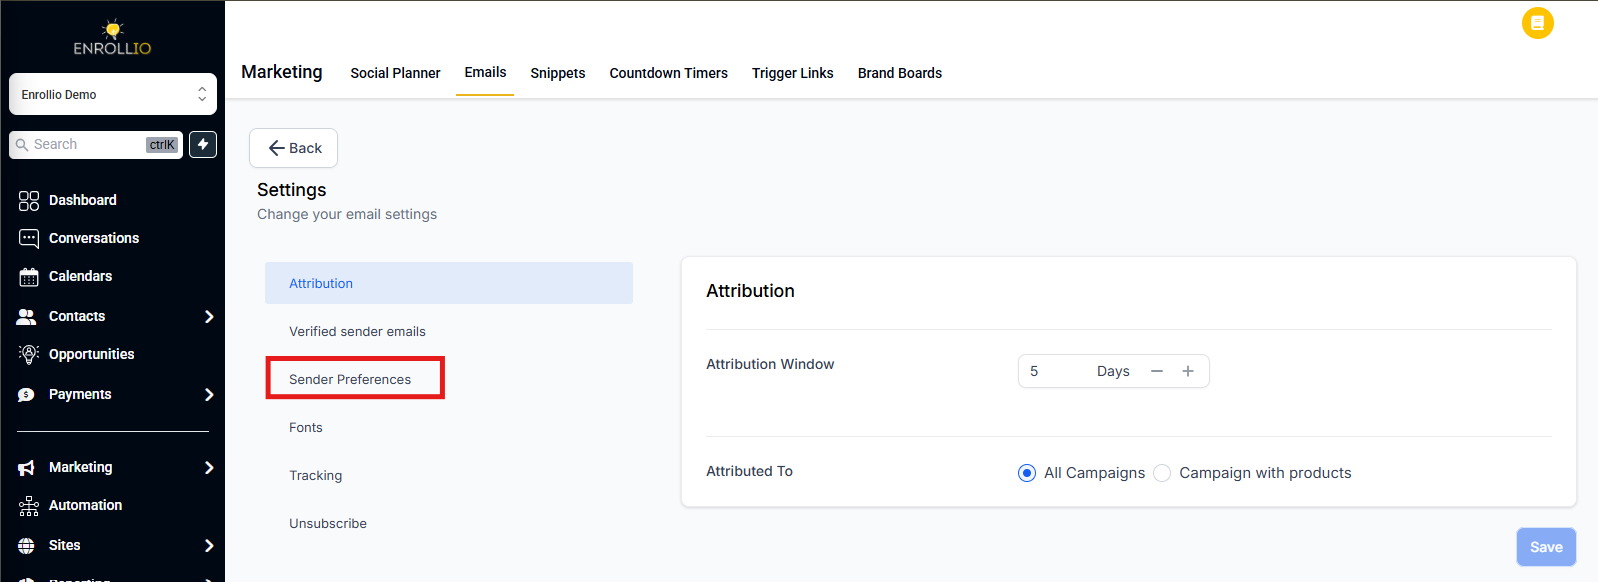
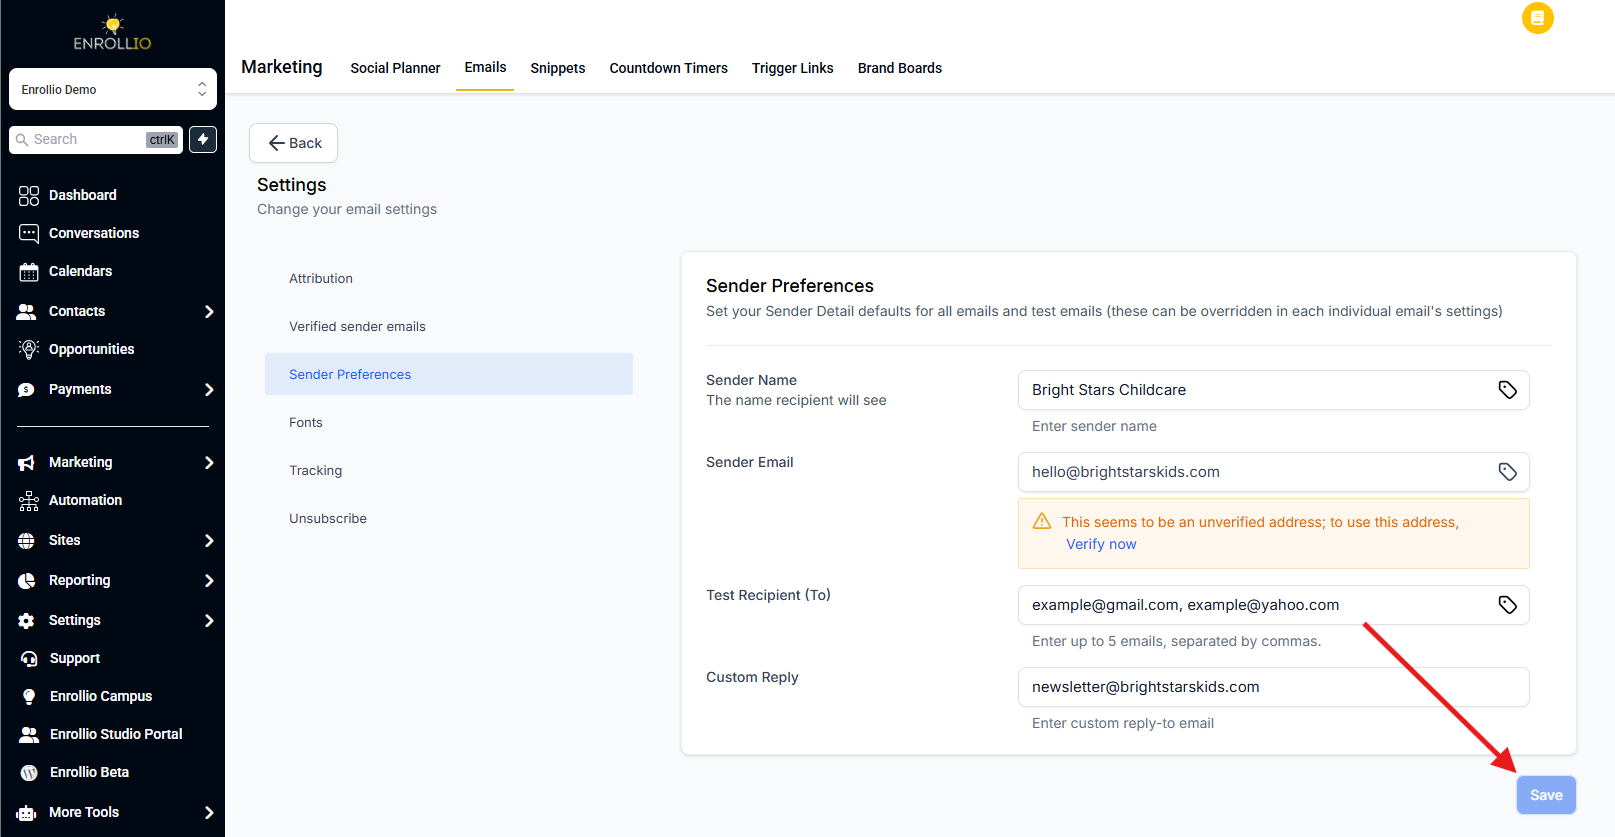
From the Settings menu, click Sender Preferences in the left sidebar. This opens the form where you'll configure your default sender details.
Step 5: Configure Your Sender Name
Enter the Sender Name that families will see in their inbox — for example, "Bright Stars Childcare" or "Director Sarah Johnson." Keeping this name consistent helps parents recognize your emails immediately.
You'll see a tag icon on the right side of the field. This lets you insert a dynamic value instead of typing a static name, useful if you want the sender name to adapt automatically based on your account settings.
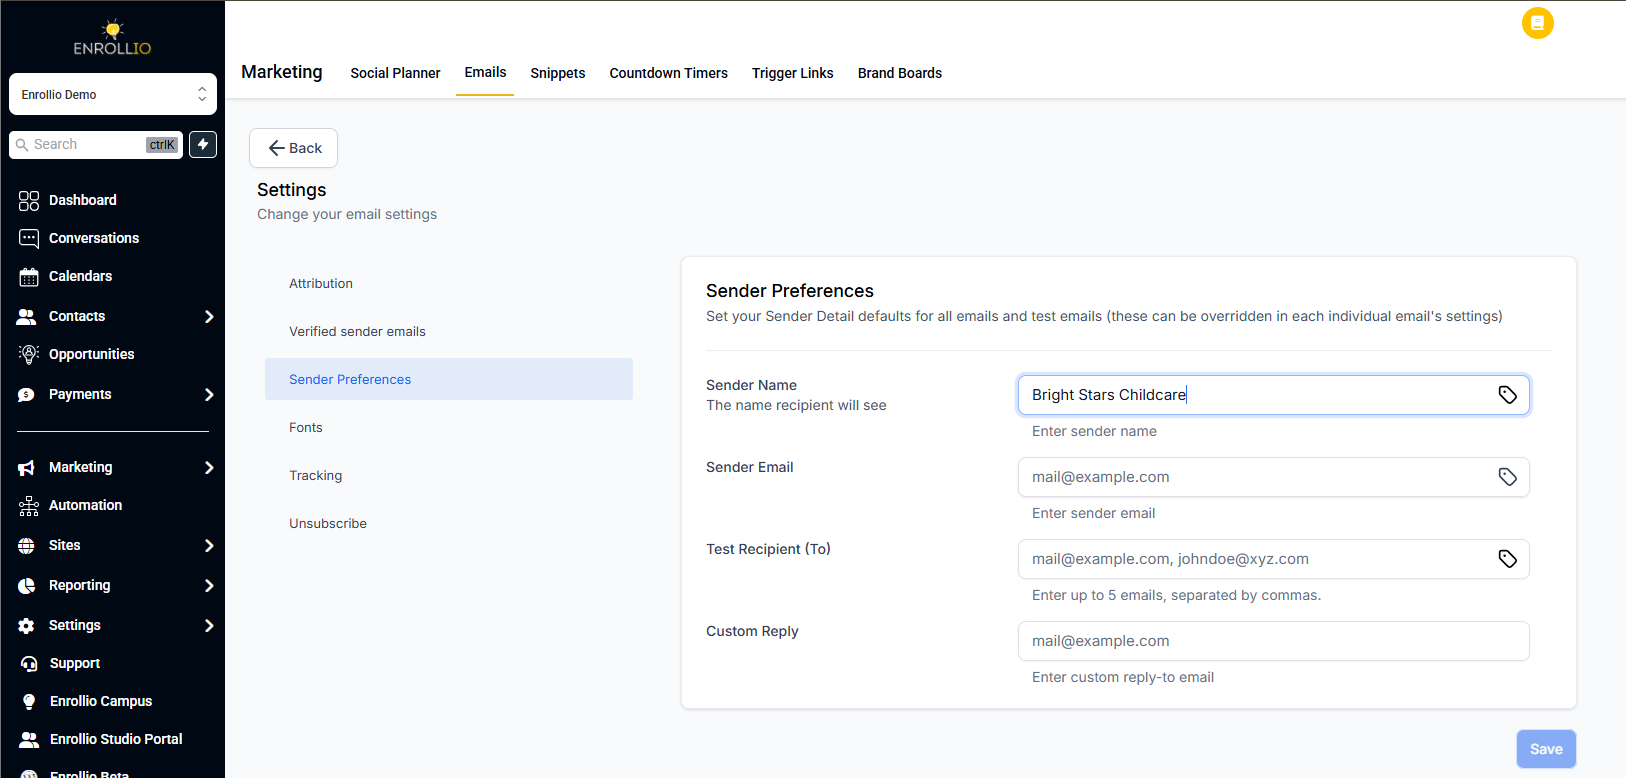
Step 6: Set Your Sender Email
The Sender Email is the address that appears in the "From" line of your emails. Use a professional address that matches your verified sending domain — like hello@brightstarskids.com or director@brightstarskids.com.
You'll see a verification status below the field (e.g., "Email verified") confirming that the address is authenticated and ready to use. The tag icon on the right lets you insert a dynamic value if needed.
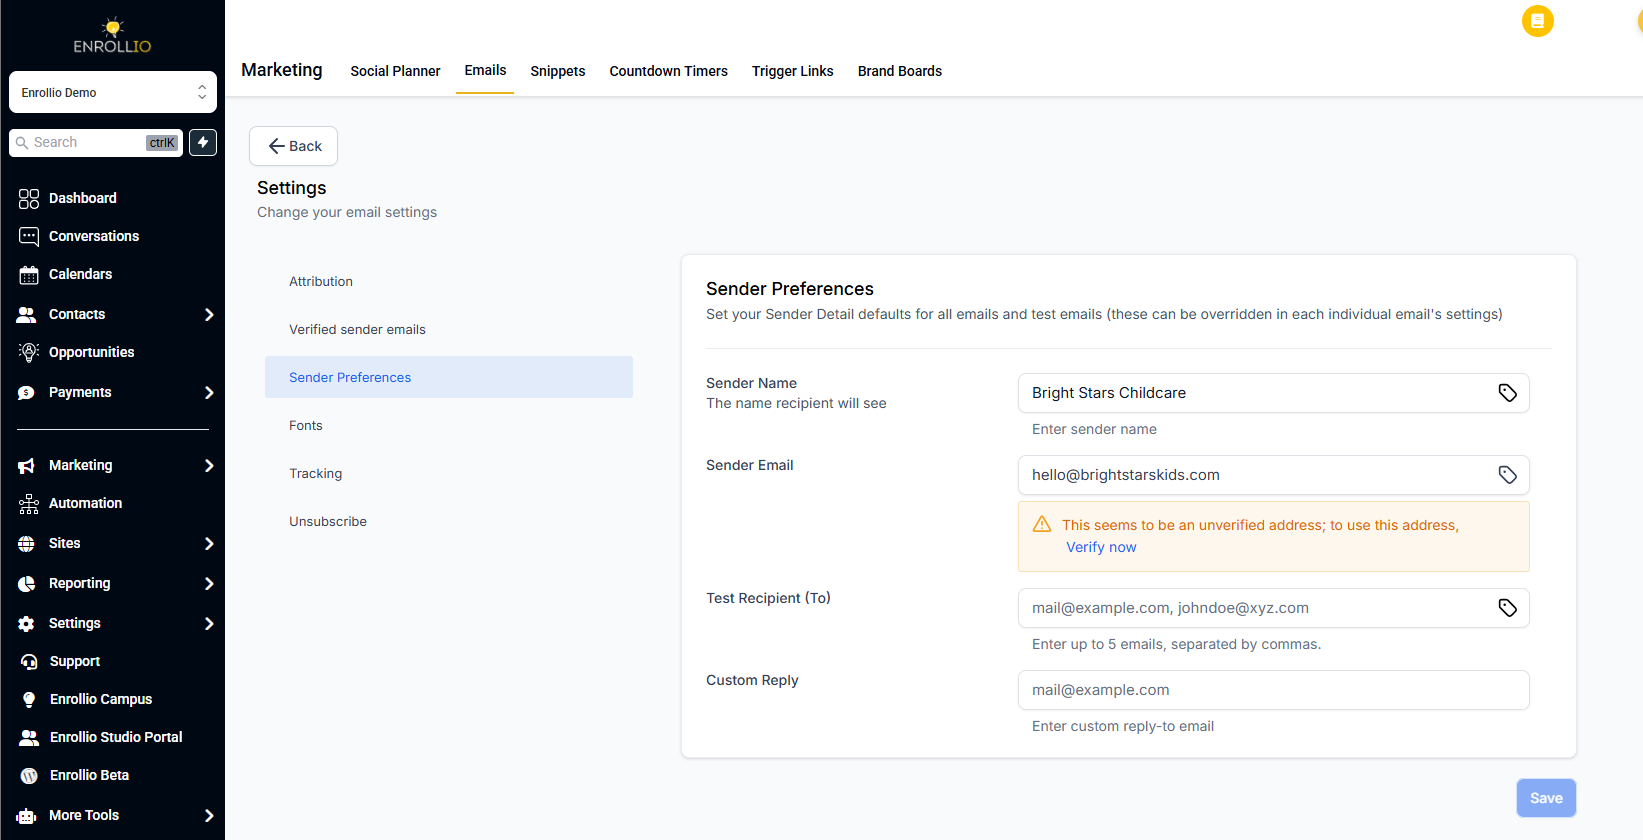
Step 7: Add Test Recipients
The Test Recipient field allows you to specify up to 5 email addresses where test emails will be sent before a campaign goes live. Separate multiple addresses with commas.
Add yourself, your assistant director, or other team members who review parent communications. This ensures you catch typos, formatting issues, or broken links before families see them.
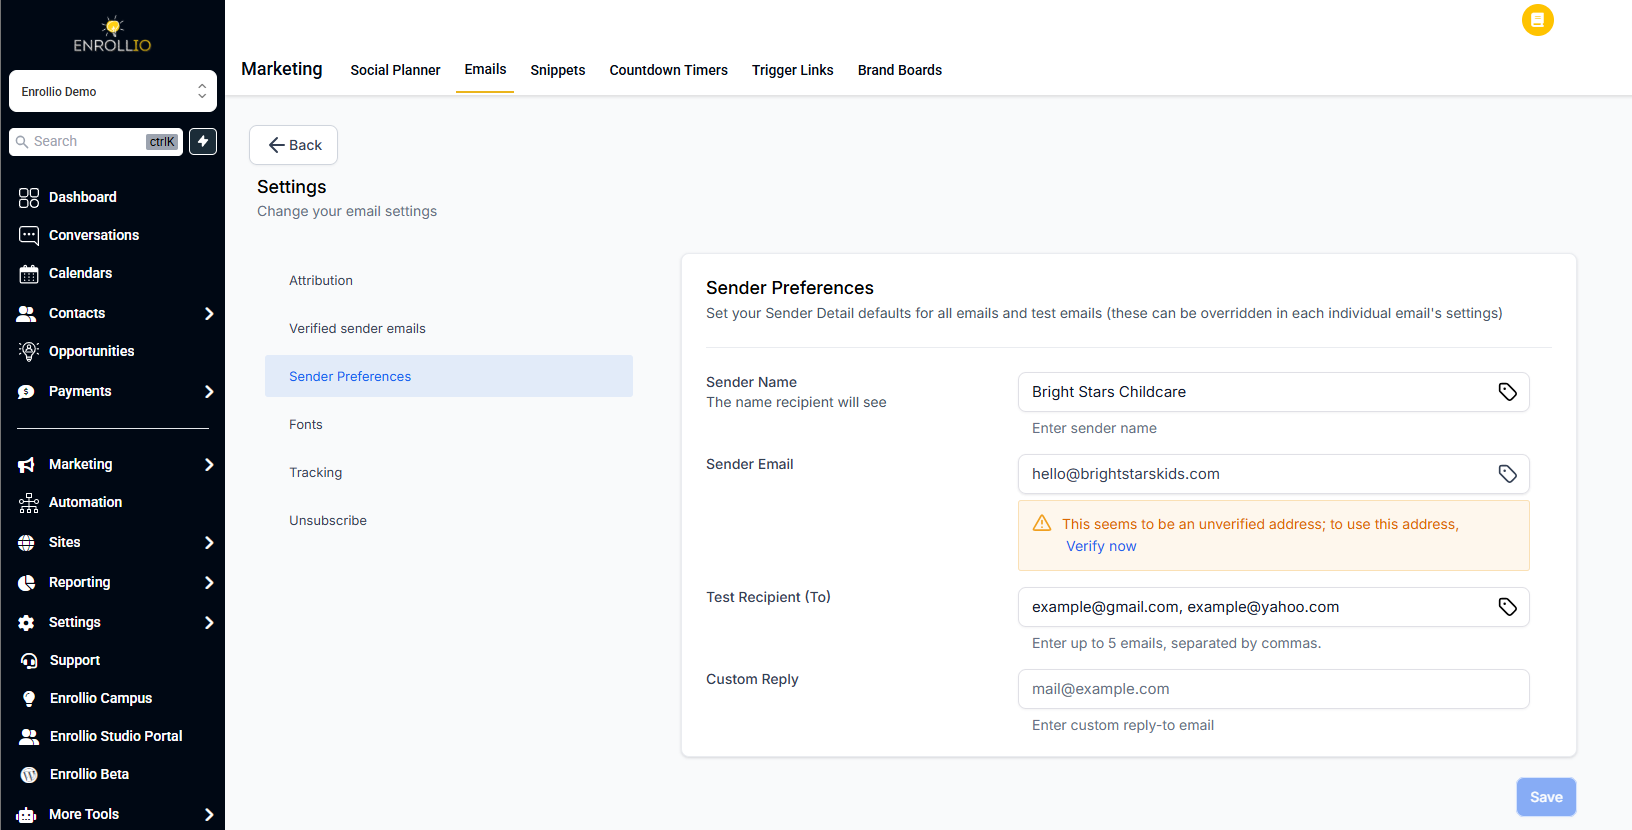
Step 8: Set a Custom Reply-To (Optional)
The Custom Reply-To field lets you specify a different email address where parent replies will be sent. For example, you might send newsletters from newsletter@brightstarskids.com but want replies to go to office@brightstarskids.com where your admin team can respond.
This helps you separate outbound campaigns from inbound parent questions. If you leave this blank, replies will go to your Sender Email address.
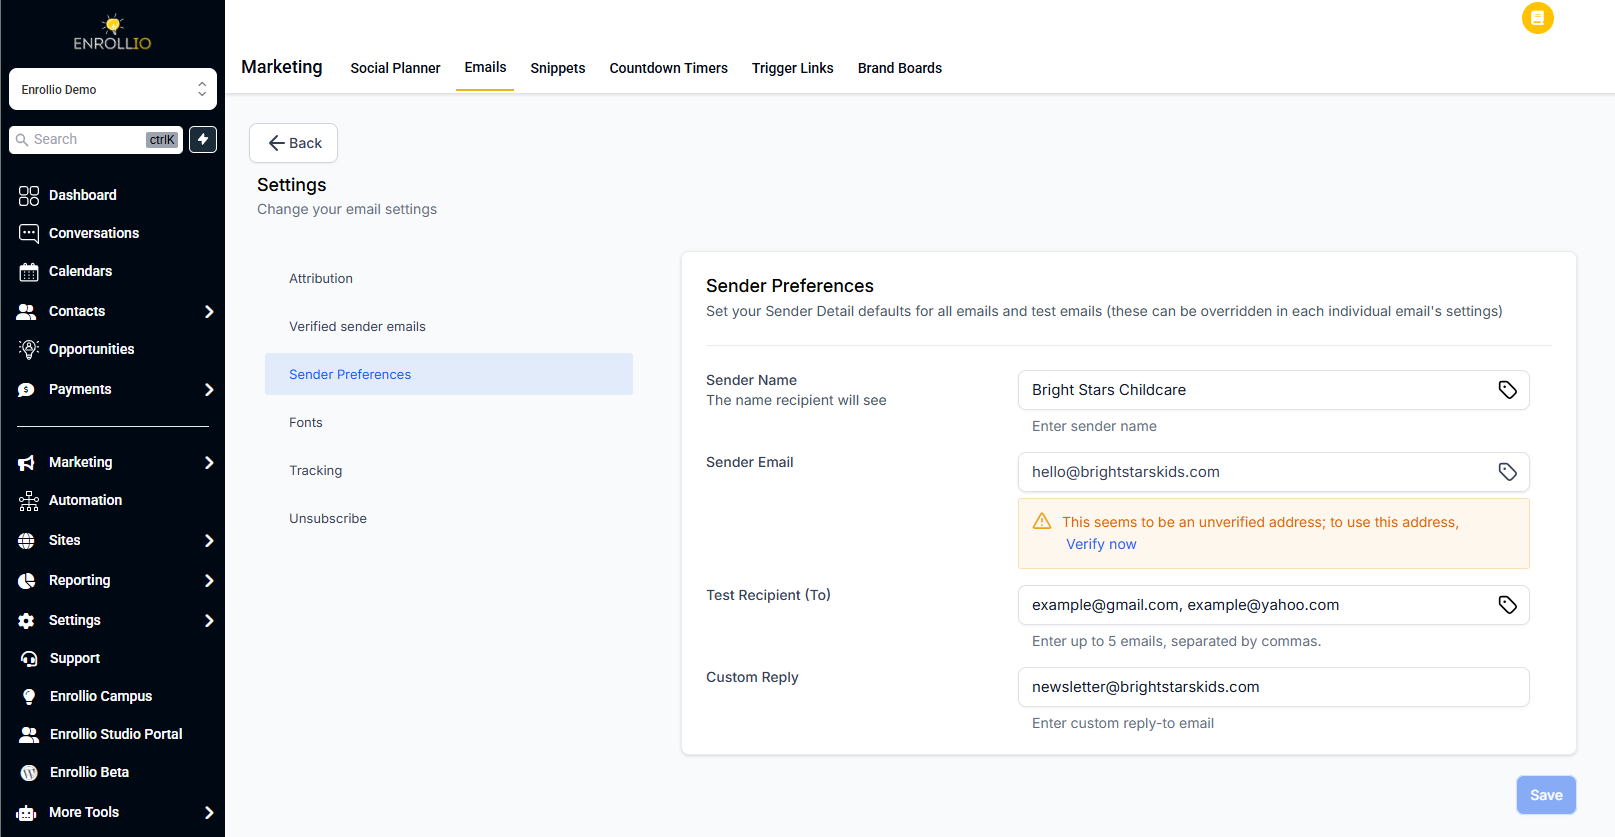
Step 9: Save Your Preferences
Click the Save button to apply your settings. These values will now be your default configuration for all new campaigns and test sends.
Important: Updating Sender Preferences does not retroactively update existing campaigns or scheduled emails. Always double-check sender fields before launching to ensure the correct details are being used.
💡 Pro Tip
If you manage multiple program locations or age groups, consider using your main center identity as the default. You can always override sender details for specific campaigns — like having your infant program coordinator send updates from their own email address.
Frequently Asked Questions
If I update my Sender Preferences, will existing scheduled campaigns automatically use the new defaults?
No. Sender Preferences only apply when creating new campaigns or test emails. Existing scheduled campaigns or drafts keep their original sender details unless you manually update them.
What happens if I copy a campaign that was created before I updated Sender Preferences?
Copied campaigns inherit the original campaign's stored sender values, not your new defaults. Always review and update the From Name, From Email, and Reply-To fields after copying a campaign.
I have multiple program locations. How do Sender Preferences work across different centers?
Sender Preferences set account-level defaults. If you manage multiple locations, set the most-used identity as your default and manually override sender details per campaign when needed for location-specific communications.
Could mismatched Sender Email and Reply-To values affect deliverability?
Yes. Email providers may flag mismatches as suspicious and send your emails to spam. For best inbox delivery, ensure your Sender Email domain is authenticated and your Reply-To address is on the same monitored domain.