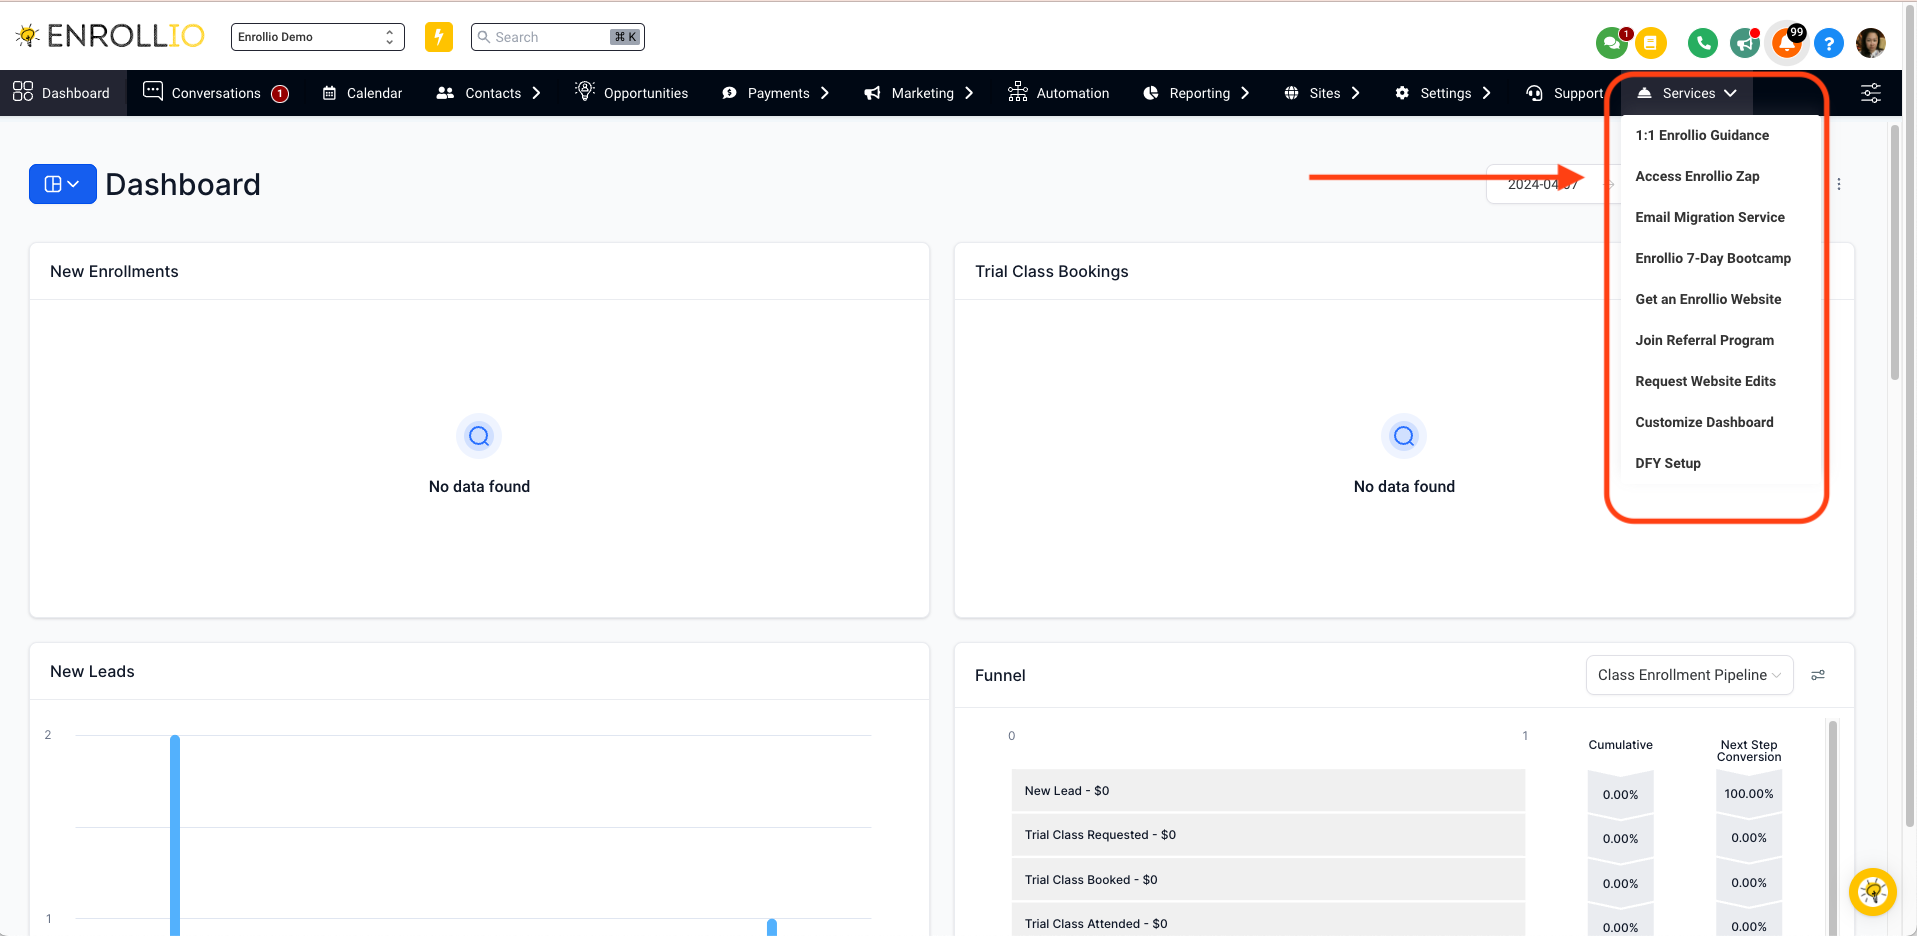
Login to Enrollio. Hover over services and click Access Enrollio Zap. If you don't have a Zapier account, you need to create one.
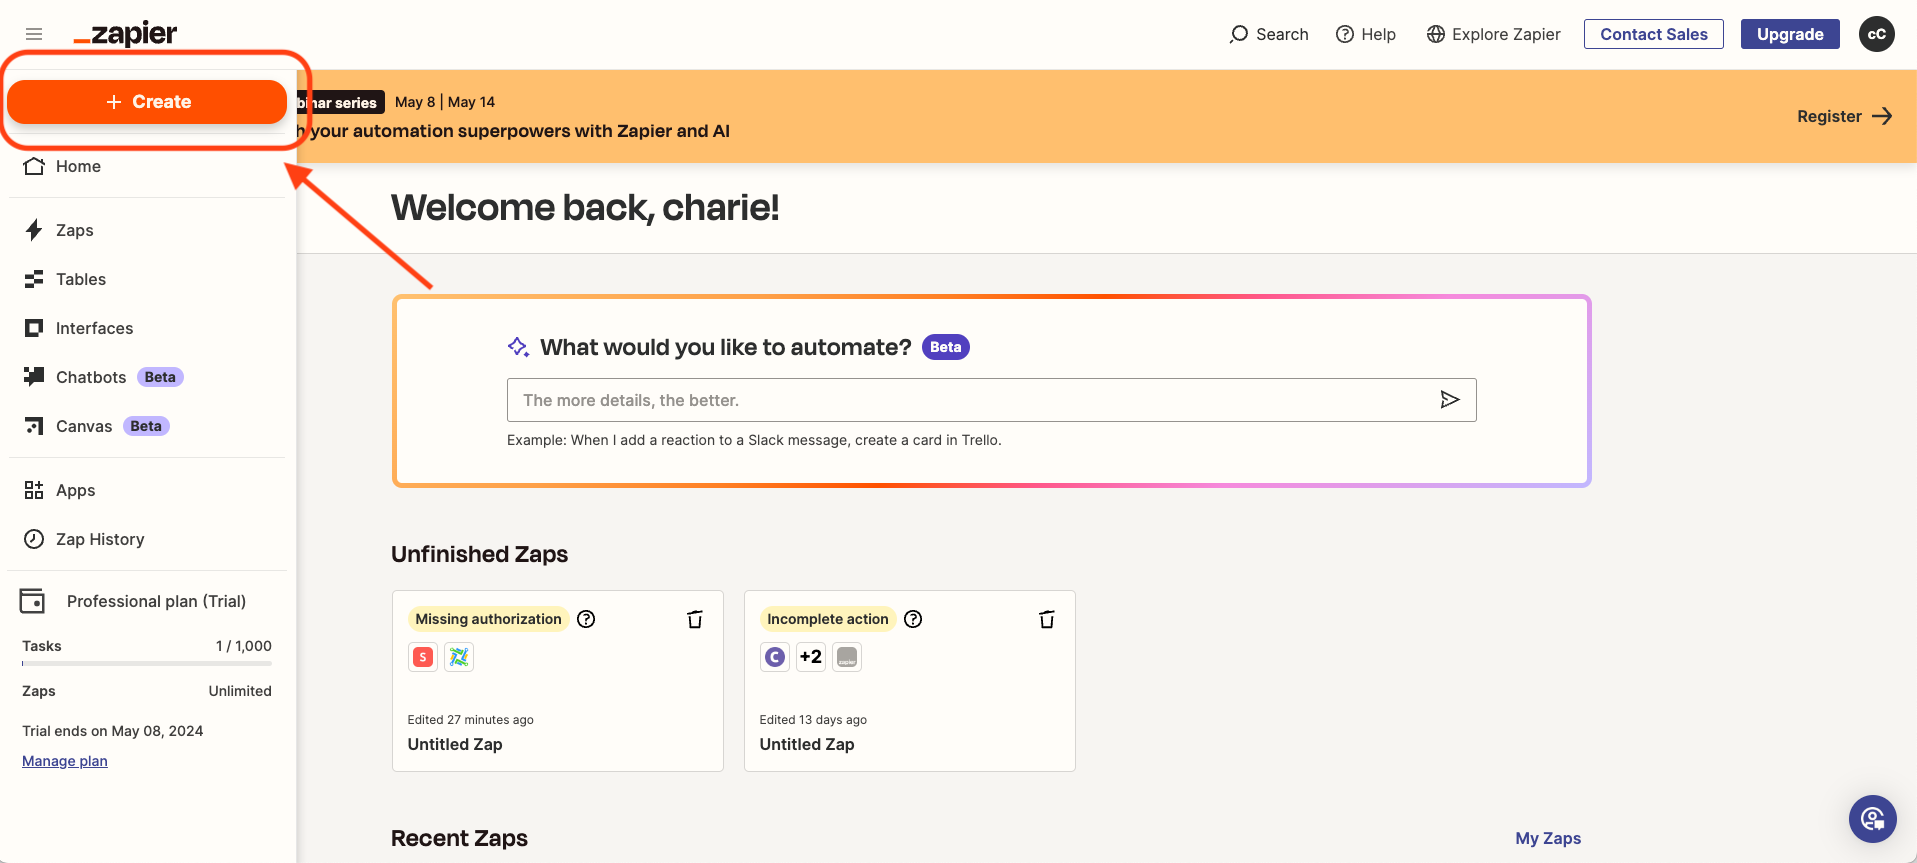
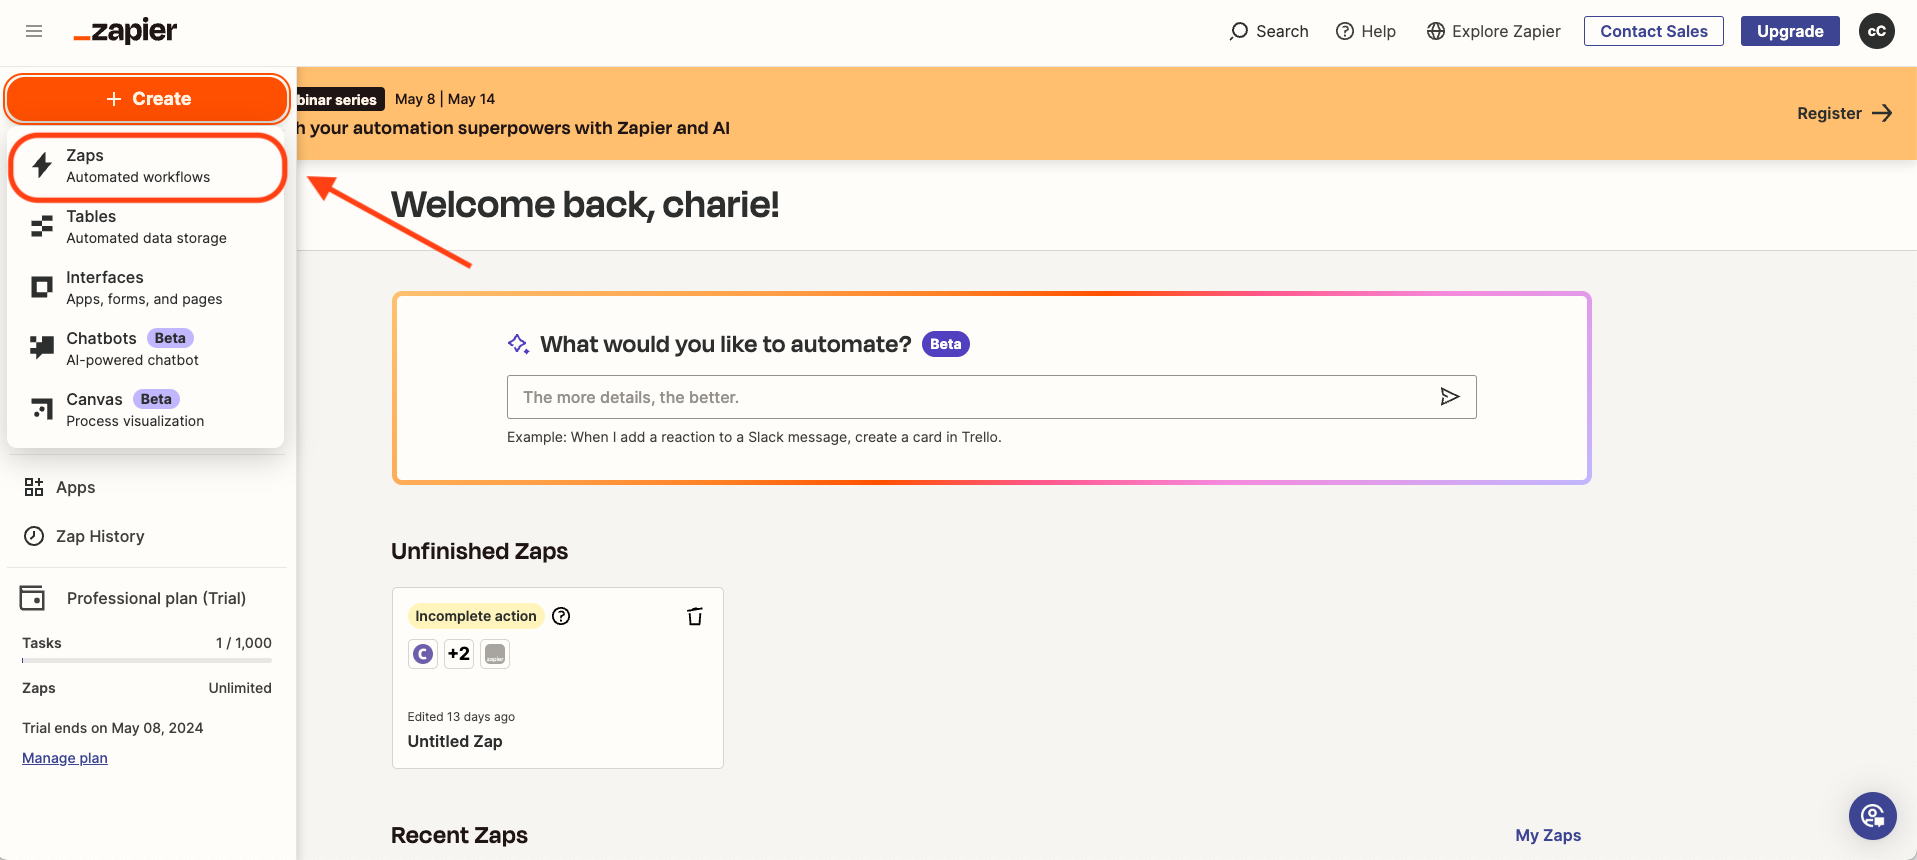
Inside Zapier, click on Create to start a new Zap.
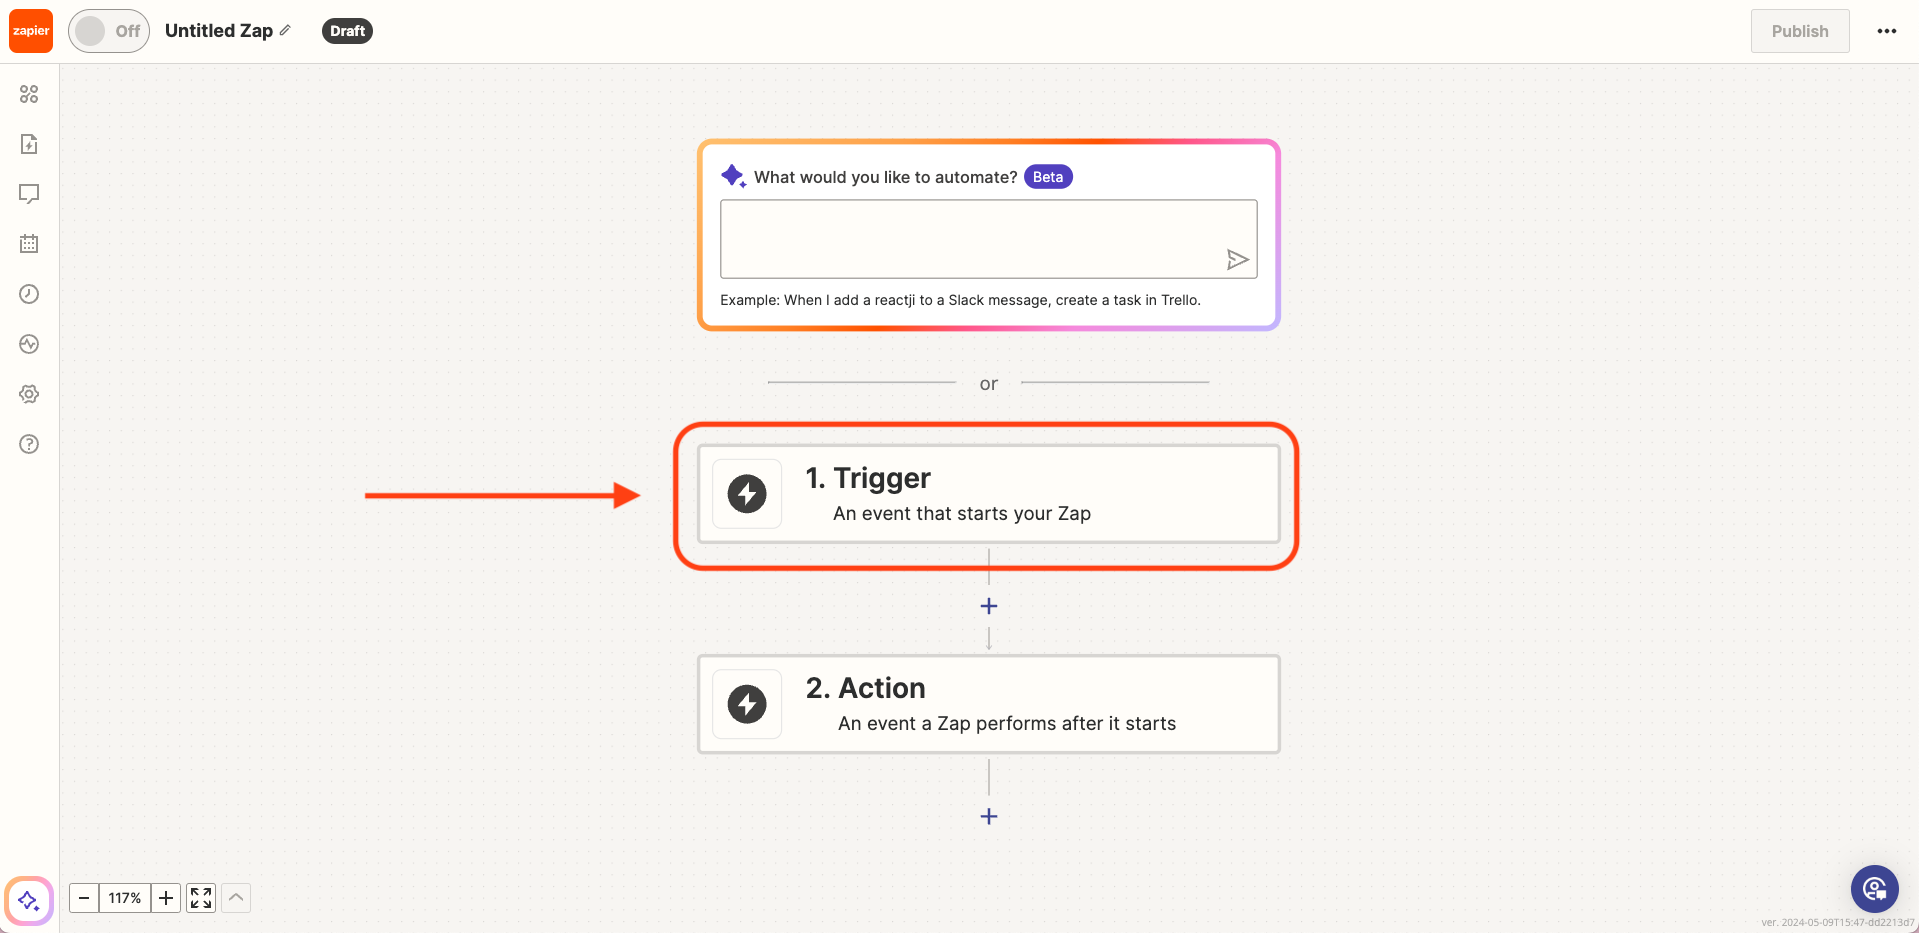
Click on Trigger.
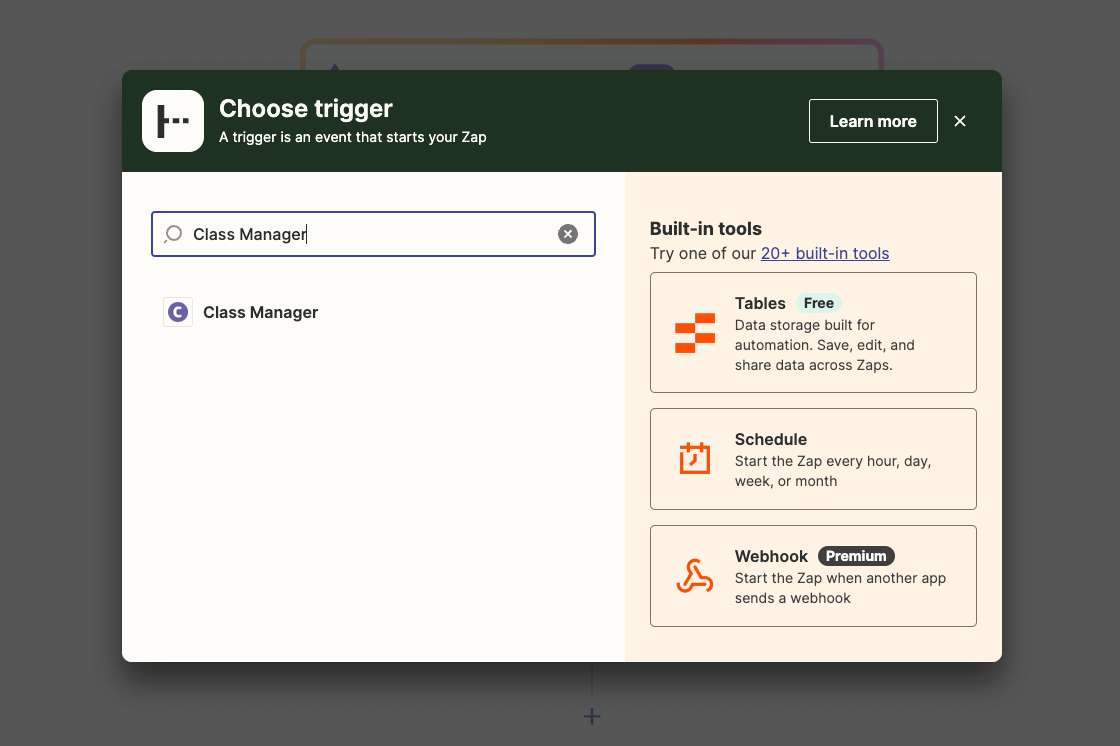
On the pop-up select Class Manager
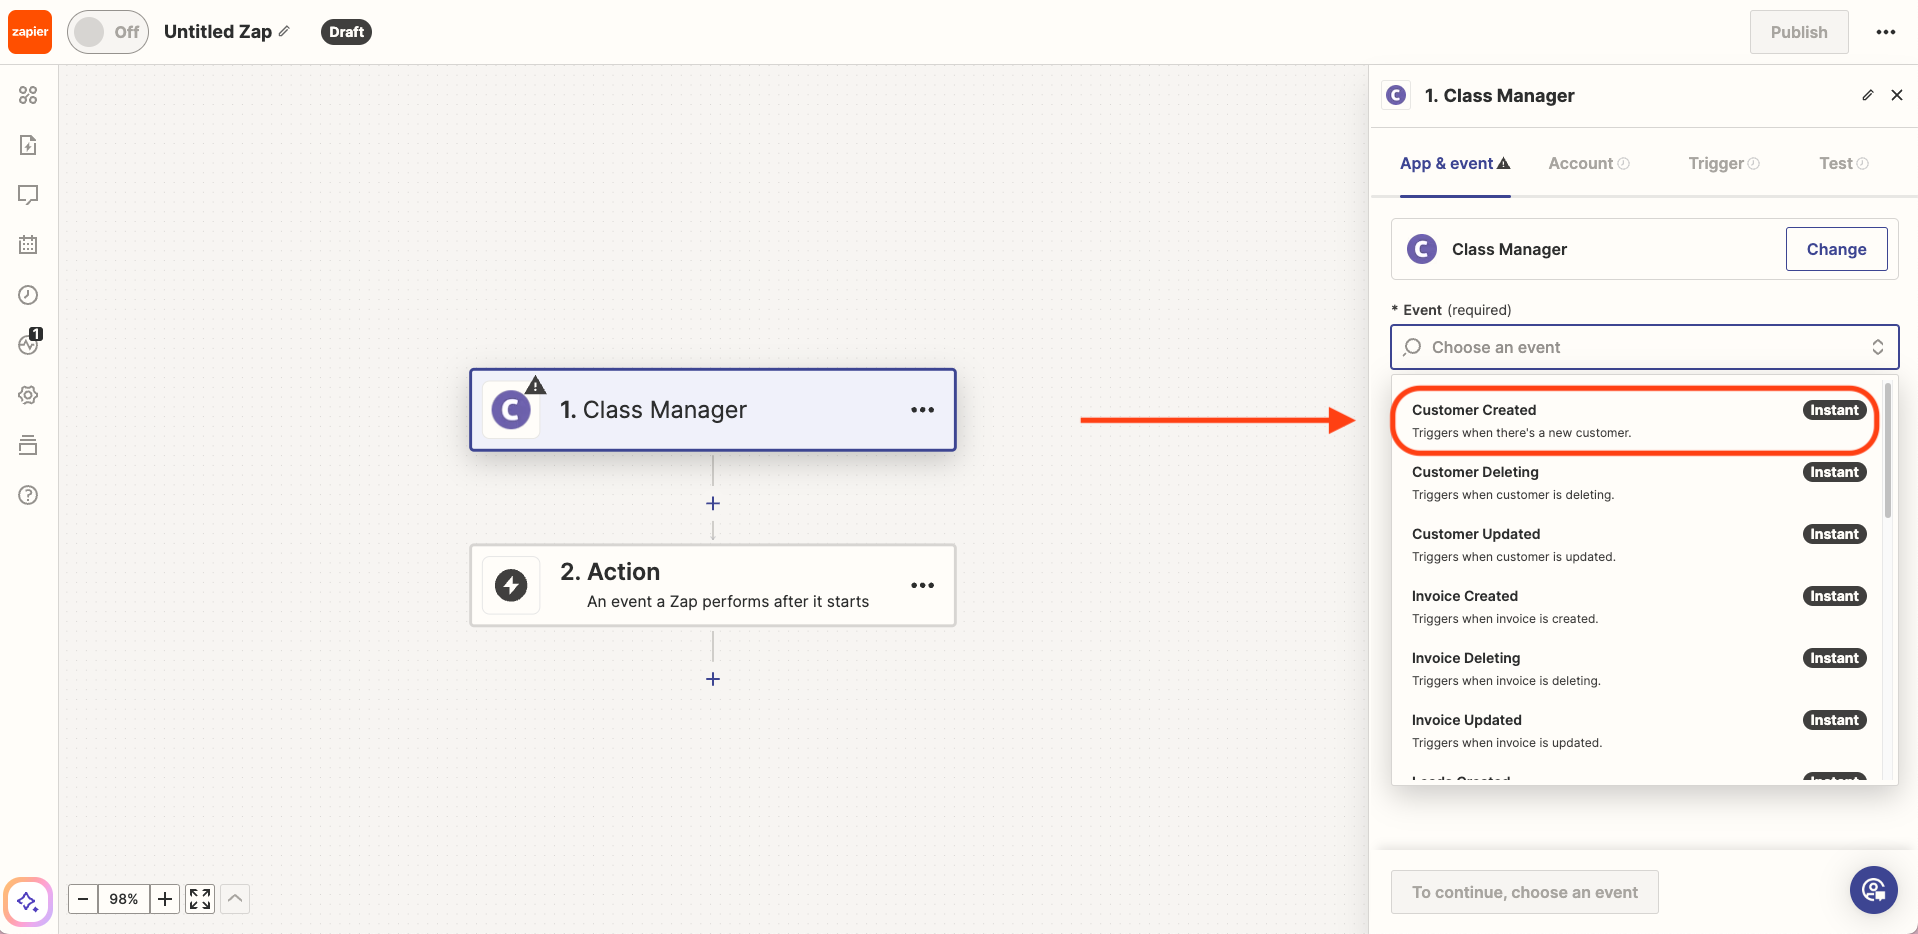
Choose the event that will trigger the automation. Select Customer Created: this means that whenever a new client is created in Class Manager, this will trigger the automation. If you need to use it for payments or enrollments change the event to Payment created. You can always create more Zaps if you need to. Click Continue below.
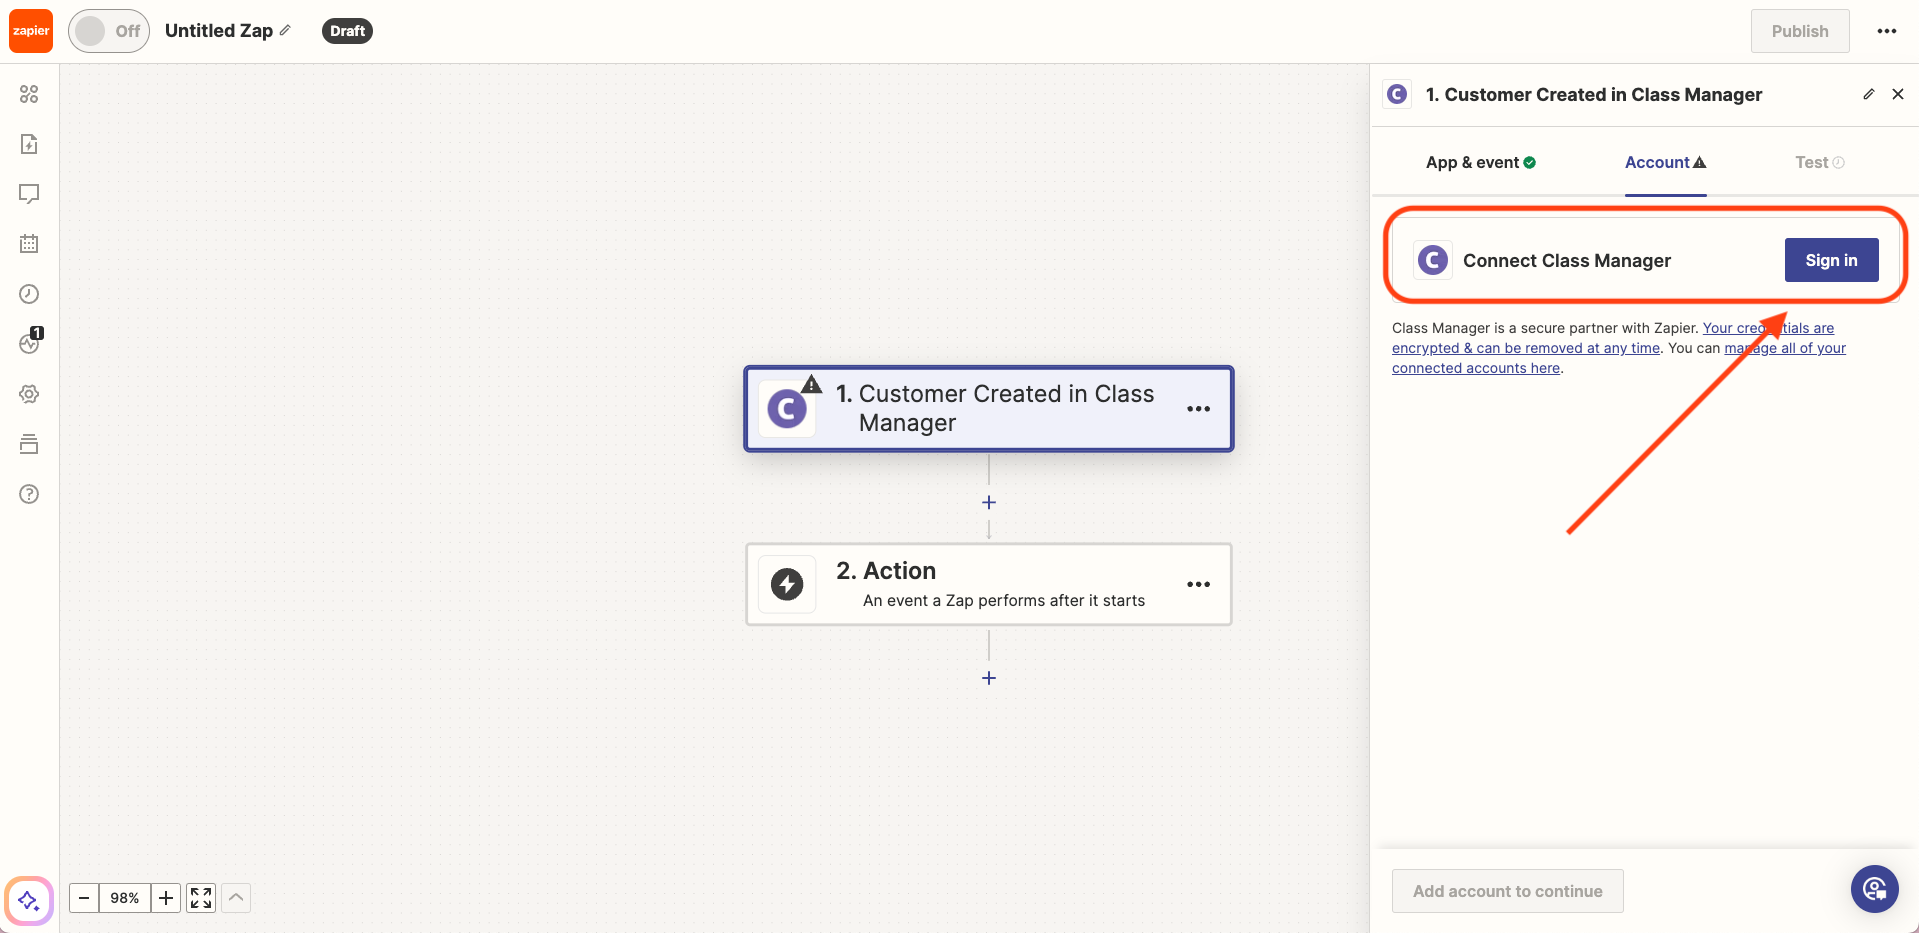
Click Sign In to connect Class Manager.
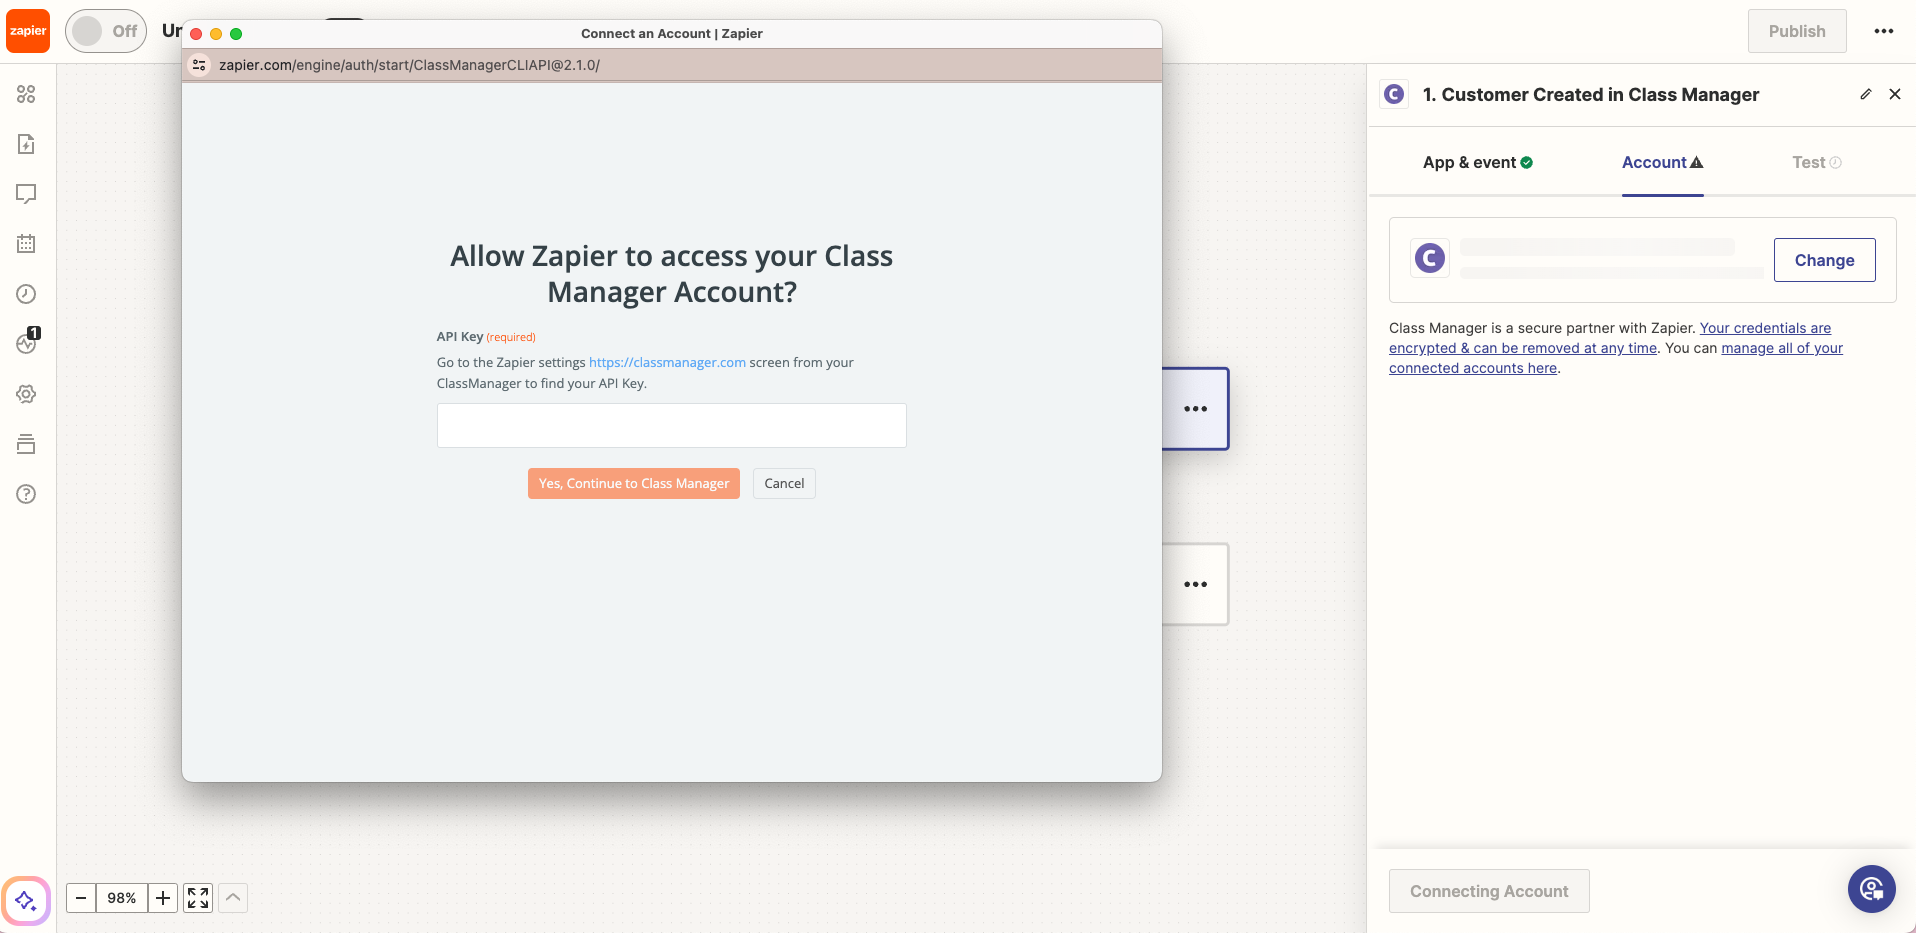
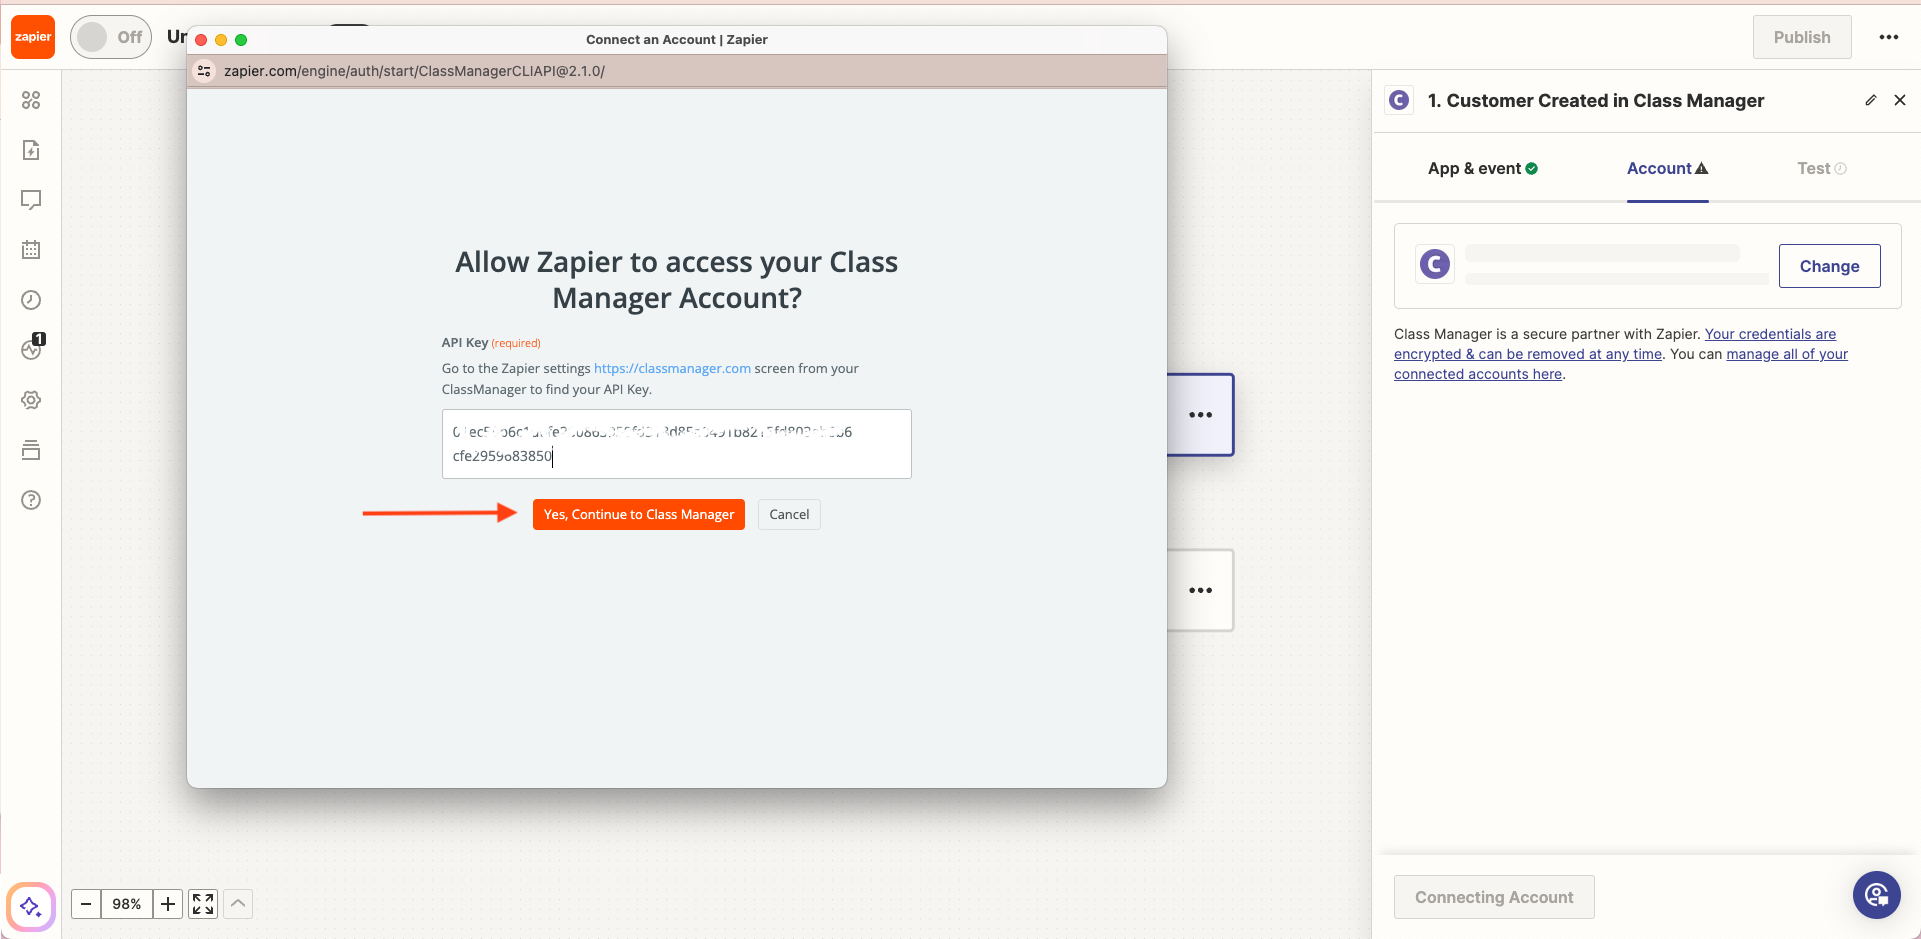
Zapier will ask for your Class Manager API Key
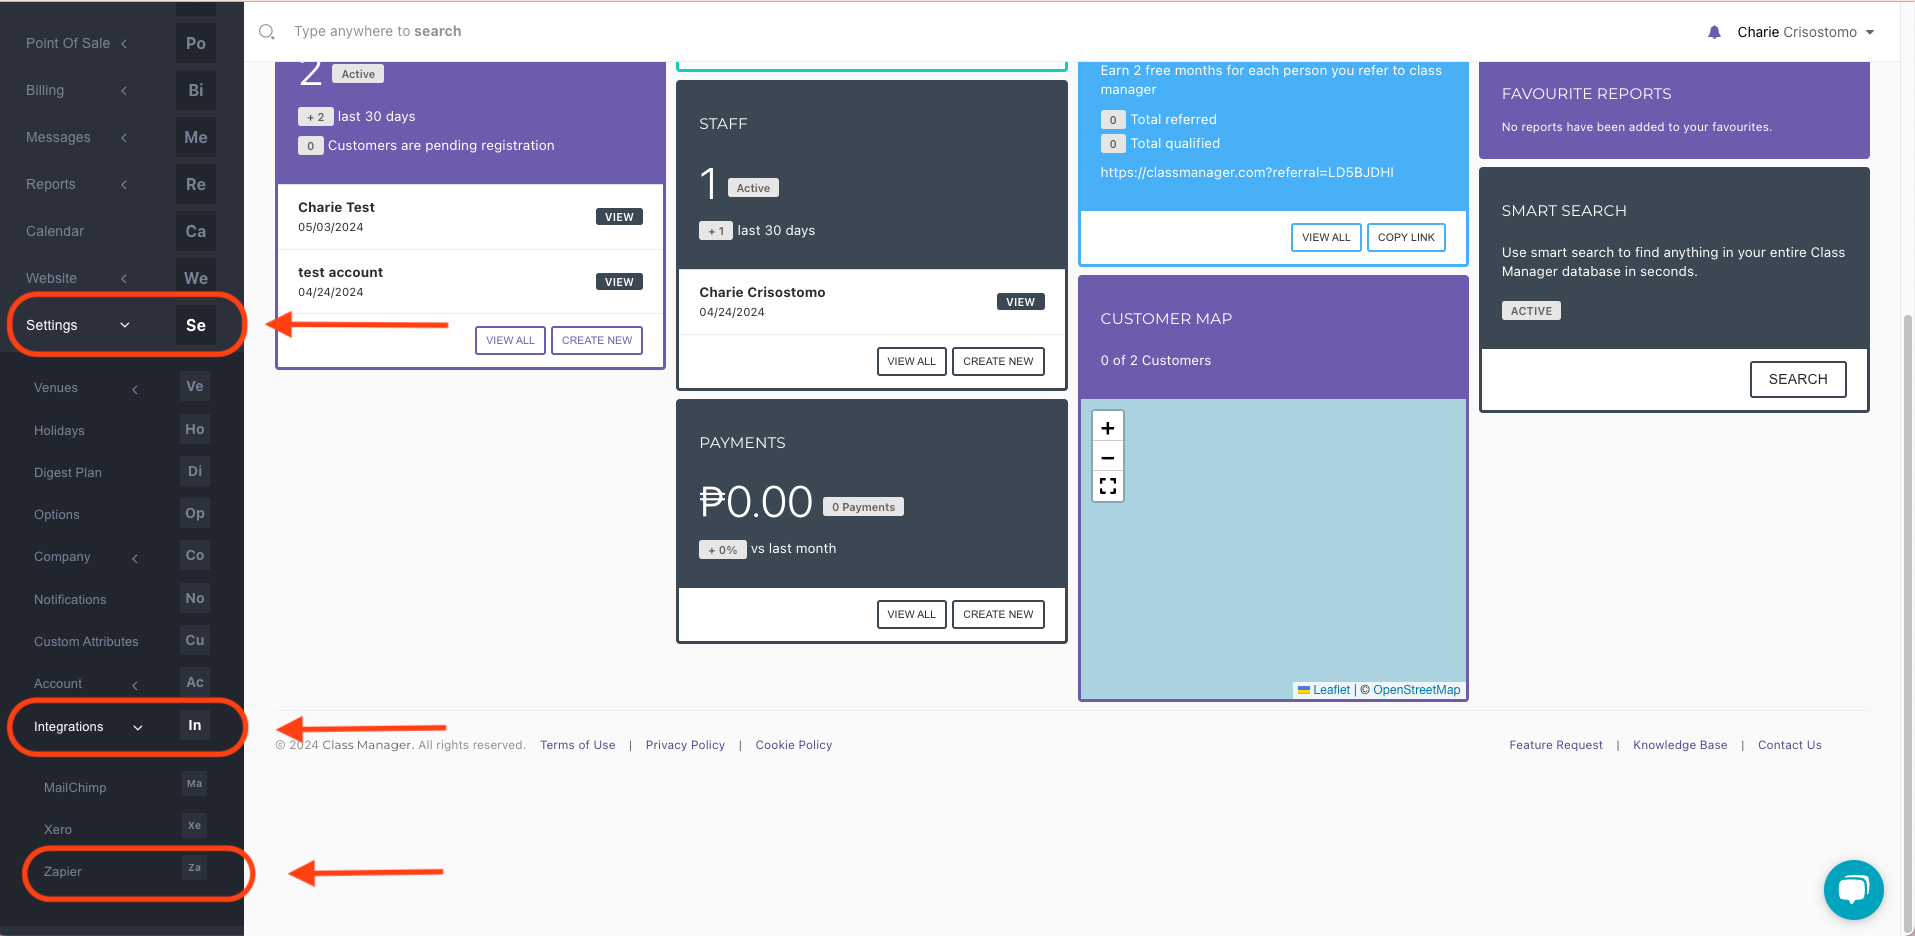
Inside your Class Manager, click on Settings>Integrations>Zapier
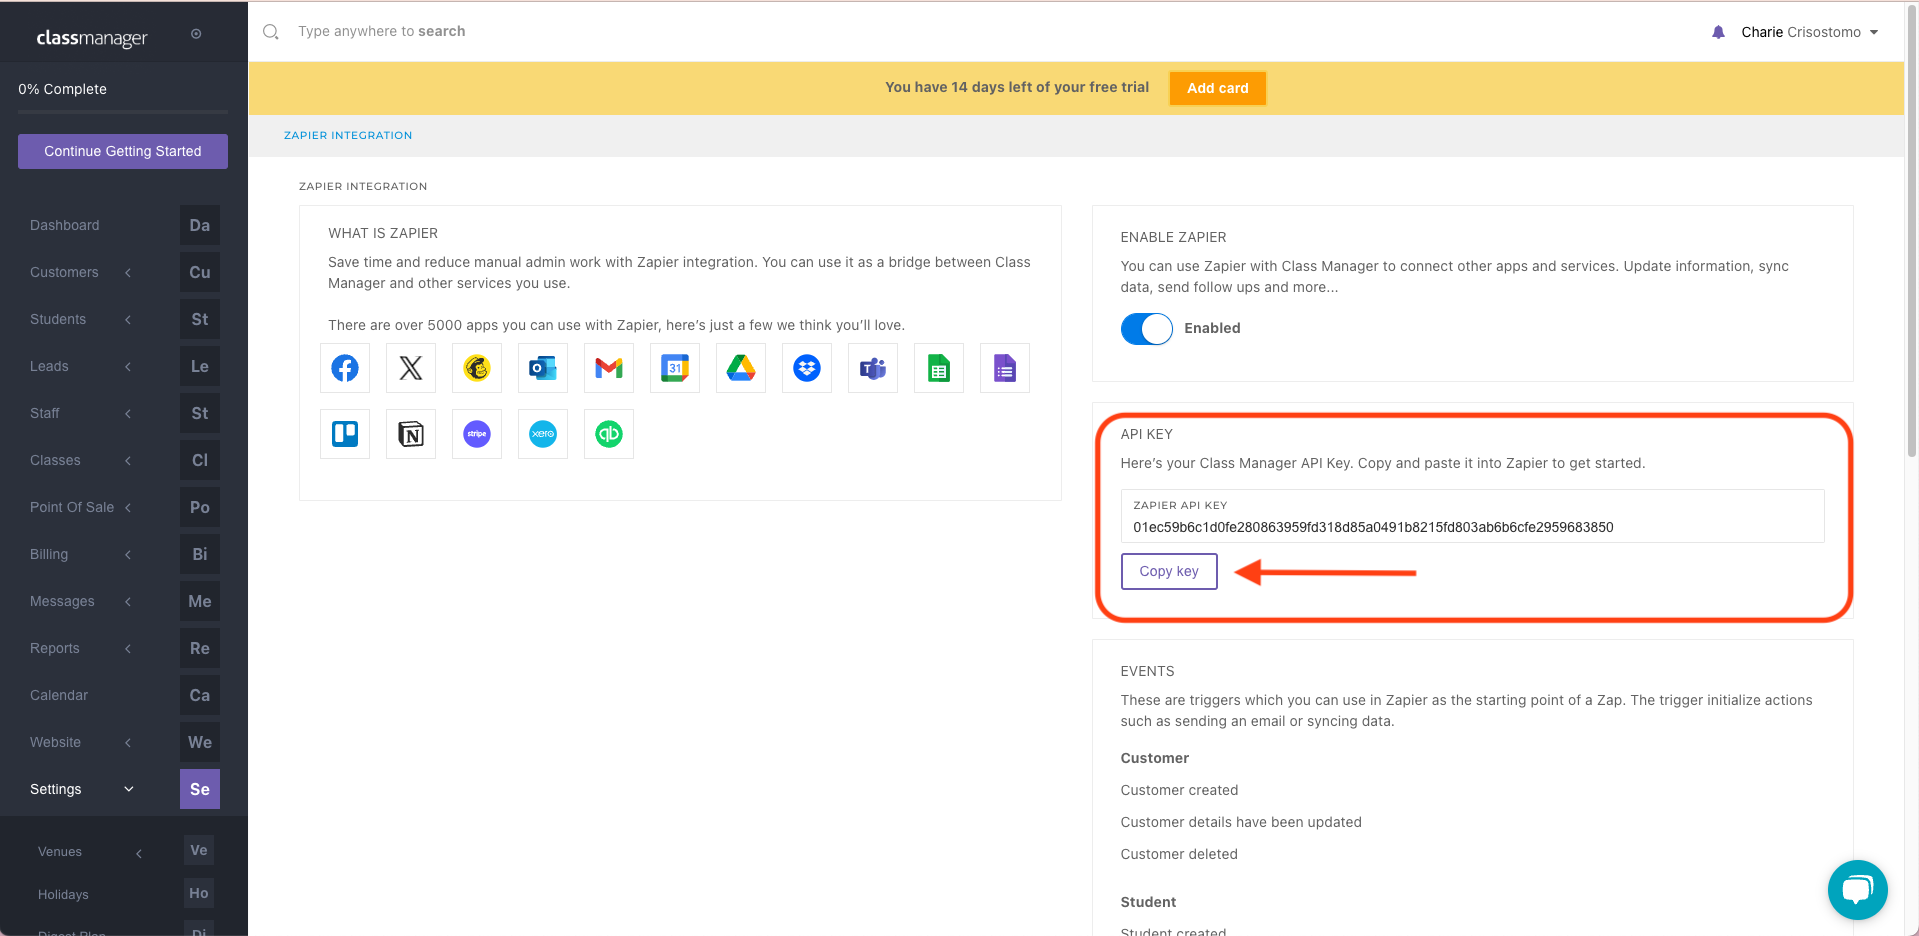
Copy the API Key then go back to Zapier
Paste the API key from Class Manager then click Yes, Continue to LeadConnector then click on Continue below.
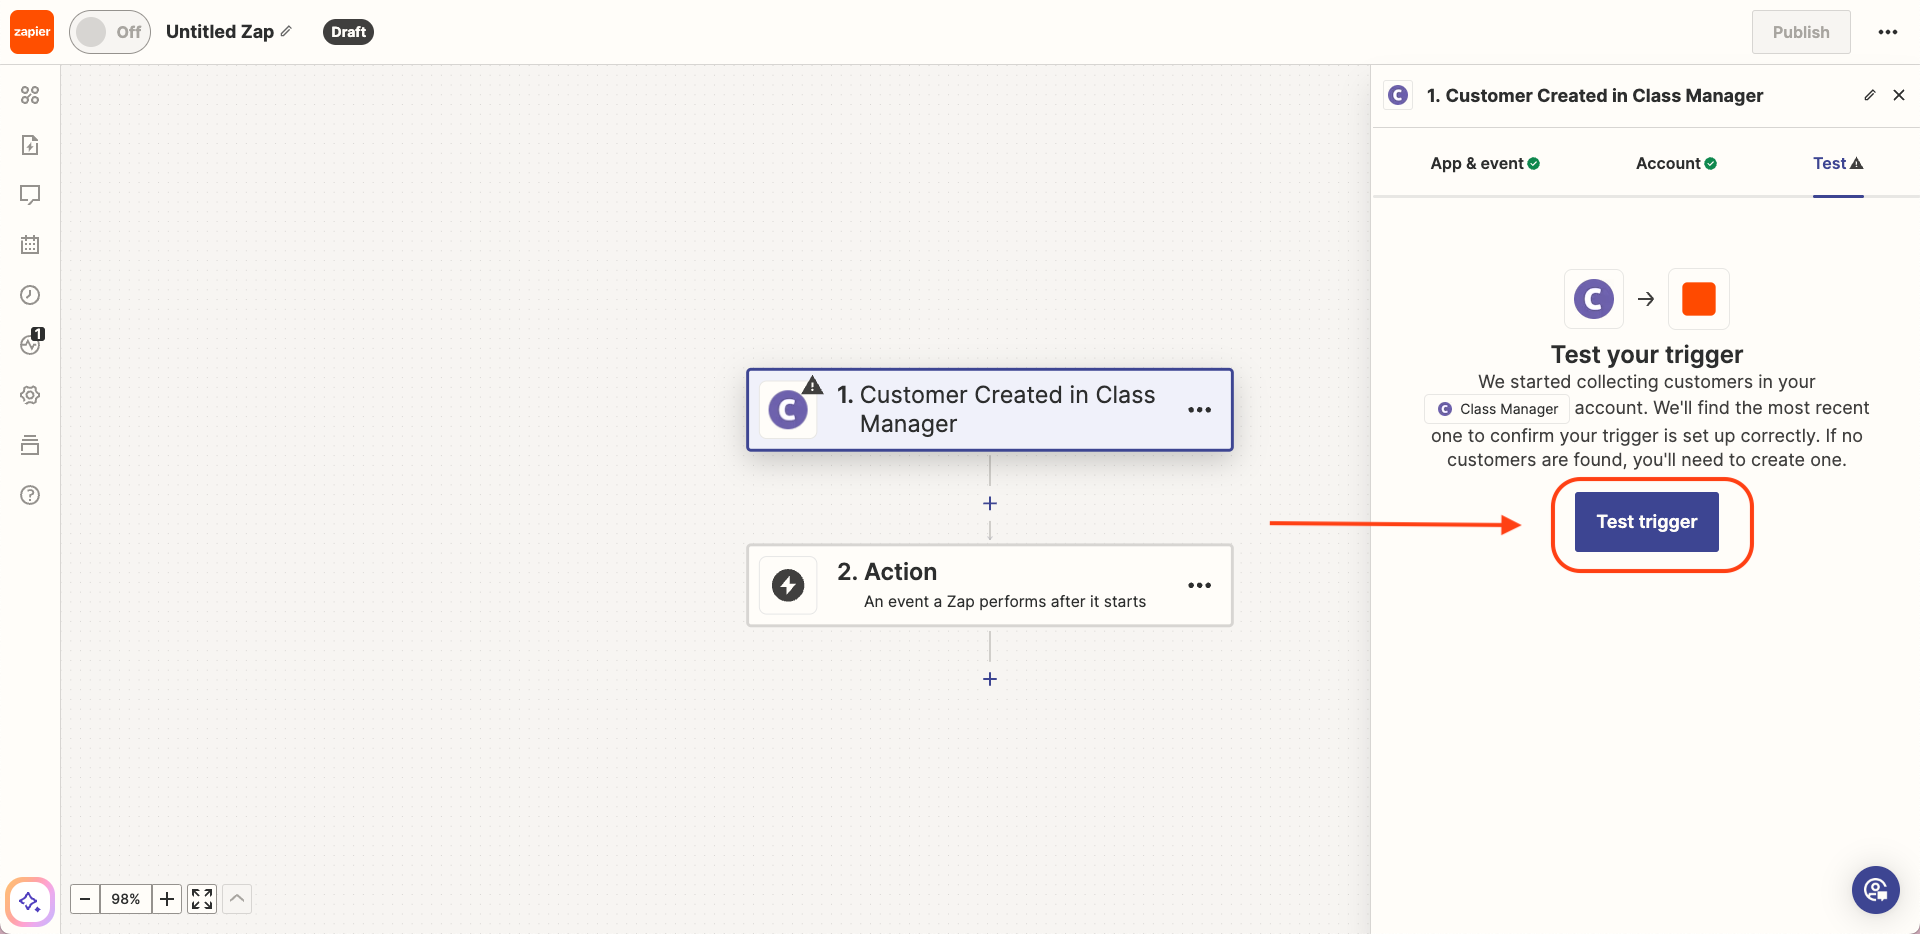
Test the trigger to make sure that the connection was established.
Select the records that you want to use for testing. This pulls the most recent activity from your Class Manager. If there is no activity in Class Manager this will not pull any data. If this happens, go to your Class Manager and create a test contact, then go back to Zapier and click find new records. Click Continue with the selected record.

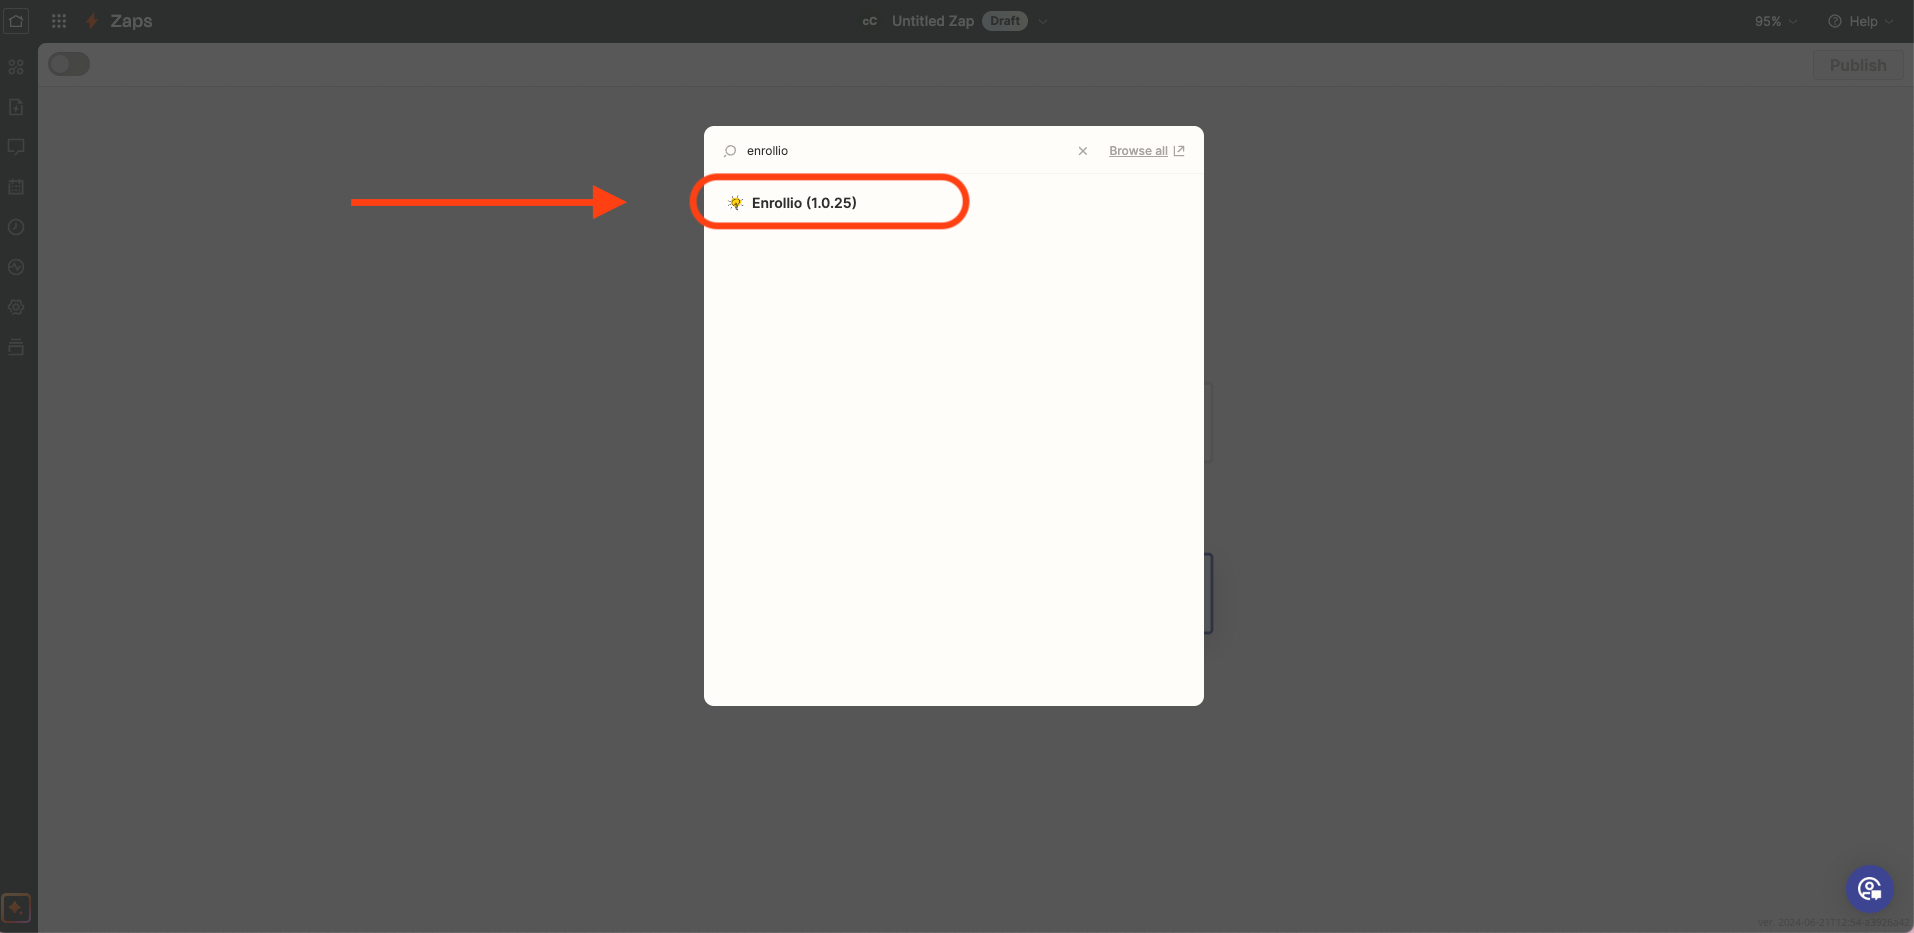
Click on Action. From the pop-up select Enrollio.
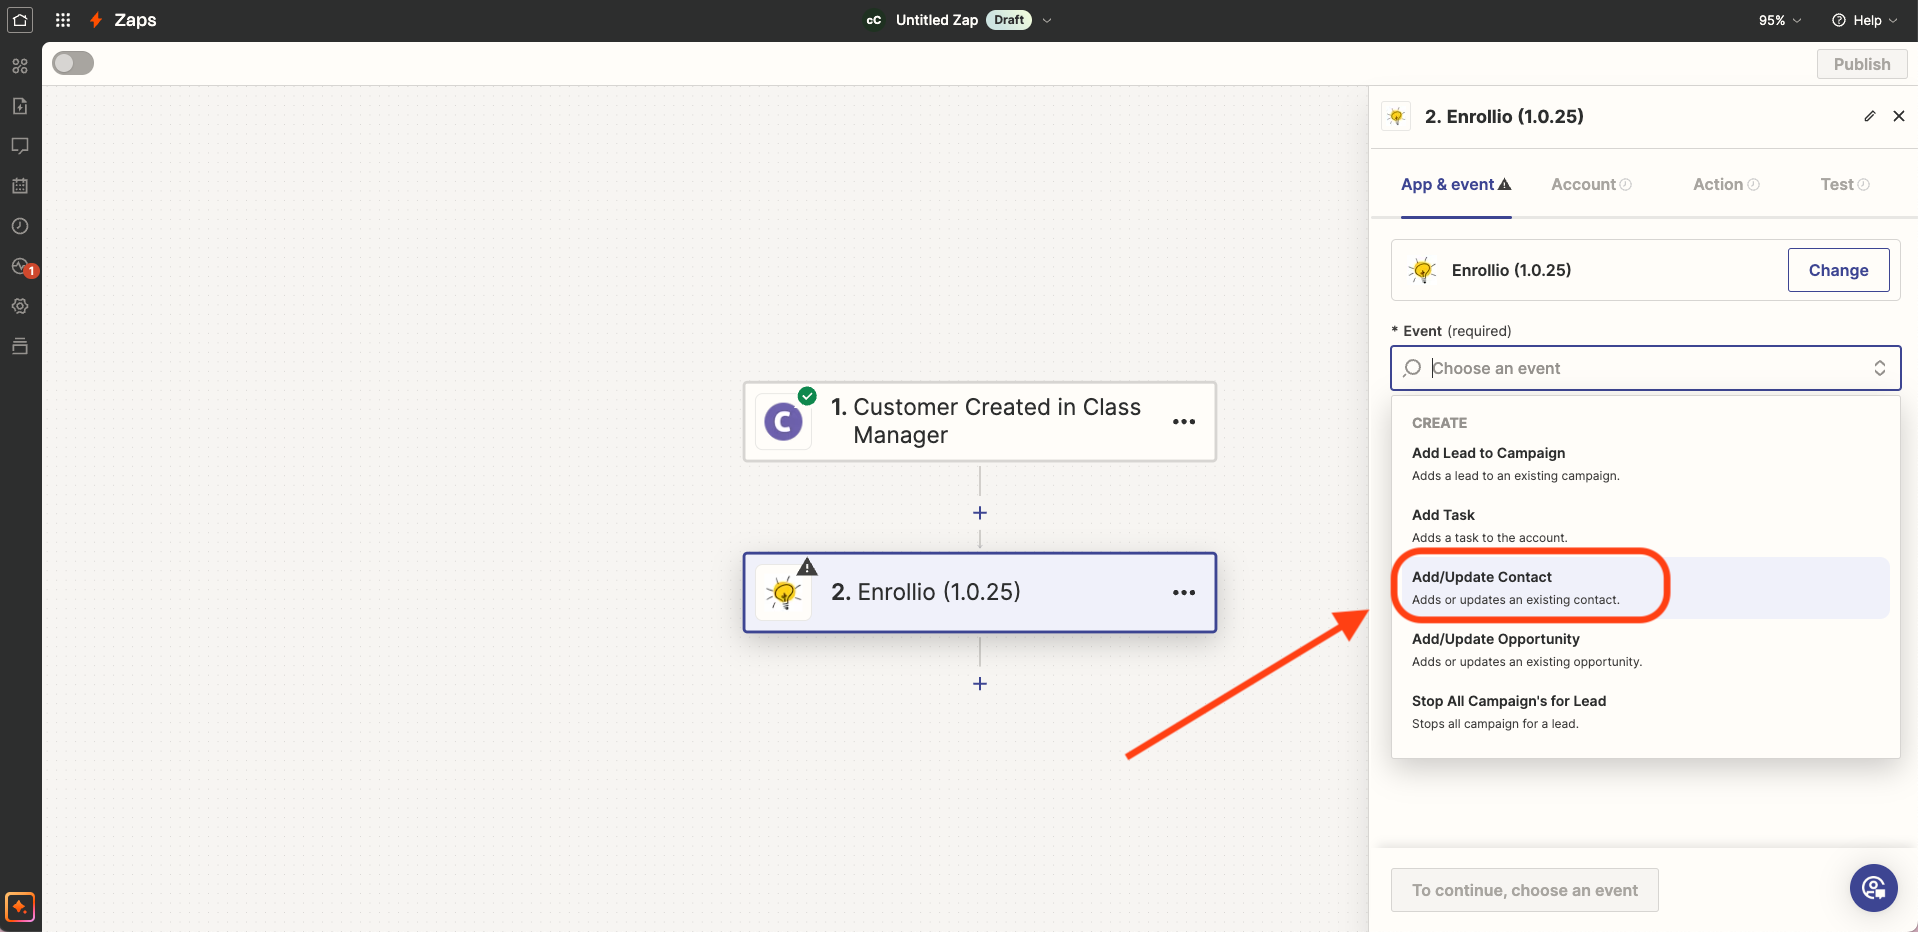
Choose the action that will be sent to Enrollio. Add/Update Contact: this means that if the contact is already in Enrollio it will update the contact information. If the contact is not yet in Enrollio it will add a new contact. Click Continue below.
** Please note that the contact update prioritizes email addresses so, if a new sign-up uses the same email address, that contact will be updated if they are already in Enrollio with the new information.
Click Sign In to connect to Enrollio.

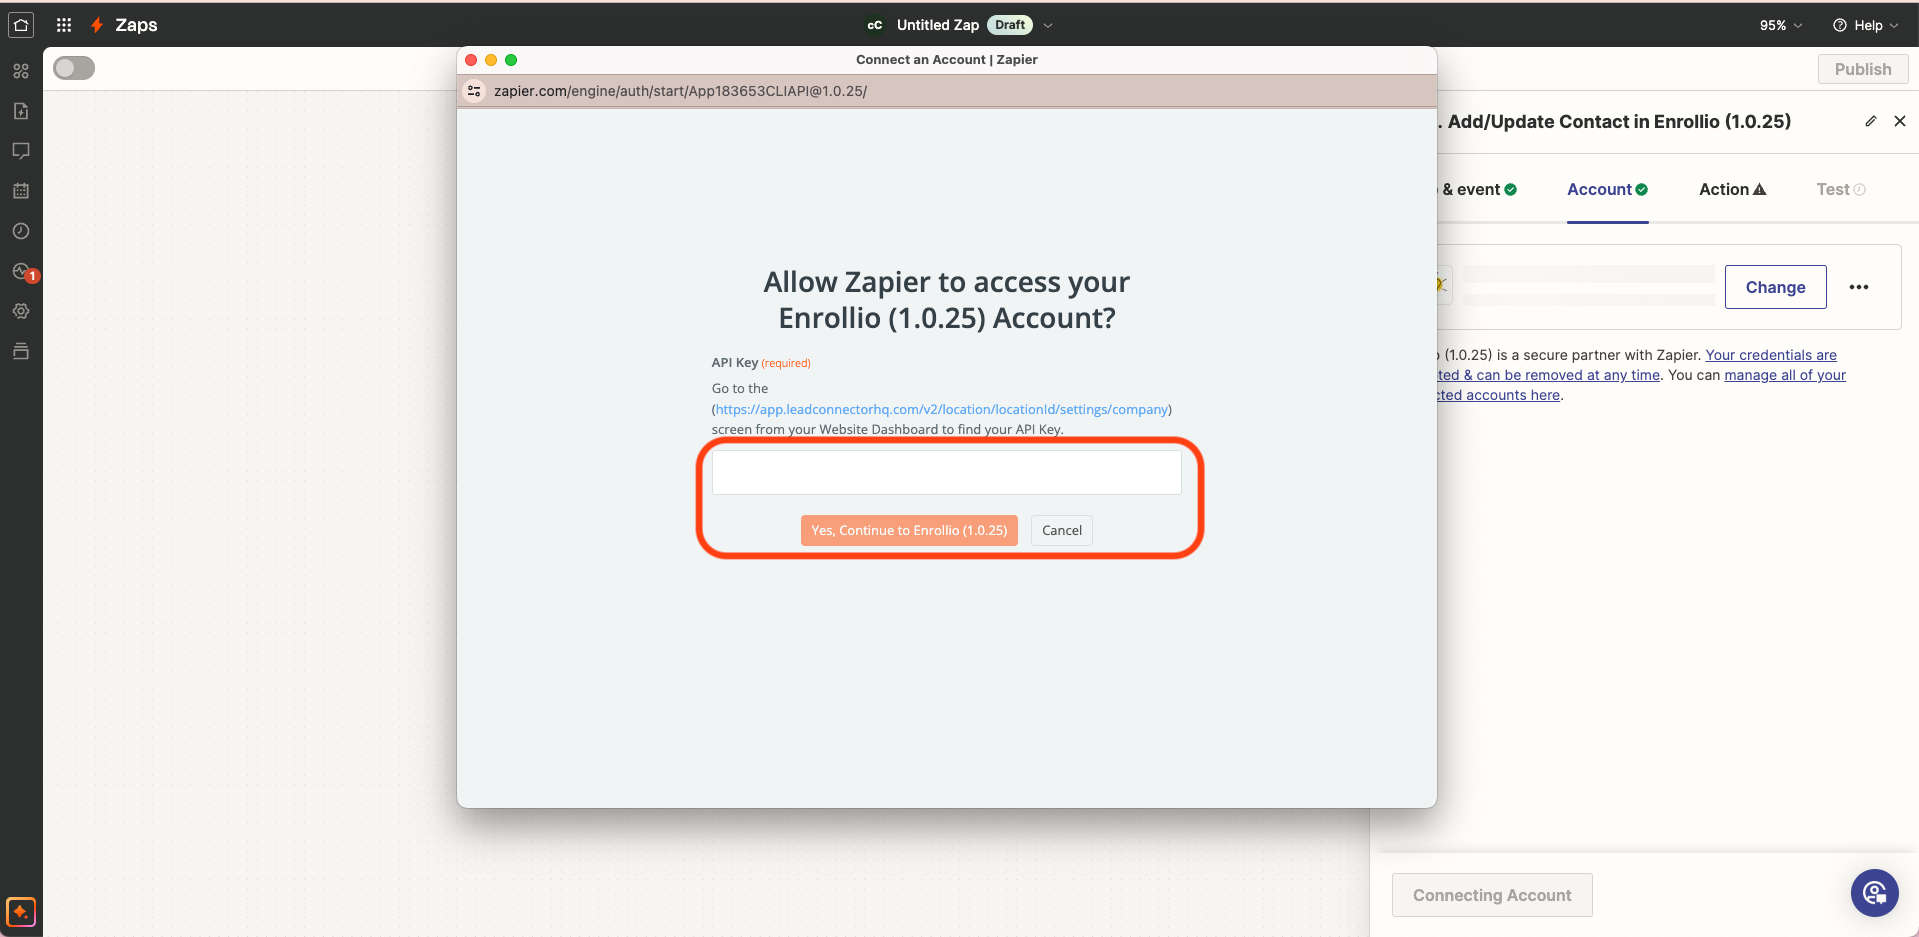
The pop-up will ask for your API key.
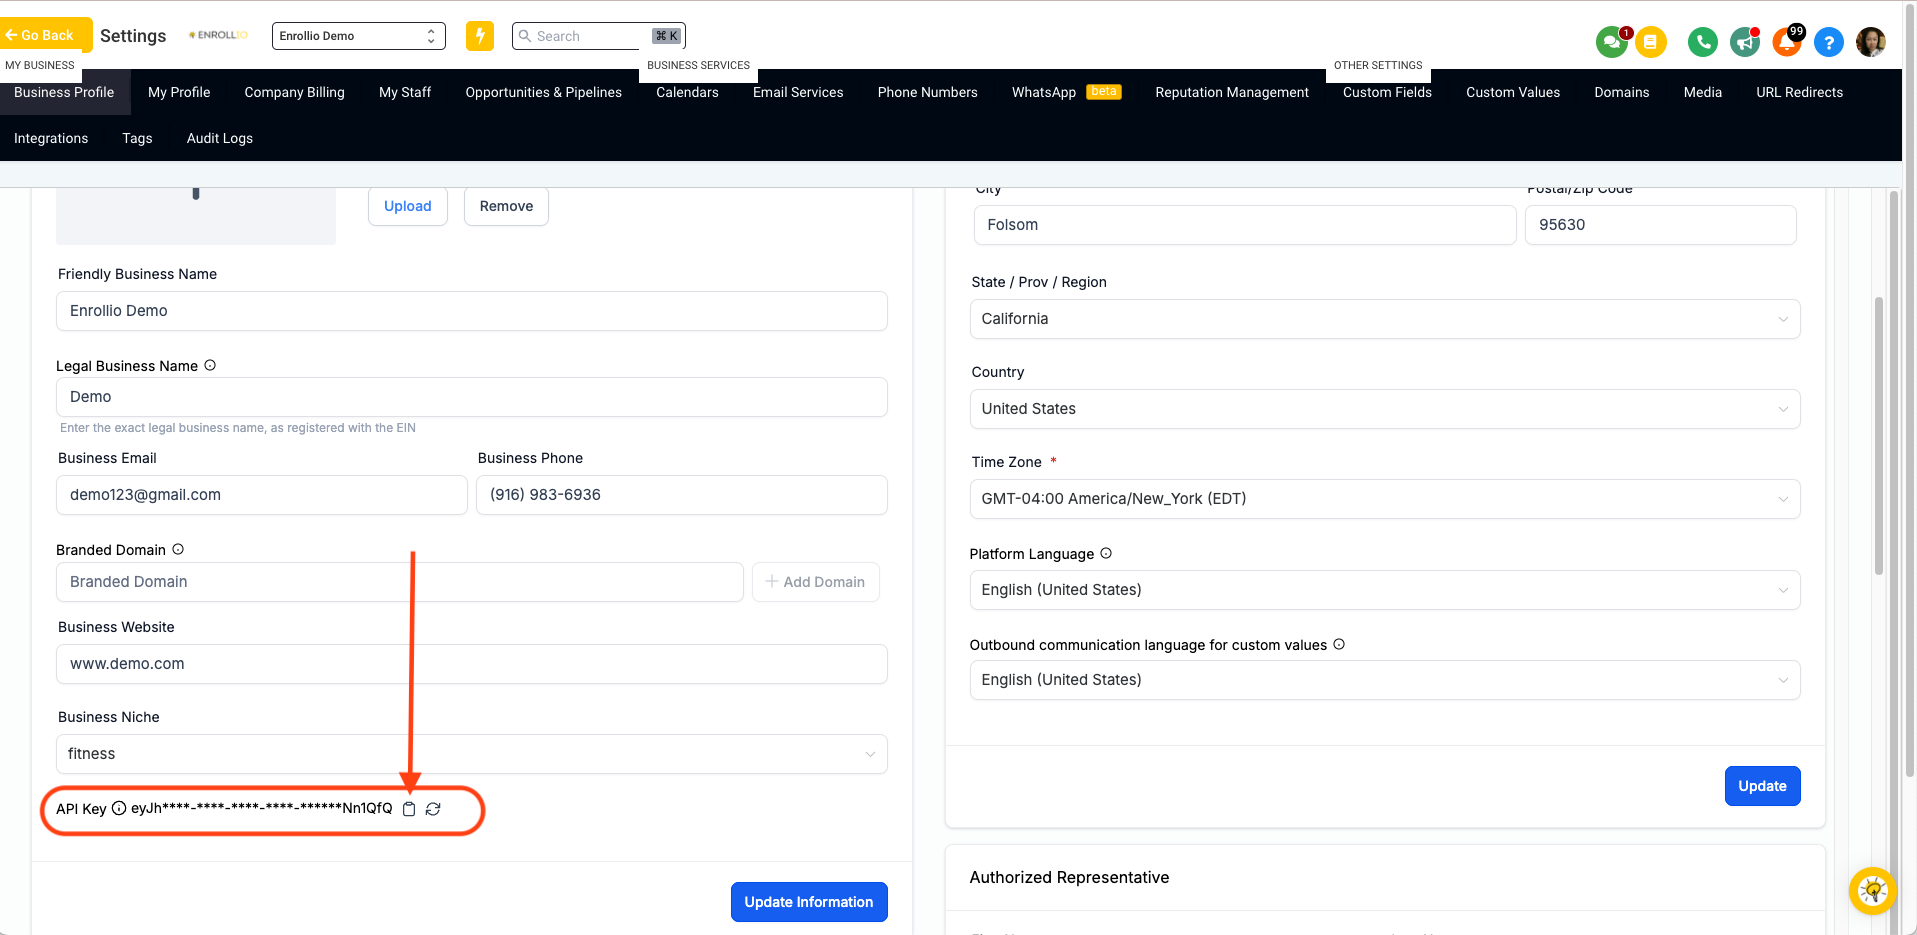
Go back to Enrollio and click on Settings>Business Profile. Scroll down a bit and look for API Key. Click on the clipboard icon to copy the API Key then go back to Zapier.
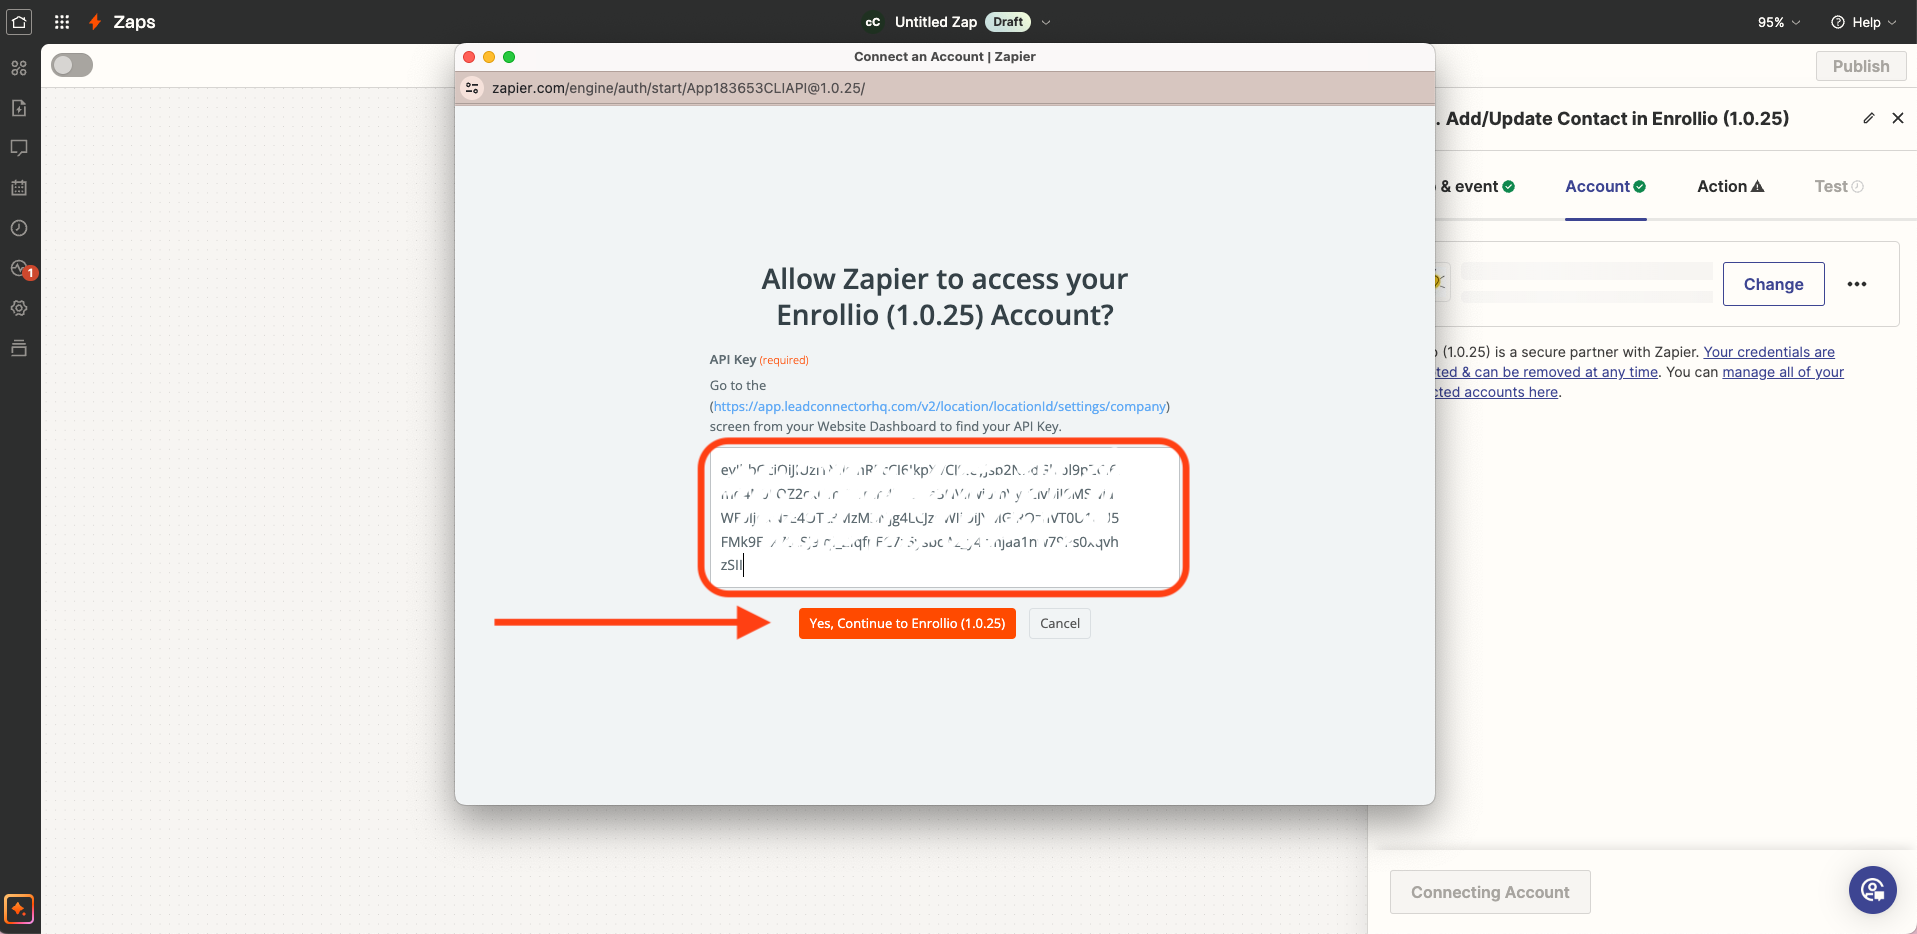
Paste the API key from Enrollio then click Yes, Continue to LeadConnector then click on Continue below.
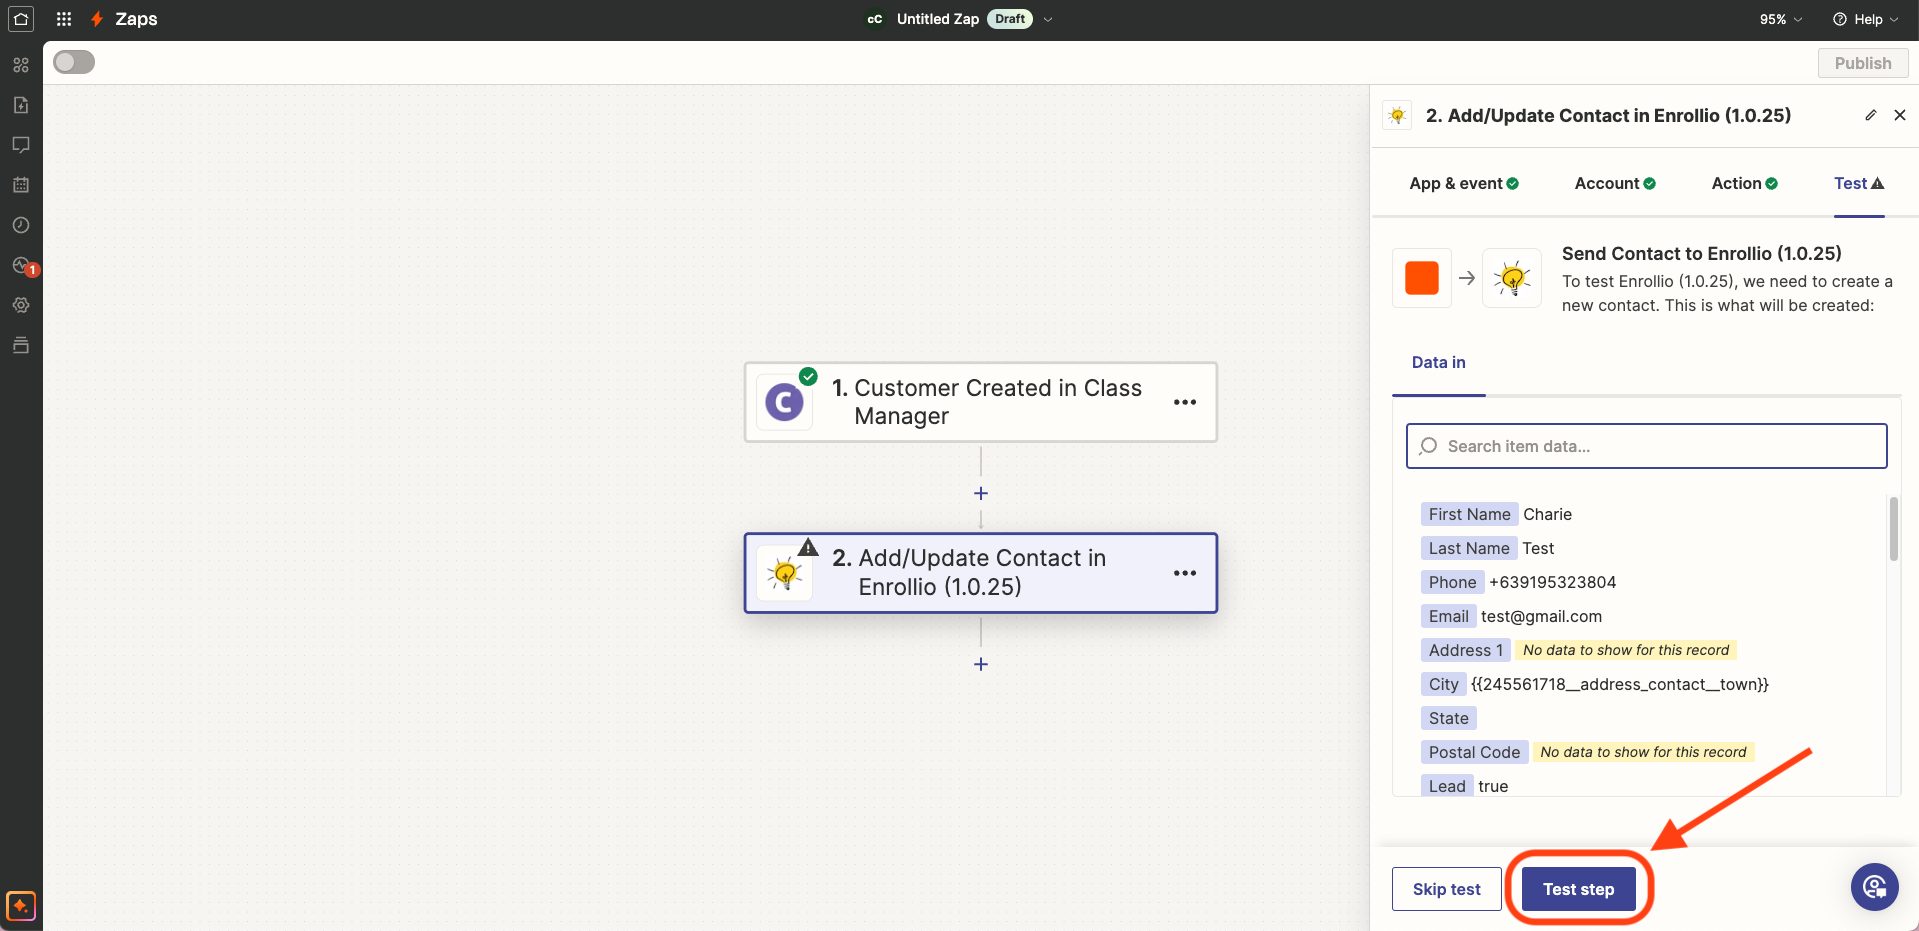
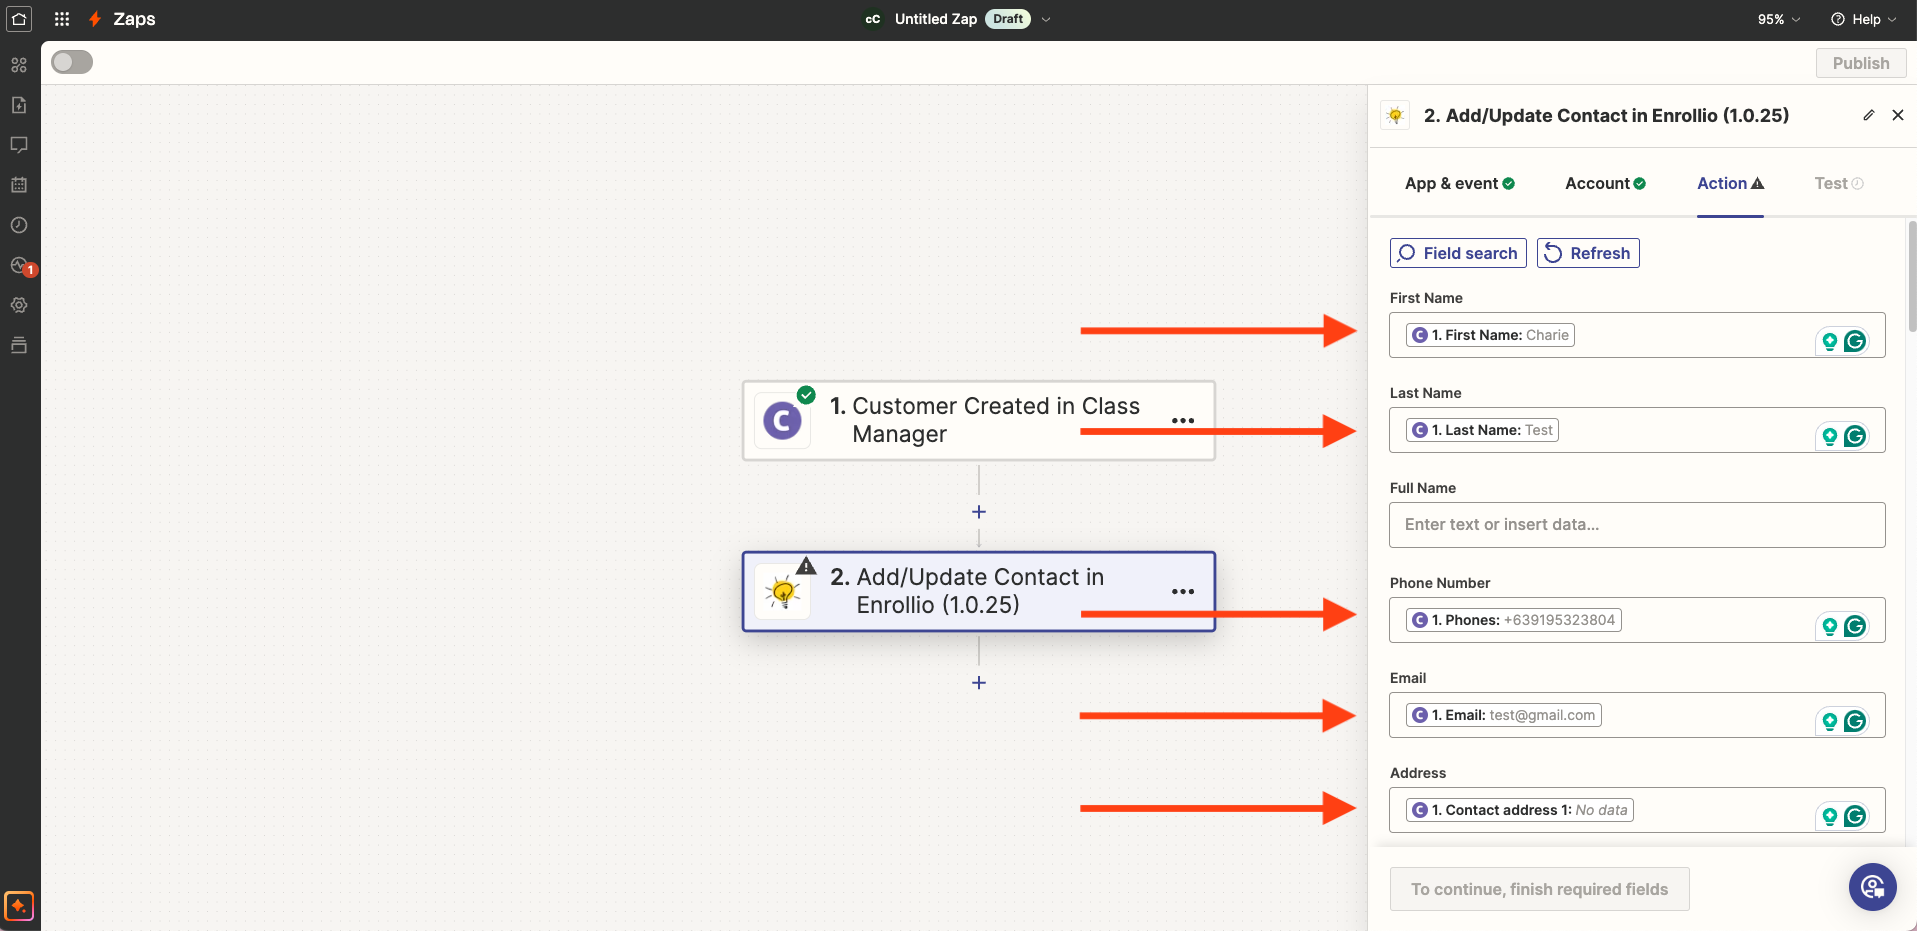
Fill out the fields that you want to import from Class Manager to Enrollio. When you click on the text box, it will show a dropdown of information that was pulled from Class Manager. You can type in information but note that whatever you type in will be the same for all contacts. Click Continue
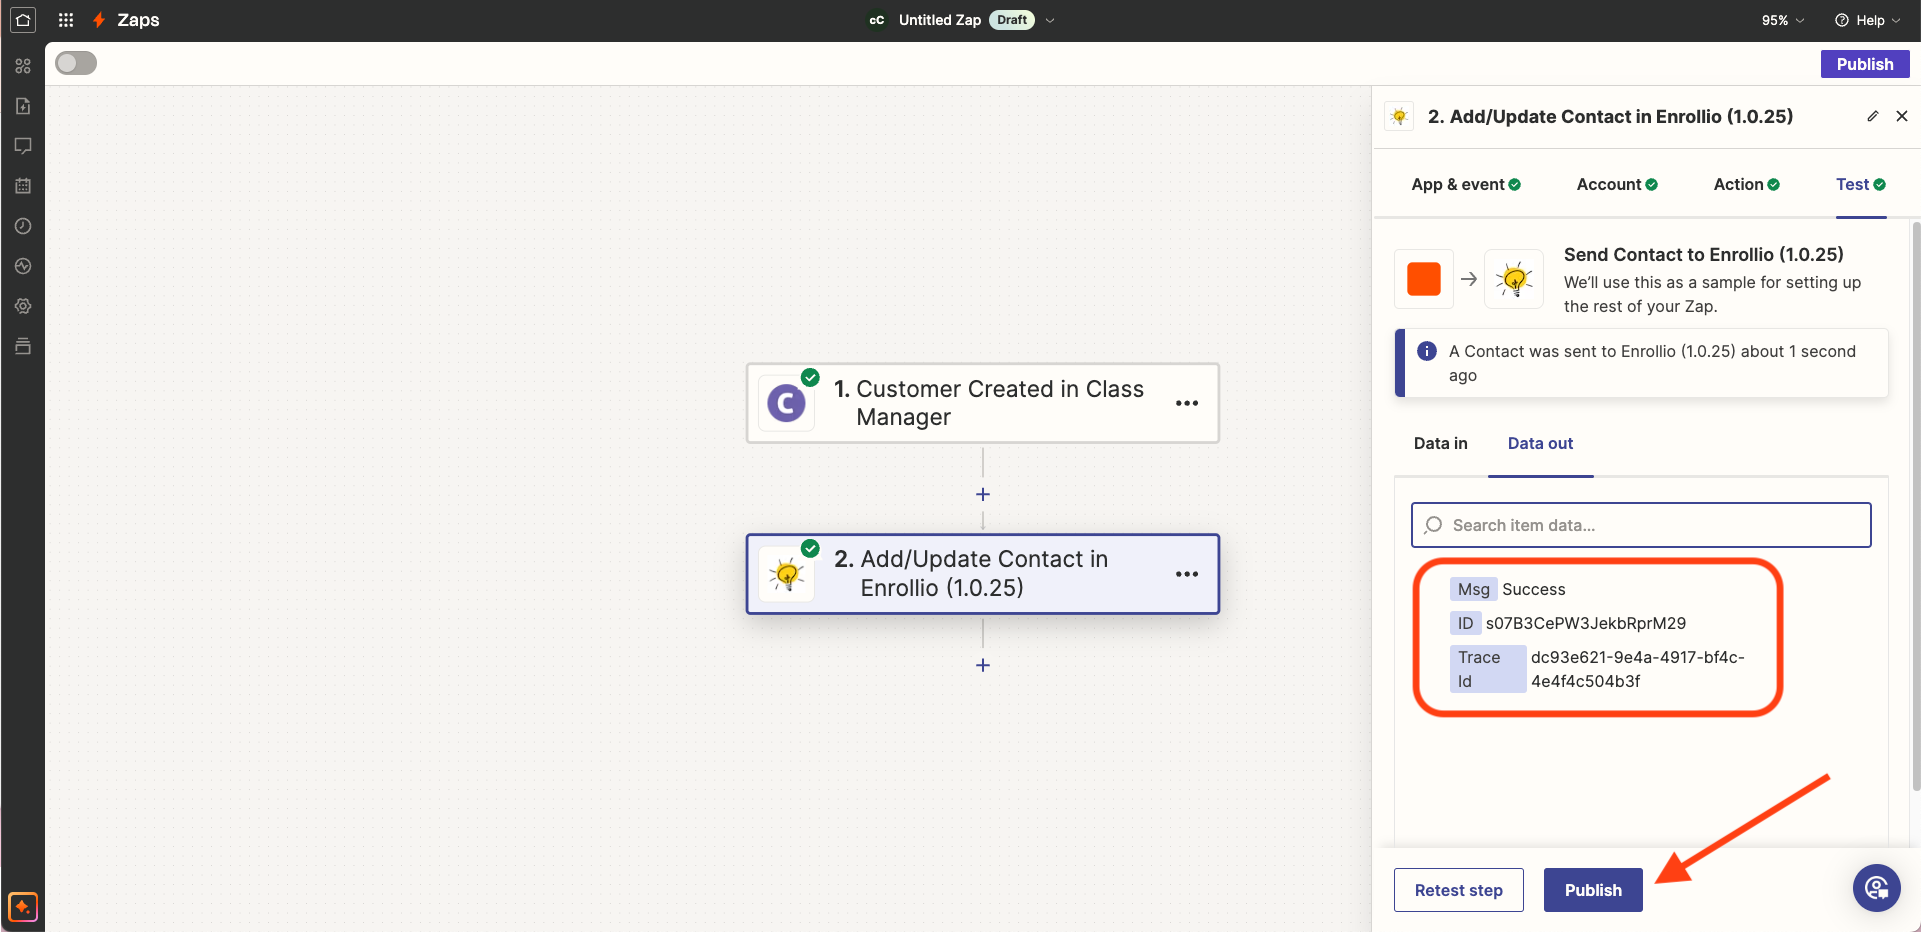
Test the zap to make sure everything is connected properly and that all information will be added in Enrollio. Go back to Enrollio and check if the information is added properly, and make some adjustments if necessary then retest the zap. Once you're happy with the connection you can hit Publish.