The Calendar widget logo is an important feature that can be customized to represent your client's company branding.
By replacing the default logo with a custom logo that reflects your client's brand identity, the Calendar widget becomes more personalized and provides a more professional appearance to users.
The logo customization feature is easy to use and can be done by uploading a high-resolution image file that meets the required specifications. Once uploaded, the custom logo will replace the default logo on the Calendar Booking widget, providing a professional and personalized appearance representing your client's brand.
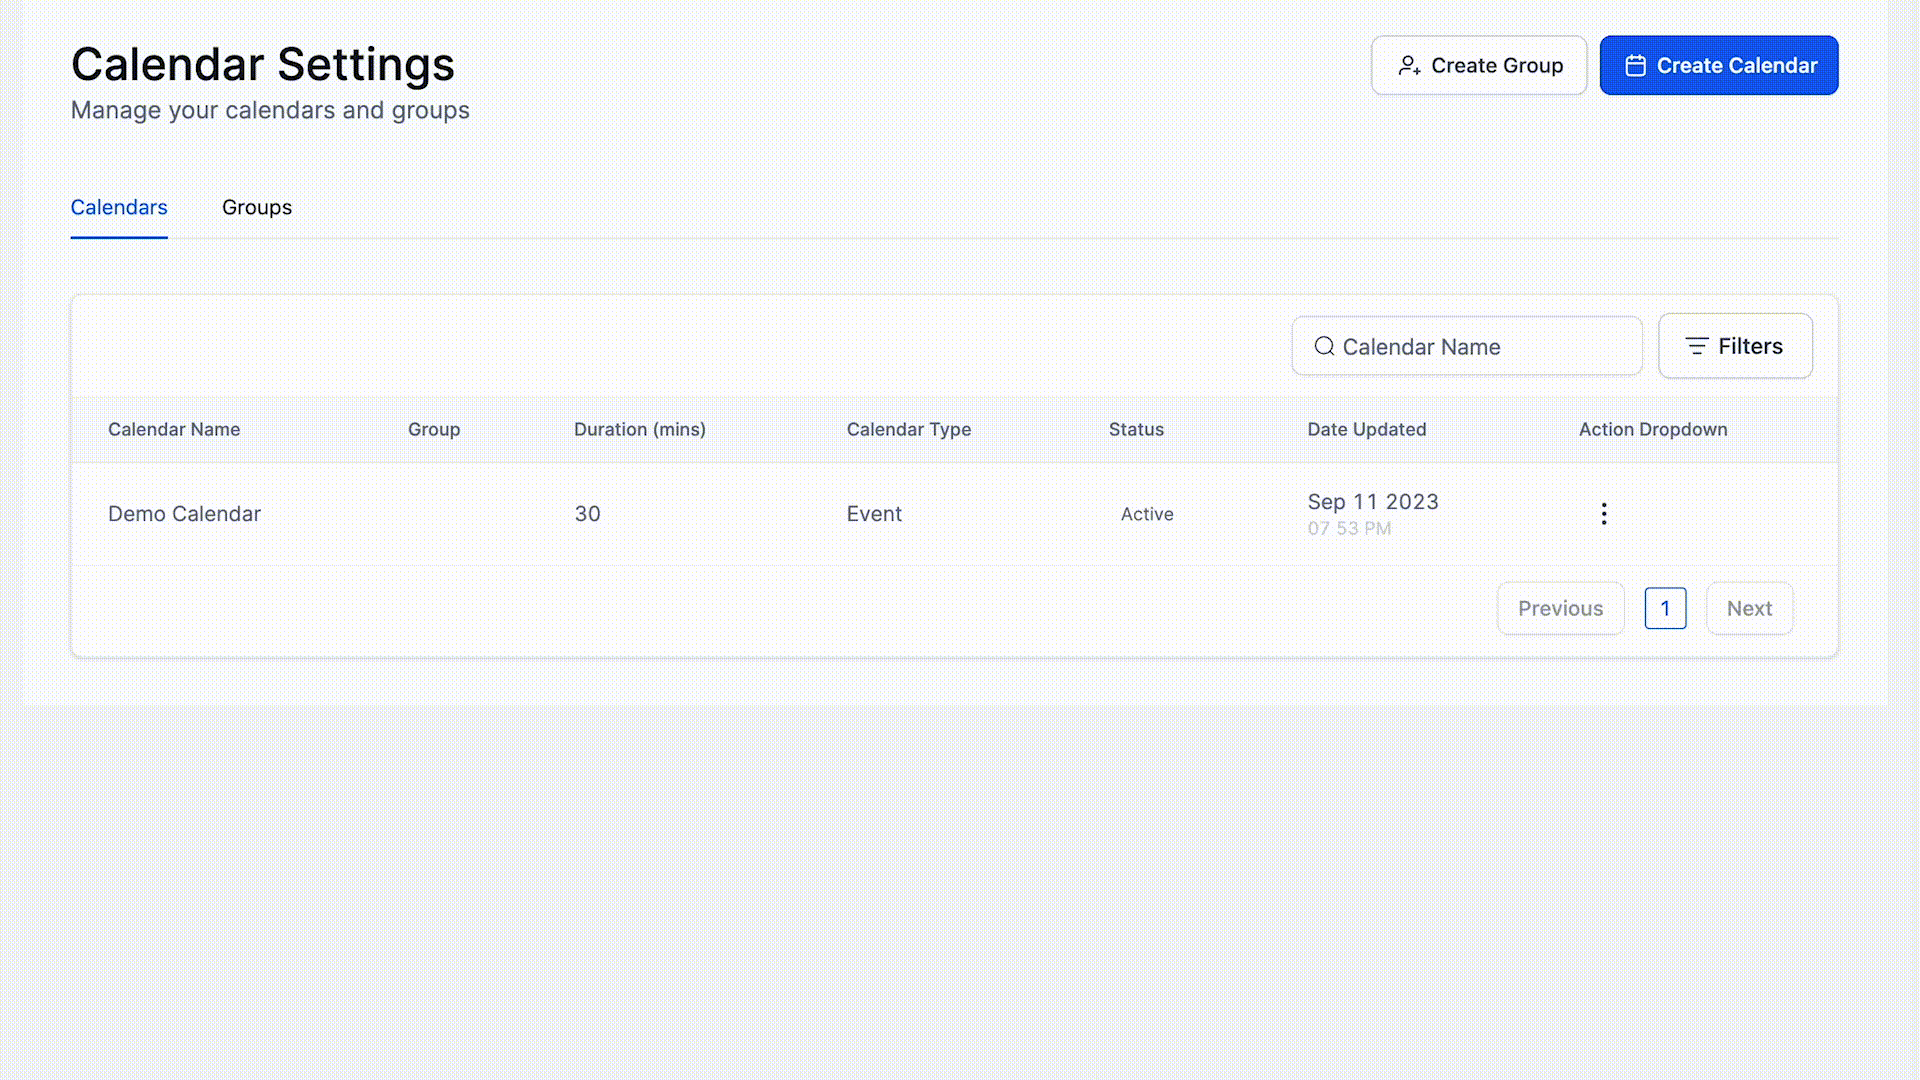
Go to Settings>Calendars
Click the three dots in front of the calendar you want to edit and choose Edit Calendar.
In the Meeting Details tab, add a logo:
Upload or drag and drop the SVG, JPG, or GIF.
After successfully uploading the image you can select a square or circle shape
Here is an example of this:

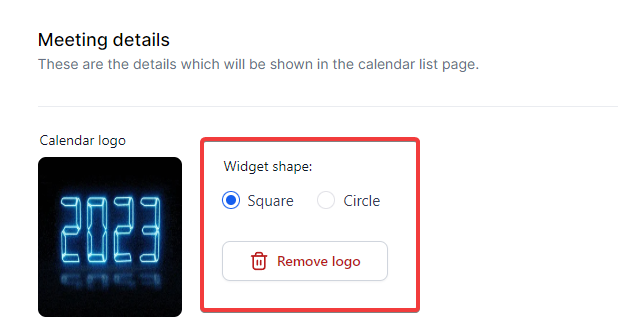
Once a logo has been added, you can always remove it or change later.