Membership certificates are a great way to acknowledge user accomplishments for courses. You can now create a certificate for all your users who complete the course.
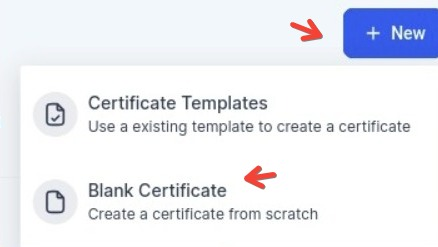
Go to Memberships > Certificates
Click on Blank Certificate
If creating your own, use the drag-and-drop feature to build it. Here are the elements you can use:
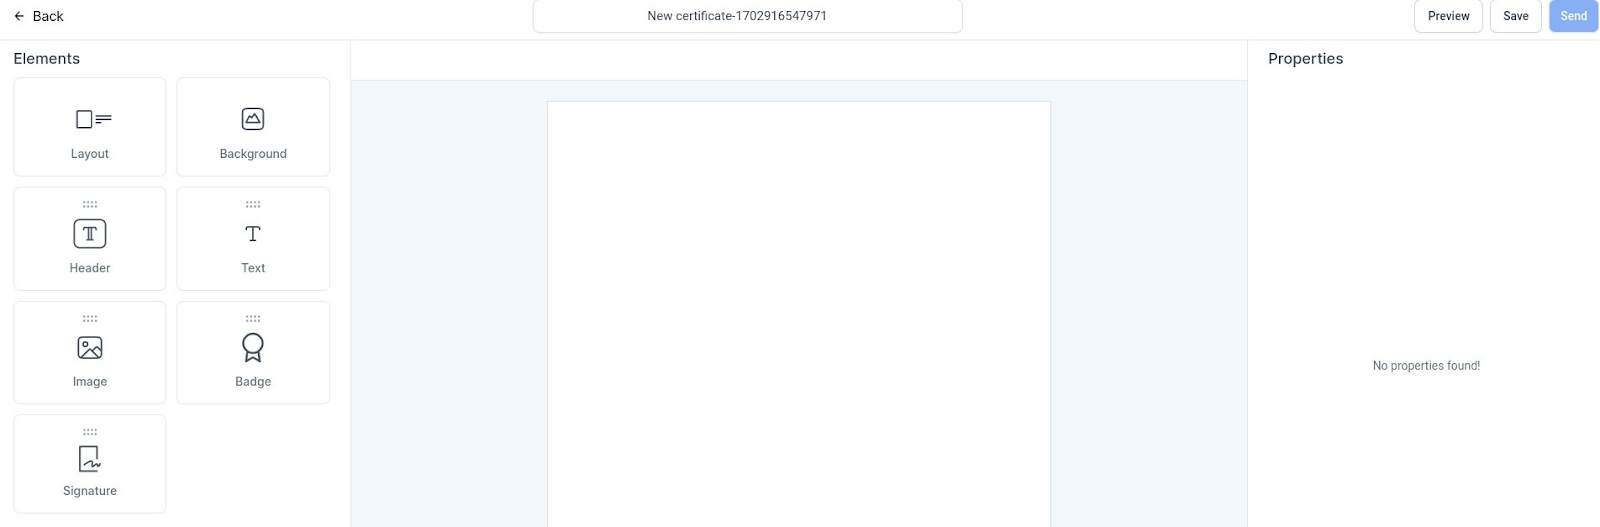
Layout:
To choose a layout, click on Layout, and choose between Portrait or Landscape
Once selected, you can choose frames for both the layouts, respectively
To remove a frame, click on the same frame again (from the right bar)
Note: Changing the layout from Portrait to Landscape or vice-versa, will disrupt the edits
Background:
To choose a background, click on Background
Choose the colours
Upload an image as a background or enter image links to upload
Choose the opacity of the background image or color by using the opacity slider
To choose a pattern as the background image, click on Patterns, choose a pattern, and color.
Header
To add a header, drag and drop the Header element to your template and start editing the text after selection
Elements can be cloned or deleted by clicking on the copy and delete icons
Choose Font Styles, Font Size, Font Type (Heading 1, Heading 2, etc ...), Font Colour, etc. from the top bar after selecting a text
To resize, move the blue dots of the text box
Text
To add a text, drag and drop the Text element to your template and start editing the text after selection
Elements can be cloned or deleted by clicking on the copy and delete icons
Choose Font Styles, Font Size, Font Type (Headings, Paragraphs, etc..), Font Colour, etc. from the top bar after selecting a text
To resize, move the blue dots of the text box
Image
To add an image, drag and drop the Image element to your template
Upload an image or add the image link to upload
Choose the opacity of the background image by using the opacity slider
To resize, move the blue dots of the box
Badge
To add a badge, drag and drop the Badge element to your template
Choose a badge from the options by clicking on it
To resize, move the blue dots of the box
Signatures
To add a signature, drag and drop the Signature element to your template
Choose a badge from the options by clicking on it
Choose the signature styles after selecting the signature
To resize, move the blue dots of the box
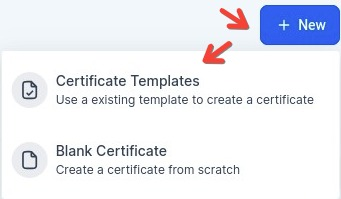
You also have the option to use our premade template certificates.
Go to Memberships, then to Certificates
Click on New
Click on Certificate Templates if you wish to use the already premade certificates we have
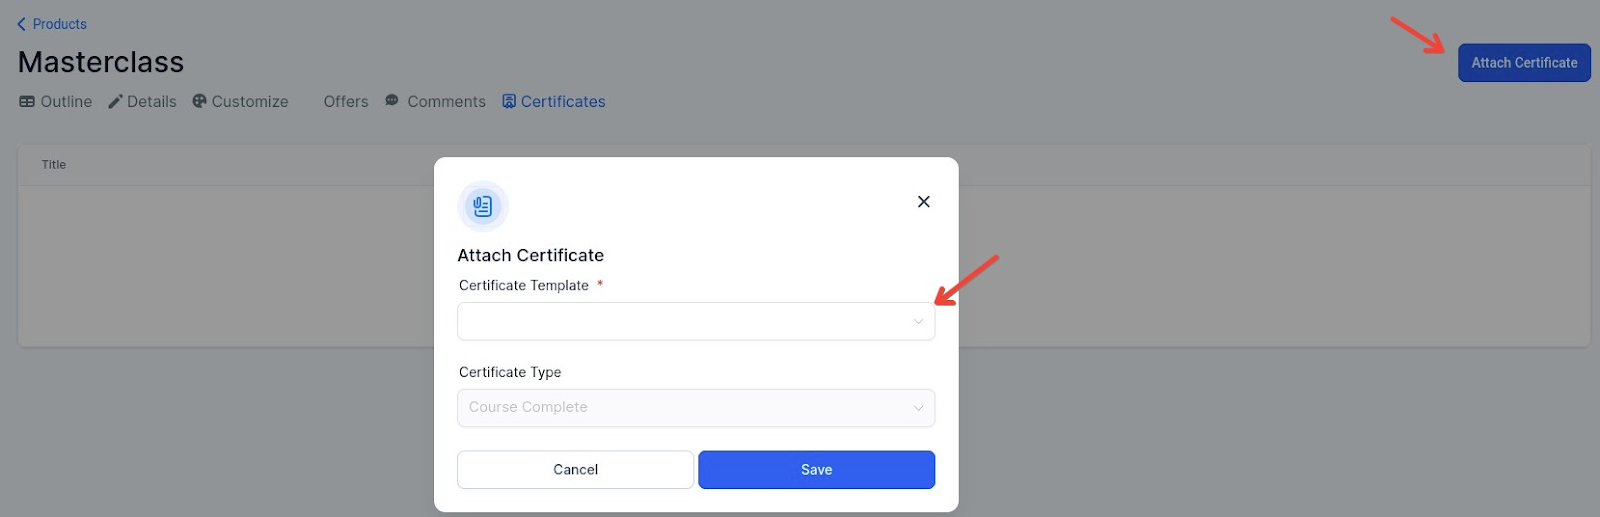
Certificates can be issued to course learners by attaching them to a course
Go to Courses - the Product you want to share the certificate - Certificates

Click on Attach Certificate and select your certificate
Once the course is complete, the certificate will be sent via email with links to access and share their certificates, which can be further downloaded as a PDF.