Enrollio’s Inbound Webhook feature has been designed to help studio owners automate essential processes by receiving real-time data from external applications, making it easier to manage class registrations, student information, event registrations, and more.
An Inbound Webhook is a robust feature that transfers data automatically from external systems into Enrollio. When an event occurs—like a student signing up for a class or a new event getting scheduled—an HTTP request (via POST, GET, or PUT) is sent to a specific URL tied to a trigger within Enrollio, thus initiating a workflow. This automation minimizes manual entries, reduces errors, and allows you to keep your studio’s records up-to-date effortlessly.
Here are some practical examples of how you can leverage Inbound Webhooks in your studio operations:
New Student Registration Integration:When a new student registers online for dancing classes, an HTTP POST request sends their details (name, email, phone, and selected class) directly to Enrollio, automatically updating your student records.
Class Enrollment Updates:If your online booking system sends class enrollment data, use the Inbound Webhook to update class capacities in Enrollio as soon as a student books a spot, ensuring that available slots are always accurate.
Event Registration Integration:When parents register their children for special dance events or recitals, the event registration system can send attendee information, such as name, contact details, and event preferences, directly to your Enrollio system.
Feedback and Support Ticketing:Should a parent or student submit a support request or feedback form on your website, an HTTP POST request can relay that information to Enrollio, automatically creating a new support ticket linked with the appropriate student record.
Using the Inbound Webhook Trigger in Enrollio is simple and straightforward. Follow these steps to bring your external data into your dance studio’s workflow:
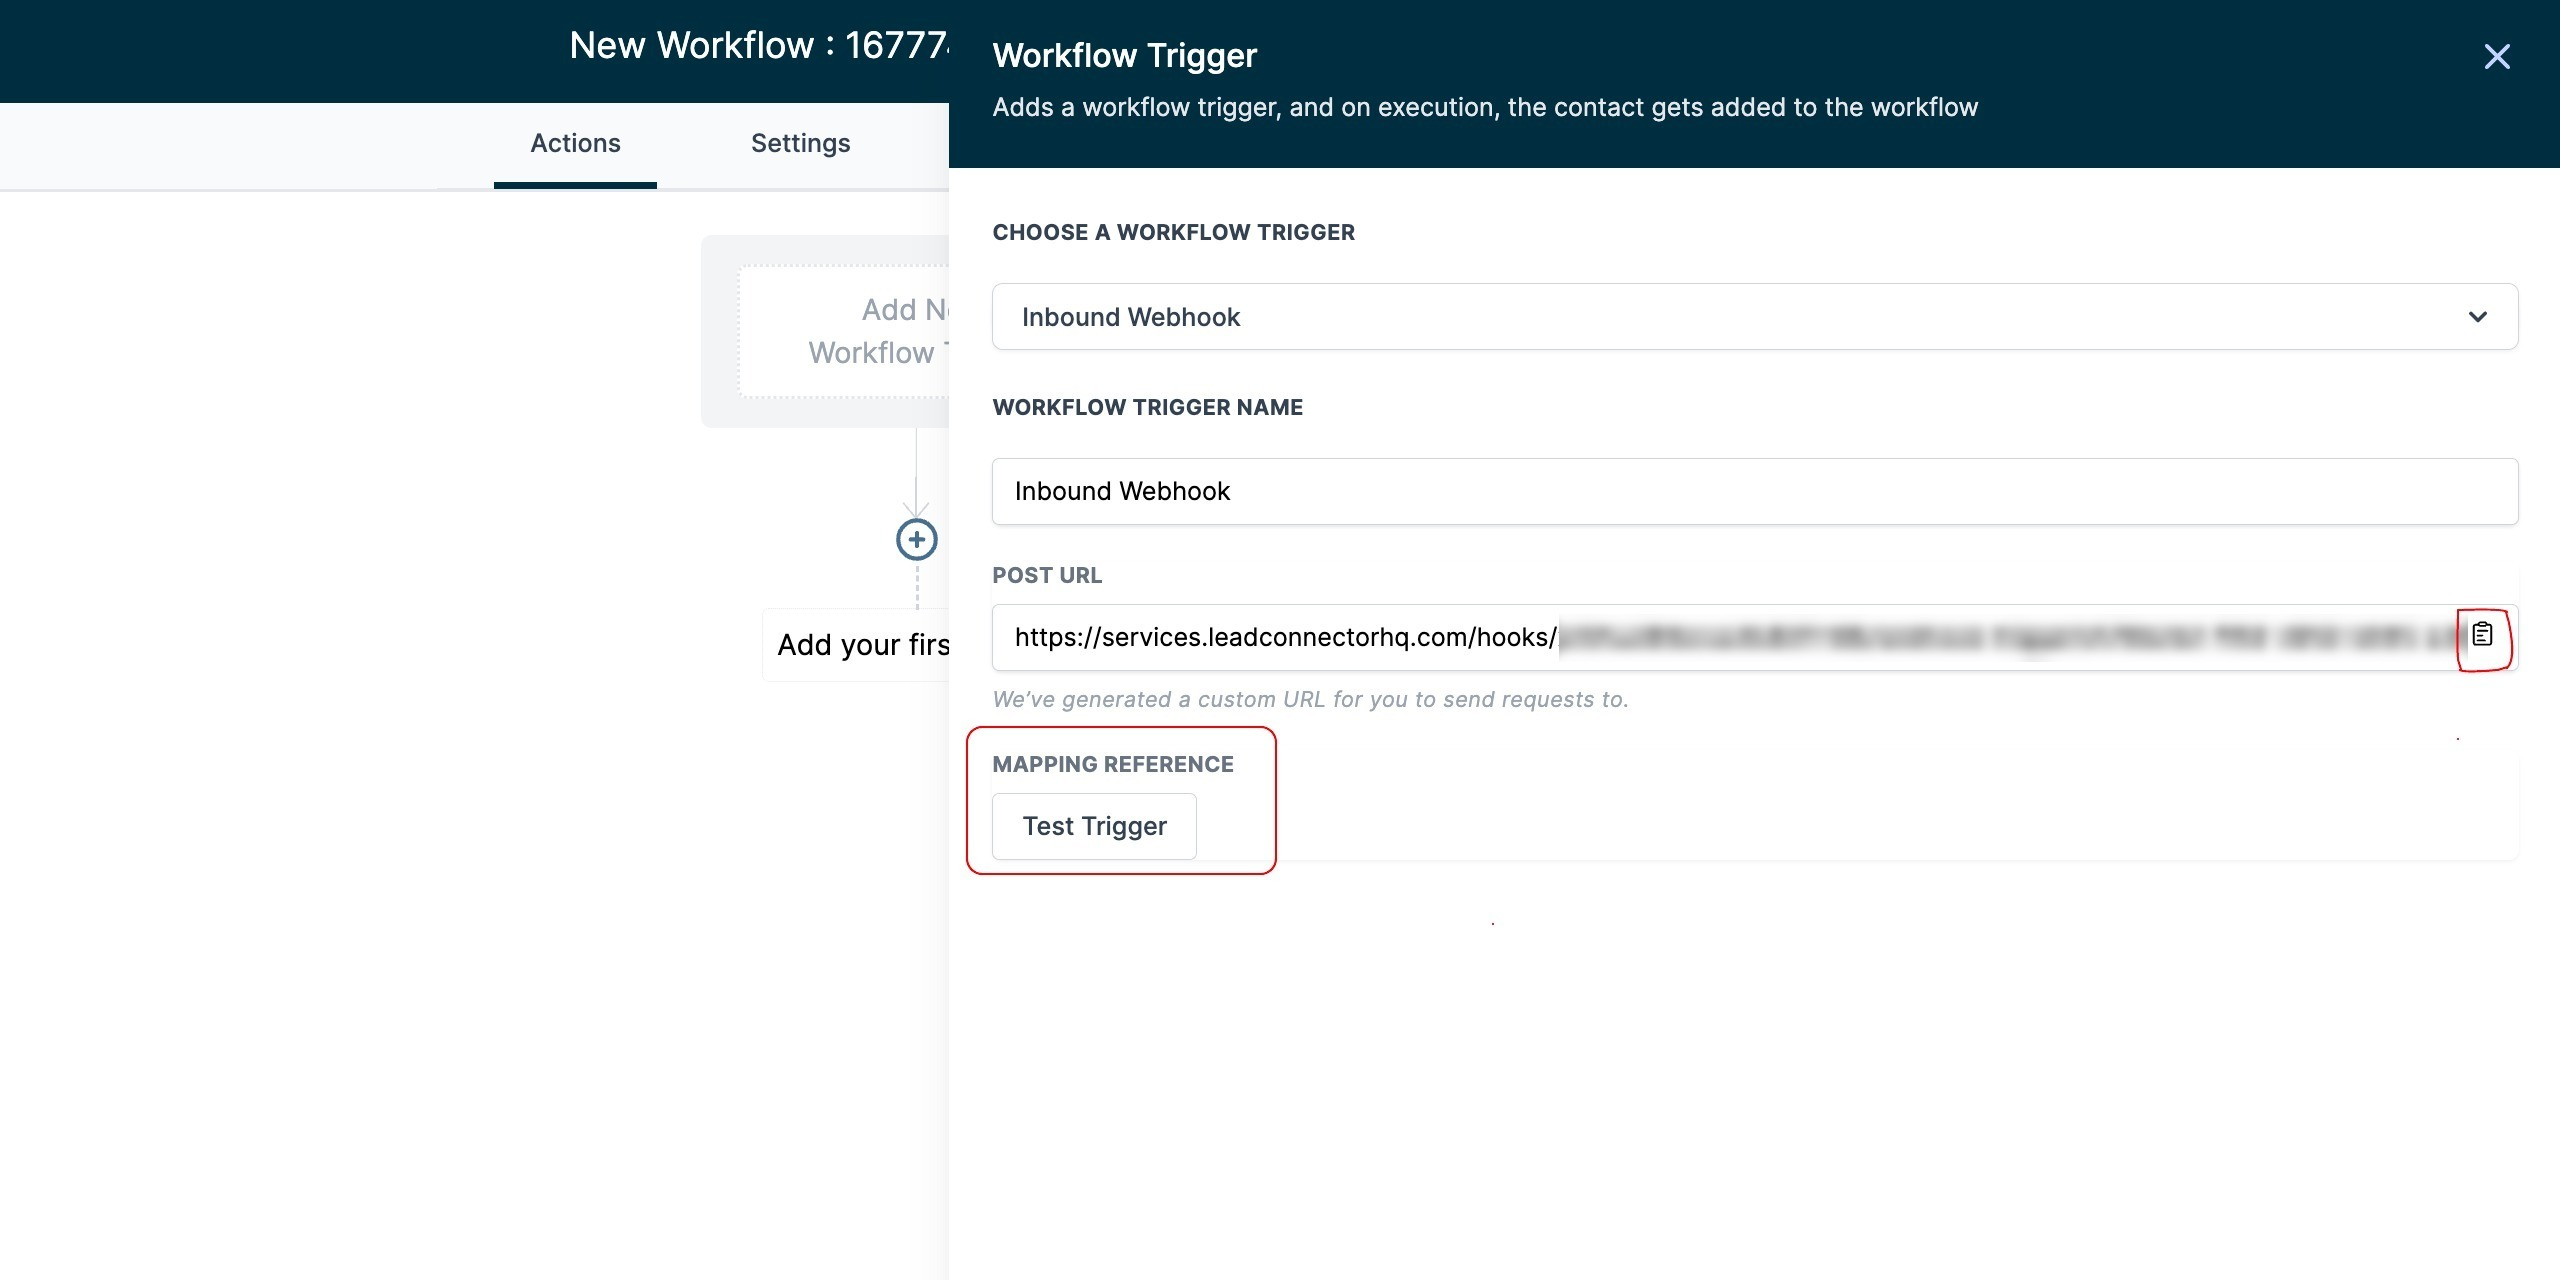
Retrieve the Webhook URL:• Copy the webhook URL provided by Enrollio and use it in your application or system.• Send data to the webhook URL using POST, GET, or PUT.• Click the "Test Trigger" button to ensure connectivity.
Set Up Your Trigger in Enrollio:• Choose the data received from your external system (via POST, GET, or PUT) and save it as sample data for future reference.• Click "Load More" if you need to see additional recent data.• Once you’ve found the desired sample data, save the trigger; this step lets you create custom variables similar to how you handle other student custom fields or class-specific variables.
Send a supported HTTP request (POST, GET, or PUT) to use the webhook URL and obtain a unique ID from the response.
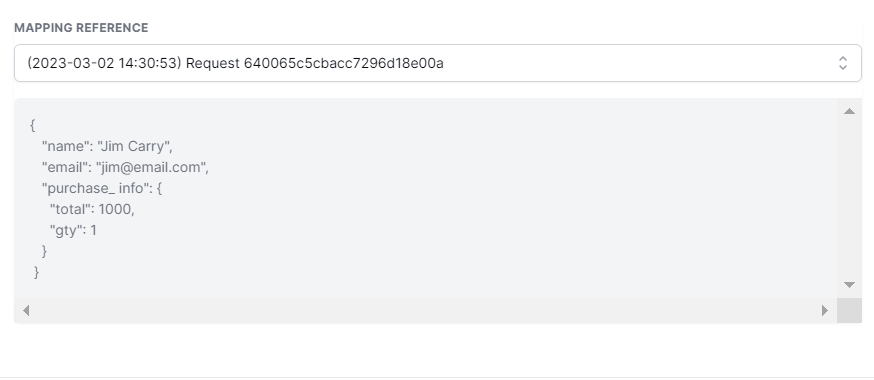
Copy this ID and search for the corresponding mapping reference inside your webhook trigger.
Select the correct mapping reference and verify the data payload.
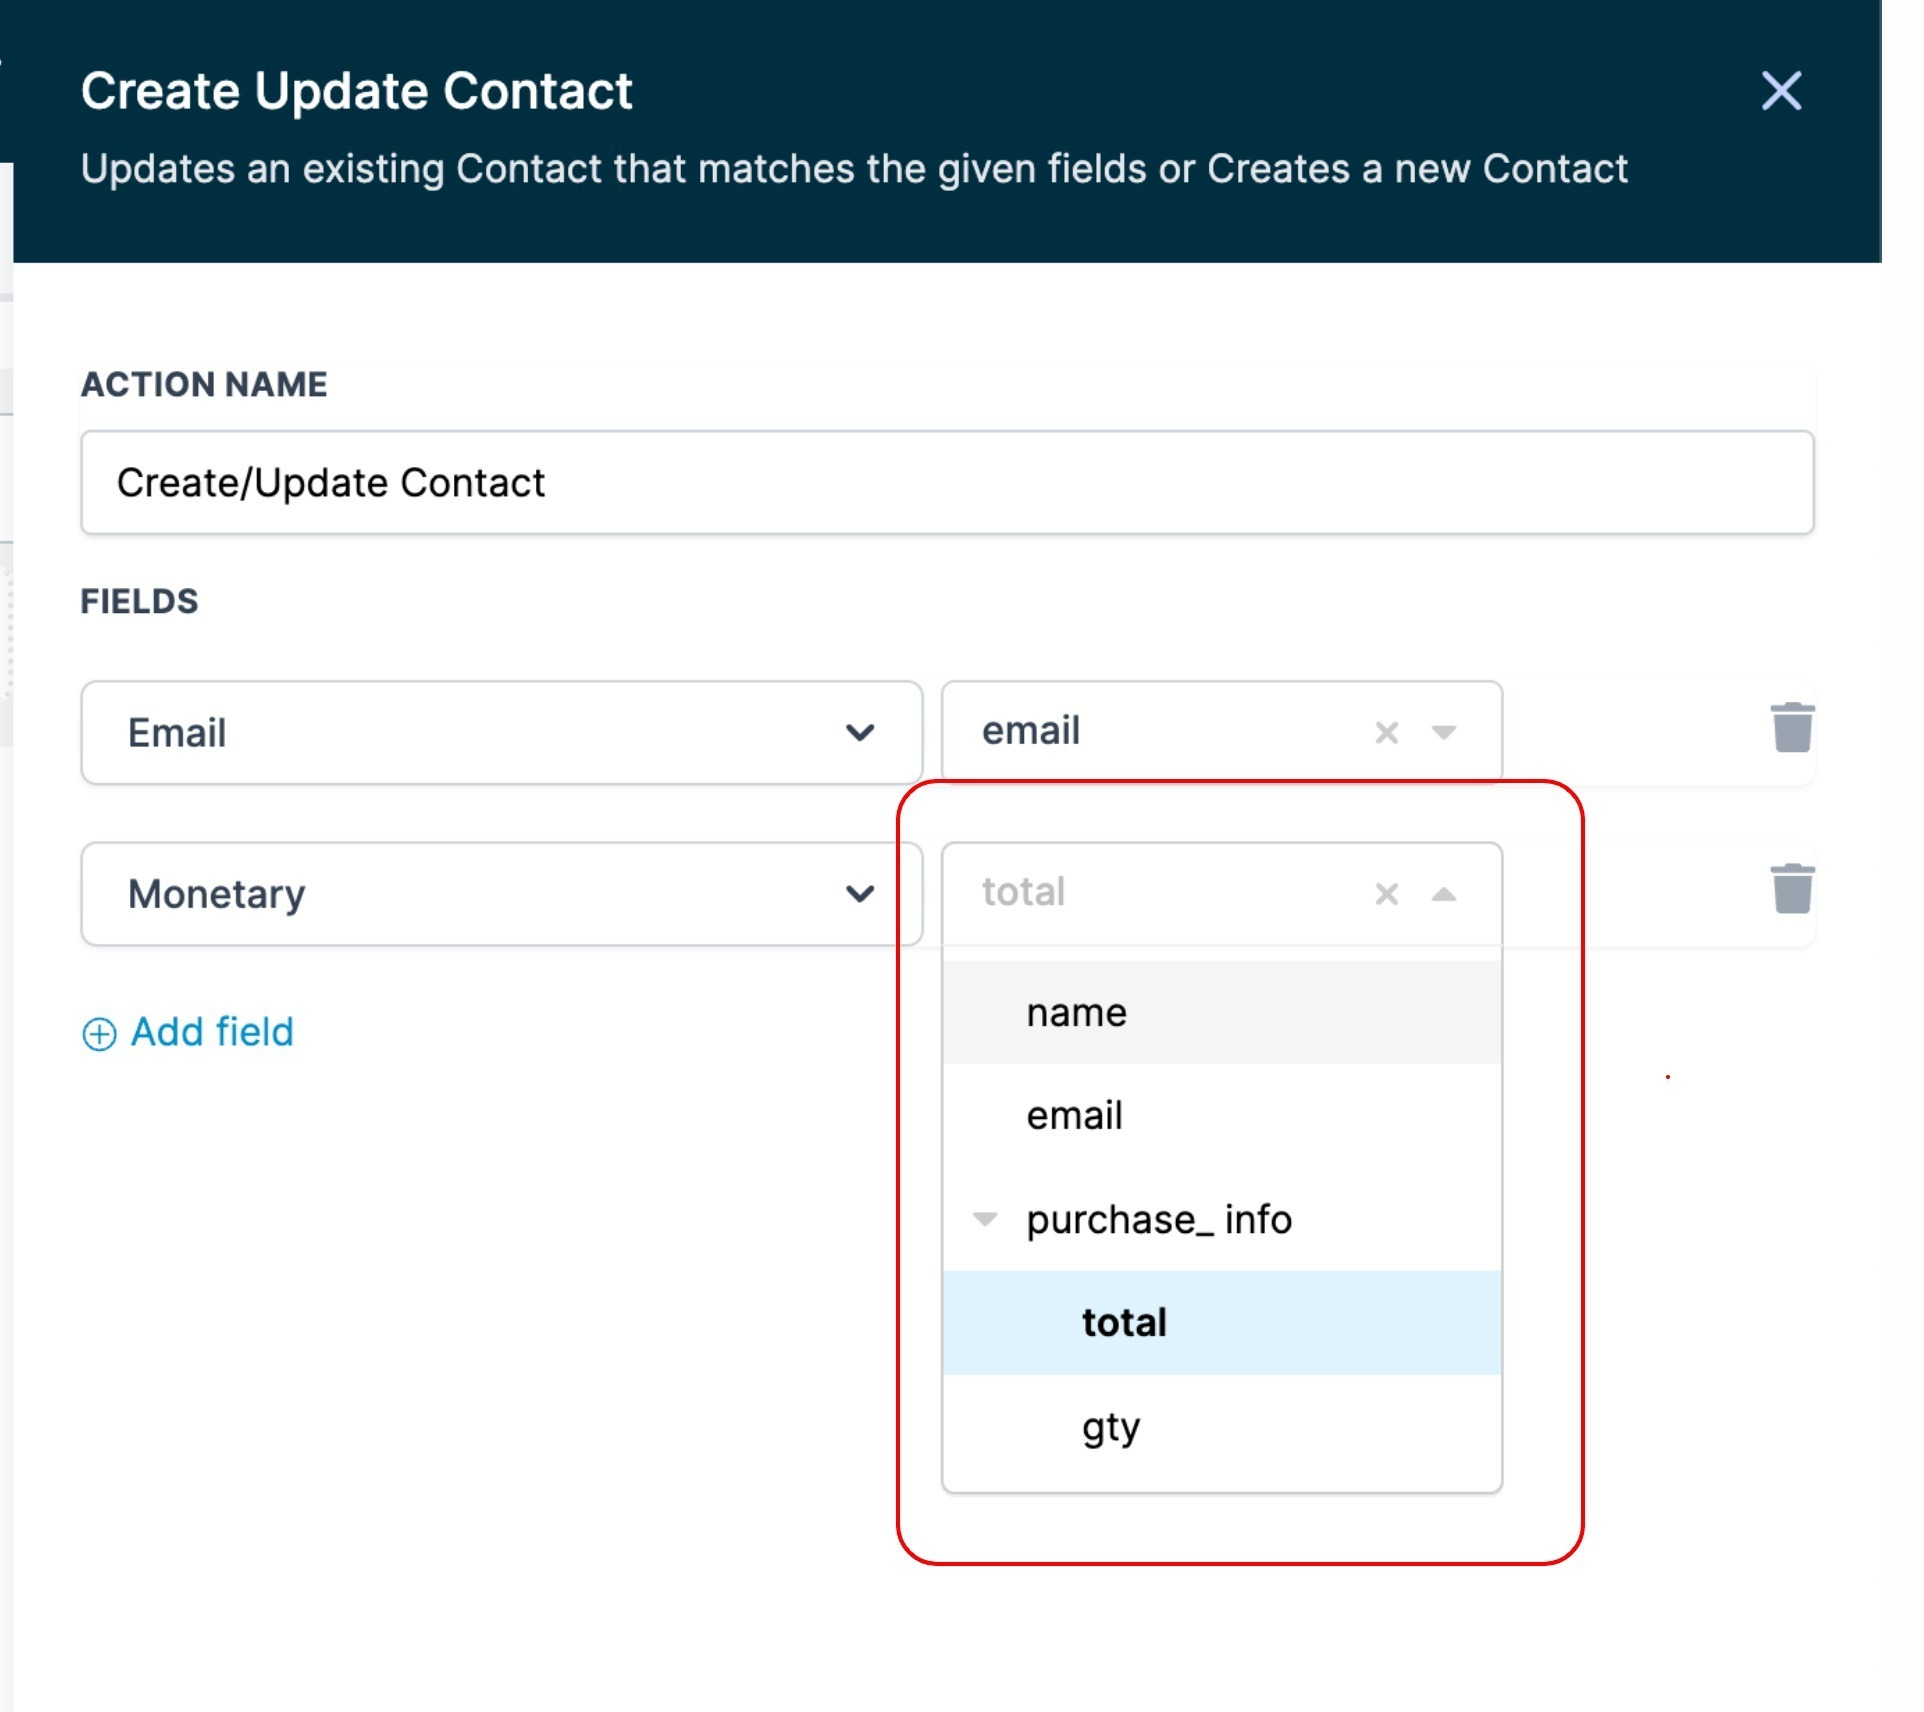
Map Incoming Data to Actions:• After saving the trigger, you will be directed to the "Create/Update Contact" action.• Here you can choose the necessary fields and map the incoming data to update student or contact records in Enrollio.• Remember, to create or update a record, either an email or phone number must be provided.• If the incoming payload does not include email or phone data, you can remove this action and proceed with contactless workflow actions.
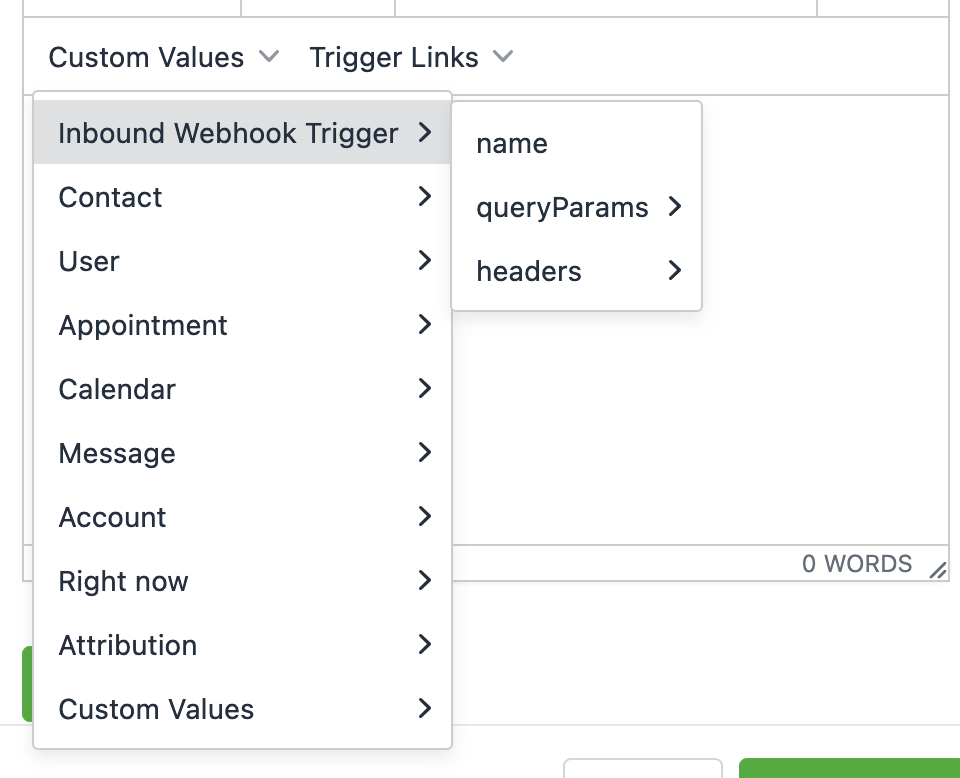
Once you complete these steps, you can utilize the incoming data as custom values within subsequent workflow actions like sending emails, text alerts, if/else conditions, and more.
Enrollio empowers you to use custom values from the Inbound Webhook throughout all workflow actions:
In Your Communication Actions:Incorporate the received data to personalize emails or SMS notifications—for example, sending a confirmation message when a student registers for a new class.
In If/Else Actions:Use the webhook data to set conditions, such as assigning students to different classes based on their age or experience level, ensuring they are grouped correctly for dance classes.
Running Workflows Contactless:Workflows can execute without a direct dependency on contact information, meaning you can pass any payload data via Inbound Webhook Triggers and use it across other internal actions like custom webhooks, Google Sheets, Slack, or ChatGPT integrations.• For instance, you can process class registration data via an inbound webhook, add details to a Google Sheet, categorize classes based on enrollment numbers with if/else actions, and send a Slack notification to your team.
Keep these recommendations in mind when using Inbound Webhooks with Enrollio:
Always send HTTP requests using a supported method (POST, GET, or PUT).
Ensure that the data is sent as a JSON object, which is the only supported format.
Keys in your JSON payload must be a single string without spaces; consider using CamelCase or snake_case.
Providing an email or phone number in your payload is mandatory as the workflow relies on this information.
Note that arrays are not supported in custom values and while you can send them, they cannot be used inside actions.
If your data structure changes, re-select the mapping reference in the Inbound Webhook Trigger setup for proper field addressing.
If your Inbound Webhook Trigger URL is compromised or leaked, delete the existing trigger in Enrollio and create a new one. A new URL with a different ending ID will be generated. Update your integrations accordingly so that only requests from the new URL will enter your workflow.

By implementing Inbound Webhooks in Enrollio, you can automate many routine tasks in your dance studio, enabling you to focus more on your students and creative programming. Enjoy the ease of real-time data integration and the enhanced efficiency of your workflows.
Happy dancing, and here's to smoother operations at your studio with Enrollio!